Fluke P3011-MMHG Product Manual - Page 27
PCU Assembly — 16 mm Nominal Diameter, Piston Disassembly, Piston Cleaning
 |
View all Fluke P3011-MMHG manuals
Add to My Manuals
Save this manual to your list of manuals |
Page 27 highlights
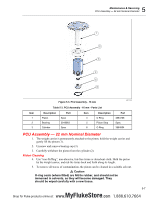
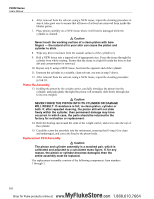
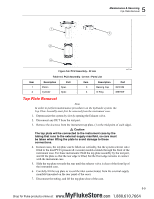
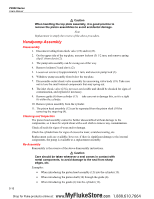
5 Maintenance & Servicing PCU Assembly - 16 mm Nominal Diameter 3 2 1 Item 1 2 Figure 5-2. PCU Assembly - 10mm - Vacuum Table 5-2. PCU Assembly - 10 mm - Vacuum - Parts List Description Piston Cylinder Part Spec Spec Item 3 Description Bonded Seal gjn32.eps Part 3918392 PCU Assembly - 16 mm Nominal Diameter Piston Disassembly 1. Unscrew the PCU assembly from the instrument; use the dowel hole if the cylinder is tight. 2. Unscrew piston stop (5). 3. The weight carrier is permanently attached to the piston; hold the weight carrier and gently withdraw the piston from the cylinder (3). Piston Cleaning 4. Use "non-fluffing", non-abrasive, lint-free tissue or absorbent cloth. Hold the piston by the weight carrier, and rub the tissue back and forth along its length. 5. To remove all traces of contamination, the piston can be cleaned in a suitable solvent. W Caution O-ring seals (where fitted) are Nitrile rubber, and should not be immersed in solvents, as they will become damaged. They should be wiped carefully with a new tissue. 5-5 MyFlukeStore Shop for Fluke products online at: www. .com 1.888.610.7664
-
 1
1 -
2
-
3
-
4
-
5
-
6
-
7
-
8
-
9
-
10
-
11
-
12
-
13
-
14
-
15
-
16
-
17
-
18
-
19
-
20
-
21
-
 22
22 -
 23
23 -
 24
24 -
 25
25 -
 26
26 -
 27
27 -
 28
28 -
 29
29 -
 30
30 -
 31
31 -
 32
32 -
33
-
34
-
35
-
36
-
37
-
38
-
39
-
40
-
41
 |
 |
