Frigidaire FPEF3077QF Complete Owner's Guide - Page 16
Setting the Clock, Oven Light, Setting the Timer - professional
 |
View all Frigidaire FPEF3077QF manuals
Add to My Manuals
Save this manual to your list of manuals |
Page 16 highlights
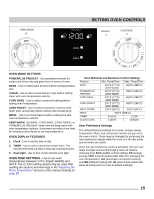
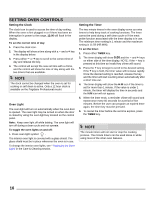
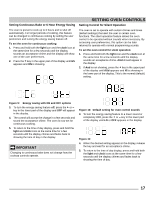
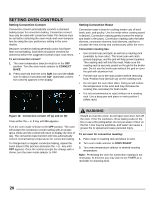
SETTING OVEN CONTROLS Setting the Clock The clock icon is used to access the time of day setting. When the oven is first plugged in or if there has been an interruption in power to the range, 12:00 will flash in the display. To set the correct time of day: 1. Press the clock icon. 2. The display will show a time along with a - and a + key in the display below. 3. Press either - or + key to scroll to the correct time of day and release the key. 4. The control will accept the new set time with a chime, and the control will show the time of day along with the two timers that are available. NOTE The clock cannot be changed when the oven is set for cooking or self clean is active. Only a 12 hour clock is available on the Frigidaire Professional model. Oven Light The oven light will turn on automatically when the oven door is opened. The oven light may be turned on when the door is closed by using the oven light key located on the control panel. Note: Keep oven light off while baking. The oven light will turn off during a clean cycle and not operate. To toggle the oven lights on and off: 1. Press oven light symbol . The interior oven light is covered with a glass shield. The glass shield must be in place whenever the oven is in use. To change the interior oven lights, see ""Replacing the Oven Light" in the Care & Cleaning section. Setting the Timer The two minute timers in the oven display serve as extra timers to help keep track of cooking functions. The timer cannot be used during a self clean cycle or if the meat probe function associated with the timer display is in use. The minimum timer setting is 1 minute and the maximum setting is 11:59 (HR:MIN). To set the timer: 1. Press either TIMER key. 2. The timer display will show 0:00 and the - and + keys on either side of the time display. NOTE: If the - key is pressed at this time an invalid key chime will sound. 3. Press the + key to begin to scroll to the desired setting. If the + key is held, the timer value will increase rapidly. Once the desired setting is reached, release the key and the timer will start counting down automatically after a short time-out. 4. The timer display will show the H:M icon if the timer is set for more than 1 minute. If the value is under 1 minute, the timer will display the time in seconds and the H:M icon will not appear. 5. When the timer ends, a reminder chime will sound and repeat once every 60 seconds for a period of five minutes. Before the user can program an expired timer again, the timer key must be pressed. 6. To cancel the timer before the set time expires, press the TIMER key. NOTE The minute timers will not start or stop the cooking process. The minute timers can be used alone or while using most of the other oven features. 16
-
 1
1 -
2
-
3
-
4
-
5
-
6
-
7
-
8
-
9
-
10
-
 11
11 -
 12
12 -
 13
13 -
 14
14 -
 15
15 -
 16
16 -
 17
17 -
 18
18 -
 19
19 -
 20
20 -
 21
21 -
22
-
23
-
24
-
25
-
26
-
27
-
28
-
29
-
30
-
31
-
32
-
33
-
34
-
35
-
36
-
37
-
38
-
39
-
40
 |
 |