Frigidaire FRT15B3JW Use and Care Guide - Page 12
Looking Inside Continued, Ice Service
 |
UPC - 761101001364
View all Frigidaire FRT15B3JW manuals
Add to My Manuals
Save this manual to your list of manuals |
Page 12 highlights
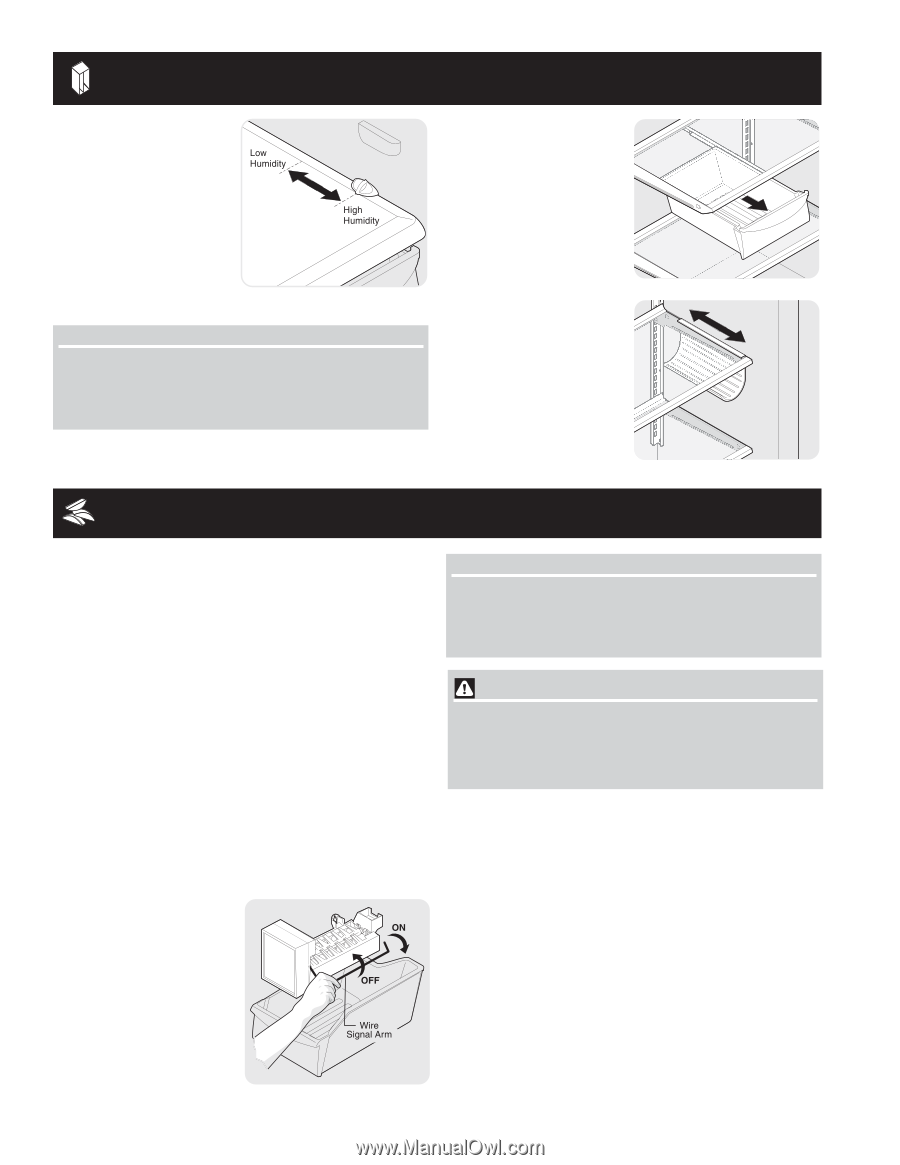
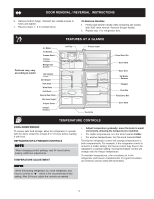
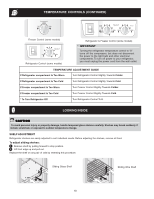
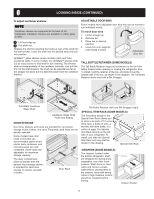
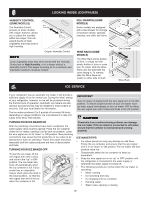
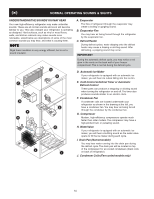
LOOKING INSIDE (CONTINUED) HUMIDITY CONTROL (SOME MODELS) The Humidity Control, present on some models with crisper drawers, allows you to adjust the humidity within the crisper. This can extend the life of fresh vegetables that keep best in high humidity. Crisper Humidity Control NOTE Leafy vegetables keep best when stored with the Humidity Control set on High Humidity, or in a drawer without a Humidity Control. This keeps incoming air to a minimum and maintains maximum moisture content. DELI DRAWER (SOME MODELS) Some models are equipped with a Deli Drawer for storage of luncheon meats, spreads, cheeses, and other deli items. WINE RACK (SOME MODELS) The Wine Rack stores bottles of wine, or single two-liter plastic bottles of juice or soda pop. To install, slide the Wine Rack onto the shelf with the curve facing in. To remove, slide the Wine Rack out. Install on either side of shelf. ICE SERVICE Deli Drawer Wine Rack If your refrigerator has an automatic ice maker, it will provide a sufficient supply of ice for normal use. During the initial startup of your refrigerator, however, no ice will be produced during the first 24 hours of operation. Automatic ice makers are also optional accessories that may be installed in most models at any time. Call your local dealer for information. The ice maker produces 2 to 5 pounds of ice every 24 hours depending on usage conditions. Ice is produced at a rate of 8 cubes every 80 to 160 minutes. TURNING YOUR ICE MAKER ON After the plumbing connections have been completed, the water supply valve must be opened. Place the ice container under the ice maker, pushing it as far back as possible. Lower the wire signal arm to its "down" or ON position. New plumbing connections may cause the first production of ice cubes to be discolored or have an odd flavor. These first cubes should be discarded until the cubes produced are free of discoloration and taste. TURNING YOUR ICE MAKER OFF To stop the ice maker, lift the wire signal arm until it clicks and locks in the "up" or OFF position. The ice maker also turns off automatically when the ice container is full. If your model has an adjustable freezer shelf, place the shelf in the lower position, so that the wire signal arm will hit the ice when the container is full. Ice Maker IMPORTANT Your ice maker is shipped with the wire signal arm in the ON position. To ensure proper function of your ice maker, hook up water supply immediately or turn ice maker OFF by lifting the wire signal arm until it clicks and locks in the UP position. CAUTION Chemicals from a malfunctioning softener can damage the ice maker. If the ice maker is connected to soft water, ensure that the softener is maintained and working properly. ICE MAKER TIPS • Ice cubes stored too long may develop an odd flavor. Empty the ice container and ensure that the wire signal arm is in its "down" or ON position. The ice maker will then produce more ice. • Occasionally shake the ice container to keep ice separated. • Keep the wire signal arm in its "up" or OFF position until the refrigerator is connected to the water supply or whenever the water supply is turned off. • The following sounds are normal when the ice maker is operating: • Motor running • Ice loosening from tray • Ice dropping into ice container • Running water • Water valve opening or closing 12
-
 1
1 -
2
-
3
-
4
-
5
-
6
-
 7
7 -
 8
8 -
 9
9 -
 10
10 -
 11
11 -
 12
12 -
 13
13 -
 14
14 -
 15
15 -
 16
16 -
 17
17 -
18
 |
 |