Frigidaire PLEB30M9EC Use and Care Guide - Page 18
Setting the Clock
 |
UPC - 057112090320
View all Frigidaire PLEB30M9EC manuals
Add to My Manuals
Save this manual to your list of manuals |
Page 18 highlights
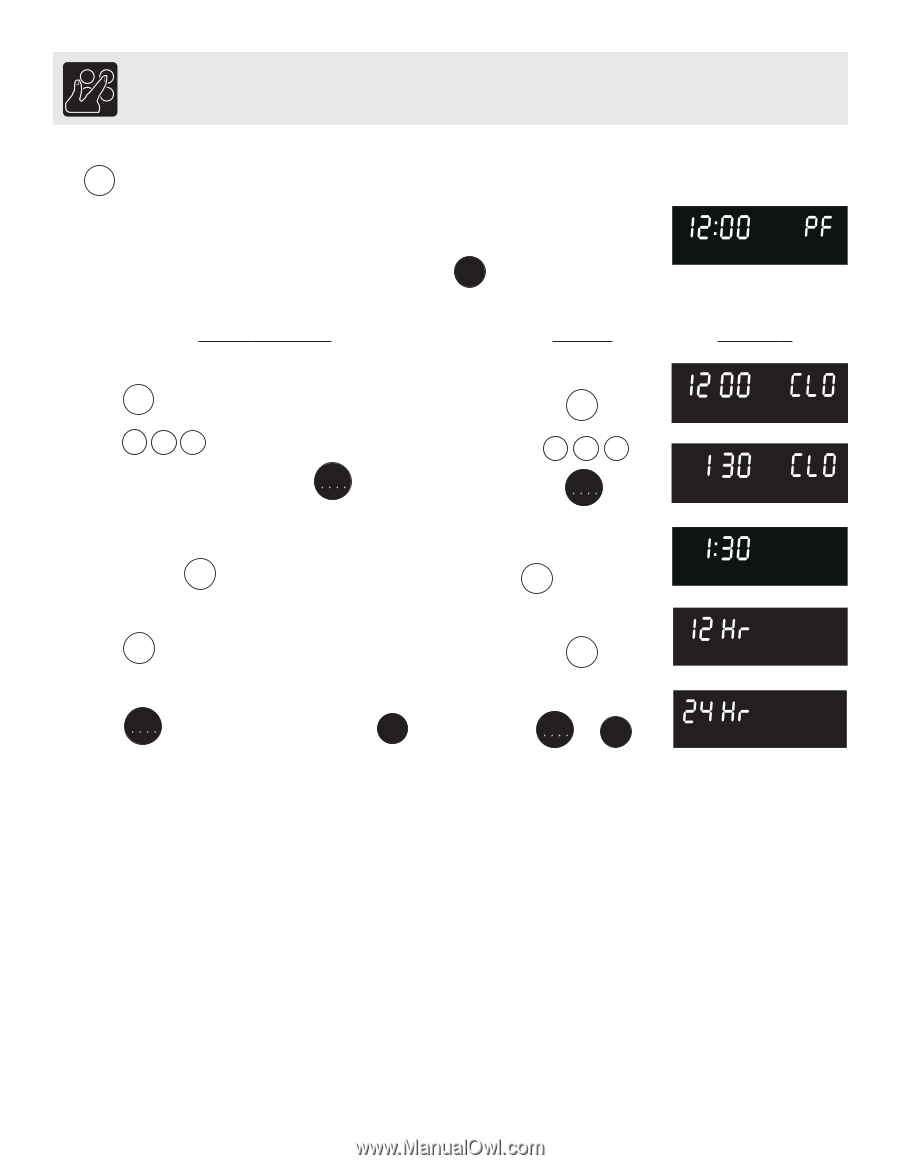
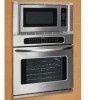
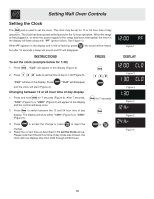
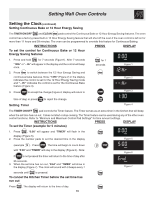
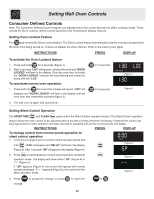
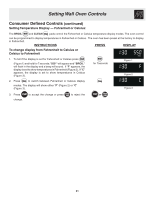
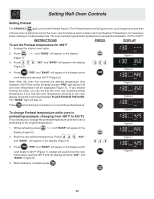
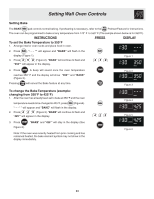
Setting Wall Oven Controls Setting the Clock The Clock pad is used to set the clock. The clock may be set for 12 or 24 hour time of day operation. The clock has been preset at the factory for the 12 hour operation. When the range is first plugged in, or when the power supply to the range has been interrupted, the timer in the display will flash along with "PF" (power failure, See Figure 1). When PF appears in the display and 12:00 is flashing, press Clear /Off . No sound will be heard, but after 10 seconds a beep will sound and PF will disappear. INSTRUCTIONS To set the clock (example below for 1:30) 1. Press Clock . "CLO" will appear in the display (Figure 2). PRESS Clock 2. Press 1 3 0 pads to set the time of day to 1:30 (Figure 3). "CLO" will stay in the display. Press START . "CLO" will disappear and the clock will start (Figure 4). Changing between 12 or 24 hour time of day display 1. Press and hold Clock for 7 seconds (Figure 3). After 7 seconds, "12Hr" (Figure 5) or "24Hr" (Figure 6) will appear in the display and the control will beep once. 2. Press Clean to switch between the 12 and 24 hour time of day display. The display will show either "12Hr" (Figure 5) or "24Hr" (Figure 6). 3. Press START to accept the change or press Clear /Off to reject the change. 4. Reset the correct time as described in To set the Clock above. Please note that if the 24 hour time of day mode was chosen, the clock will now display time from 0:00 through 23:59 hours. 1 30 START Clock for 7 seconds Clean START or Clear /Off Figure 1 DISPLAY Figure 2 Figure 3 Figure 4 Figure 5 Figure 6 18
-
 1
1 -
2
-
3
-
4
-
5
-
6
-
7
-
8
-
9
-
10
-
11
-
12
-
 13
13 -
 14
14 -
 15
15 -
 16
16 -
 17
17 -
 18
18 -
 19
19 -
 20
20 -
 21
21 -
 22
22 -
 23
23 -
24
-
25
-
26
-
27
-
28
-
29
-
30
-
31
-
32
-
33
-
34
-
35
-
36
-
37
-
38
-
39
-
40
-
41
-
42
-
43
-
44
 |
 |