Fujitsu PA03420-B001 Getting Started - Page 15
Confirming the Installation, Confirming with ScandAll 21, Confirming with QuickScan Pro™
 |
UPC - 097564306105
View all Fujitsu PA03420-B001 manuals
Add to My Manuals
Save this manual to your list of manuals |
Page 15 highlights
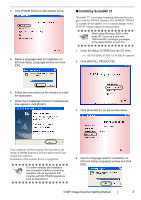
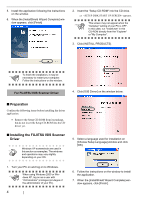
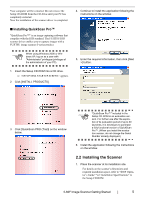
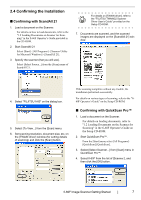
2.4 Confirming the Installation ■ Confirming with ScandAll 21 1. Load a document on the Scanner. For details on how to load documents, refer to the "1.2 Loading Documents on Scanner for Scanning" in the fi-60F Operator's Guide provided in the CD-ROM. 2. Start ScandAll 21 Select [Start] - [All Programs] - [Scanner Utility for Microsoft Windows] - [ScandAll 21]. 3. Specify the scanner (that you will use). Select [Select Source...] from the [Scan] menu of ScandAll 21. For details on [TWAIN driver], refer to HINT the "FUJITSU TWAIN32 Scanner Driver User's Guide" provided on the Setup CD-ROM. 7. Documents are scanned, and the scanned images are displayed on the [ScandAll 21] window. 4. Select "FUJITSU fi-60" on the dialog box. 5. Select [To View...] from the [Scan] menu. 6. Set scanning resolution, document size, etc. on the [TWAIN driver] window (for setting details of scanning) and click the [Scan] button. If the scanning completes without any trouble, the installation performed successfully. For details on various types of scanning, refer to the "fi60F Operator's Guide" on the Setup CD-ROM. ■ Confirming with QuickScan Pro™ 1. Load a document on the Scanner. For details on loading documents, refer to "1.2 Loading Documents on the Scanner for Scanning" in the fi-60F Operator's Guide on the Setup CD-ROM. 2. Start QuickScan Pro™. From the [Start] menu select [All Programs][QuickScan]-[QuickScan]. 3. Select [Select Scanner...] from [Scan] menu in QuickScan Pro™. 4. Select fi-60F from the list of [Scanner:], and then click the [OK] button. fi-60F Image Scanner Getting Started 7
-
 1
1 -
2
-
3
-
4
-
5
-
6
-
7
-
8
-
9
-
 10
10 -
 11
11 -
 12
12 -
 13
13 -
 14
14 -
 15
15 -
 16
16 -
 17
17 -
 18
18 -
 19
19 -
 20
20
 |
 |
