Fujitsu S1500M Operator's Guide
Fujitsu S1500M - ScanSnap - Document Scanner Manual
 |
UPC - 097564307584
View all Fujitsu S1500M manuals
Add to My Manuals
Save this manual to your list of manuals |
Fujitsu S1500M manual content summary:
- Fujitsu S1500M | Operator's Guide - Page 1
P3PC-2432-01ENZ0 Operator's Guide - Fujitsu S1500M | Operator's Guide - Page 2
Introduction Thank you for purchasing our Color Image Scanner, ScanSnap S1500/S1500M (hereinafter referred to as "the ScanSnap"). This Operator's Guide describes how to handle and operate the ScanSnap. Before using the ScanSnap, be sure to read this manual, "Safety Precautions" and "Getting Started" - Fujitsu S1500M | Operator's Guide - Page 3
. ScanSnap S1500/S1500M Getting Started This manual describes how to install and connect the ScanSnap. Included in the package. ScanSnap S1500/S1500M Operator's Guide (this manual) This manual describes basic operations of ScanSnap, the scanning methods, various settings, troubleshooting, and - Fujitsu S1500M | Operator's Guide - Page 4
to start up help, refer to the User's Guide for each product. CardMinder Help (*1) Cardiris Help (*2) From the menu bar, select [Help] → [Cardiris Help]. ABBYY FineReader for ScanSnap Help (*2) Adobe Acrobat Help *1: Supplied with S1500. *2: Supplied with S1500M. From the menu bar, select [Help - Fujitsu S1500M | Operator's Guide - Page 5
scanning settings, and other various functions of the ScanSnap. Troubleshooting This chapter describes how to remove jammed documents and resolve other problems. Daily Care This chapter describes how to clean the ScanSnap. Consumables This chapter describes how to replace consumables such as pad - Fujitsu S1500M | Operator's Guide - Page 6
. This symbol alerts operators to helpful advice regarding operations. This symbol indicates operations using Windows. This symbol indicates operations using Mac OS. Description of Successive Operations In the procedures described in this manual, successive operations are connected with → in - Fujitsu S1500M | Operator's Guide - Page 7
. The screenshots used in this manual are of Windows Vista. Depending on the operating systems you are using, the screen examples and operations may differ from the actual ones. • Mac OS screen The screenshots used in this manual are of Mac OS X v10.5. Depending on the Mac OS you are using, the - Fujitsu S1500M | Operator's Guide - Page 8
The following abbreviated terms used in this manual are described. Windows Vista: Microsoft® Windows Vista® Home Basic operating system, English Version Microsoft® Windows Vista® Home Premium operating system, English Version Microsoft® Windows Vista® Business operating system, English Version - Fujitsu S1500M | Operator's Guide - Page 9
are any discrepancies between those descriptions provided in this manual and the actual screen, refer to the Help for ABBYY FineReader for ScanSnap. CardMinder™ application for ScanSnap Cardiris™ for ScanSnap Color Image Scanner ScanSnap S1500 Color Image Scanner ScanSnap S1500M S1500 and S1500M 9 - Fujitsu S1500M | Operator's Guide - Page 10
Sizes of Documents to Be Scanned 26 Loading Documents 28 Basic Flow of Operations 32 Installing the Software 34 For S1500 35 Supplied Software 35 Installing Adobe Acrobat 36 Installing ScanSnap Manager on Mac OS 38 Installing Trial Version Software 42 For S1500M 44 Supplied Software 44 - Fujitsu S1500M | Operator's Guide - Page 11
Cards 126 Saving Data in SharePoint 133 Saving to Rack2-Filer 143 Using the ScanSnap in Various Ways 149 Scanning Only One Side of a Document 149 Scanning Color Documents in Black and White or Gray Mode 151 Scanning Color Documents in High Compression Mode 153 Removing Blank Pages from the - Fujitsu S1500M | Operator's Guide - Page 12
Contents Automatically Setting Keywords to PDF Files 179 Setting Document Open Passwords for PDF Files 184 Using the ScanSnap (for Mac OS Users 188 ScanSnap Manager Icon and Operations 189 ScanSnap Manager Menu 190 [Profile] Menu 191 How to Perform a Scan 192 Preparation 192 Using the Quick - Fujitsu S1500M | Operator's Guide - Page 13
Consumables 331 Part Numbers and Replacement Cycle of Consumables 332 Replacing the Pad Assembly 335 Replacing the Pick Roller 339 Purchasing the Carrier Sheet 347 Appendix 348 Updating ScanSnap Manager 349 Updating on a Windows OS 349 Updating on a Mac OS 352 Uninstalling the Software 355 - Fujitsu S1500M | Operator's Guide - Page 14
Contents Index 365 14 - Fujitsu S1500M | Operator's Guide - Page 15
names of parts and their functions, the system requirements, and basic operations of the ScanSnap. Features of the ScanSnap 16 Names and Functions of Components 19 System Requirements 21 Turning the ScanSnap On/Off 25 Paper Sizes of Documents to Be Scanned 26 Loading Documents 28 Basic Flow - Fujitsu S1500M | Operator's Guide - Page 16
of the ScanSnap The ScanSnap is a scanner that is capable of double-sided scanning in both monochrome and color. The ScanSnap contains the following features: • You can turn documents into data by just pressing the [Scan] button! You can turn documents cluttering up your desk into PDF or JPEG - Fujitsu S1500M | Operator's Guide - Page 17
documents into Word/Excel/PowerPoint files! Use ABBYY FineReader for ScanSnap supplied with the ScanSnap to convert the scanned image data directly into the Word/Excel/PowerPoint file. For Mac Index) − Drag and drop a keyword onto the keyword list (Keyword Addition by Drag&Drop) You can view set - Fujitsu S1500M | Operator's Guide - Page 18
OS, you can use the ScanSnap in a manner that best suits your office environment. * : The following functions are not available for Mac OS. - Color high compression - Set the document with its face up - Set a password for PDF file Note: The ScanSnap does not conform to TWAIN, ISIS, and WIA standards - Fujitsu S1500M | Operator's Guide - Page 19
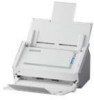
to clear document jams, replace the pad assembly and the pick roller, and clean the inside of the ScanSnap. Extension When scanning long-size documents, pull up this part. ADF paper chute (cover) After opening it, load the documents to be scanned on this part. Side guide Adjust the side guides to - Fujitsu S1500M | Operator's Guide - Page 20
Names and Functions of Components Ventilation ports These openings ventilate the interior of the ScanSnap. Power connector Security cable slot Insert a commercially available security cable into this slot (anti-theft). Tape seal After installing the software, remove this tape seal. USB connector 20 - Fujitsu S1500M | Operator's Guide - Page 21
− Windows XP − Windows 2000 Supplied software ScanSnap Manager ScanSnap Organizer CardMinder ABBYY FineReader for ScanSnap Scan to Microsoft SharePoint Adobe Acrobat 9 Standard OK: Supported -: Not supported Windows Vista OK OK OK OK OK OK Windows XP (*1) OK OK OK OK OK OK *1 : Service Pack - Fujitsu S1500M | Operator's Guide - Page 22
. The following shows the image data size criteria when scanning a one-sheet color document in simplex mode. File format PDF Compression rate 3 Paper size A4 (general catalog) Color mode Color Gray B&W Color high compression Image data size criteria (KB) Auto Normal Better 438.4 393 - Fujitsu S1500M | Operator's Guide - Page 23
System Requirements ■ Mac OS • Operating system − Mac OS X v10.5 − Mac OS X v10.4 Supplied software ScanSnap Manager Cardiris ABBYY FineReader for ScanSnap Adobe Acrobat 8 Professional Mac OS X v10.5 OK OK OK OK (*1) Mac OS X v10.4 OK OK OK OK (*2) OK: Supported *1: When the provided Adobe - Fujitsu S1500M | Operator's Guide - Page 24
size criteria when scanning a one-sheet color document in simplex mode. File format Compression rate Paper size PDF 3 A4 (general catalog) Color mode Color Gray B&W Auto 438.4 393.4 175.8 Image data size criteria (KB) Normal Better 295.1 264.3 112.0 442.4 390.0 183.5 Best 859.3 753 - Fujitsu S1500M | Operator's Guide - Page 25
do not need to manually turn the ScanSnap on/off if it is connected to a computer. • Turning the ScanSnap on With the computer power on, open the ADF paper chute (cover). ⇒ The [Scan] button blinks blue, indicating the ScanSnap is turning on. The ScanSnap might perform initialization several times - Fujitsu S1500M | Operator's Guide - Page 26
can damage the pad assembly or rollers. For best use of your ScanSnap, when scanning carbonless paper, note the following. - It is recommended to scan with a Carrier Sheet - Multiple sheets of carbonless paper can be directly scanned. However, to preserve the efficiency of the scanner, make sure to - Fujitsu S1500M | Operator's Guide - Page 27
*: Fold in half when scanning. • Do not write on, color, stain, or cut the portion striped in black and white on the Carrier Sheet. Doing so may prevent the document from being correctly scanned with the Carrier Sheet. • Do not place the Carrier Sheet upside-down on the ScanSnap. Doing so can cause - Fujitsu S1500M | Operator's Guide - Page 28
number of sheets in the document stack. The maximum number of sheets that can be loaded on the ScanSnap is as follows: For A4-size paper or smaller: A document stack of 5 mm or less (50 sheets at 80 g/m2 or at 20 lb) If you try to scan more sheets that can be loaded, the following problems may occur - Fujitsu S1500M | Operator's Guide - Page 29
Loading Documents 4. Open the ADF paper chute (cover) of the ScanSnap. ADF paper chute (cover) 5. Pull the stacker on the ADF top section towards you. Stacker 6. Pull out the extension of the ADF paper chute (cover), and open the stacker. Extension Stacker 29 - Fujitsu S1500M | Operator's Guide - Page 30
(cover). Do not load the document beyond the reference marks on the side guide. Side guide • Do not load the documents of more than 50 sheets (80 g/m2 or 20 lb). • Right-click the ScanSnap Manager taskbar icon , select [Scan Button Settings]. In the ScanSnap setup dialog box that appears, click - Fujitsu S1500M | Operator's Guide - Page 31
Loading Documents 8. Adjust the side guides to the document width. Move the side guides so that there is no gap between the document edge and side guide on both sides. Doing so reduces skewing of the document during scanning. Paper 31 - Fujitsu S1500M | Operator's Guide - Page 32
scan documents in two different ways. Use either way according to your preference. • Using the Quick Menu After the scanning of a document is complete, select an action to be performed from the Quick Menu. Beginners can use the Quick Menu to easily operate the ScanSnap. For Windows (page 55) For Mac - Fujitsu S1500M | Operator's Guide - Page 33
Menu Select a profile Select an action to be performed from the Quick Menu Press the [Scan] button to scan the document The selected action is performed. If interacting with an application, the application window appears. Scan to E-mail Scan to Folder/ Scan to Picture Folder Scan to Print 33 - Fujitsu S1500M | Operator's Guide - Page 34
describes the outline of the software supplied with the ScanSnap, the installation procedure of Adobe Acrobat, and the installation procedure of ScanSnap Manager for S1500 used on Mac OS and S1500M used on Windows. For details about how to install the software on the ScanSnap Setup DVD-ROM, refer to - Fujitsu S1500M | Operator's Guide - Page 35
and organize the image data scanned. • ScanSnap Manager This software is required to scan documents with the ScanSnap. The scanned image data can be converted to a PDF or JPEG file to be saved. • ScanSnap Organizer This software can be used to display image data (PDF and JPEG files) without opening - Fujitsu S1500M | Operator's Guide - Page 36
the following operating systems: • Windows Vista • Windows XP (Service Pack 2 or later must be applied) Additional requirements are as follows: • Internet Explorer 6.0 or later • 1024 × 768 or higher resolution In Adobe Acrobat, you can view the scanned image data with the ScanSnap. You do not have - Fujitsu S1500M | Operator's Guide - Page 37
3. Click the [Install Adobe® Acrobat® 9] button. For S1500 ⇒ The [Adobe Acrobat 9 Standard - English, Français, Deutsch - Setup] window appears. 4. Click the [Next] button. 5. Follow the instructions on the screen to install. • For more details about installing Adobe Acrobat, click [Read Me.html] - Fujitsu S1500M | Operator's Guide - Page 38
■ Installing ScanSnap Manager on Mac OS For S1500 Follow the procedure to install ScanSnap Manager from the Setup DVD-ROM supplied with the ScanSnap. For details about system requirements, refer to "System Requirements" (page 21). • After installing ScanSnap Manager, connect the ScanSnap to the - Fujitsu S1500M | Operator's Guide - Page 39
Continue] button. For S1500 ⇒ The [Welcome to the ScanSnap Installer] window appears. 6. Click the [Continue] button. ⇒ The [Important Information] window appears. 7. Read the "Important Information", then click the [Continue] button. ⇒ The [Software License Agreement] window appears. 8. Read the - Fujitsu S1500M | Operator's Guide - Page 40
9. To accept the agreement, click the [Agree] button. For S1500 ⇒ The [Standard Install on "(volume_name)"] window appears. 10.Click the [Install] button. ⇒ The installation is started. The [Startup item registration] window appears. 11.Click the [OK] button. ⇒ When the installation is complete, - Fujitsu S1500M | Operator's Guide - Page 41
12.Click the [Close] button. For S1500 13.Remove the Setup DVD-ROM from the DVD-ROM drive. 41 - Fujitsu S1500M | Operator's Guide - Page 42
Version Software For S1500 The following describes how to install trial version software. For details about the required operating environment, refer to the trial version software "Readme". The "Readme" can be displayed by clicking the [Readme] button on the trial version program setup window - Fujitsu S1500M | Operator's Guide - Page 43
For S1500 5. Click the [Install Products] button. ⇒ The installation starts. 6. Follow the instructions on the screen to complete the installation. • For more details about installation, refer to the trial version software "Readme". The "Readme" can be displayed by clicking the [Readme] button on - Fujitsu S1500M | Operator's Guide - Page 44
, you can edit, manage, and organize the image data. • ScanSnap Manager This software is required to scan documents with the ScanSnap. The scanned image data can be converted to a PDF or JPEG file to be saved. • Cardiris This software can be used to efficiently digitalize a large number of business - Fujitsu S1500M | Operator's Guide - Page 45
can use Adobe Acrobat on the following operating systems: • Mac OS X v10.5 • Mac OS X v10.4.3 or later Additional requirements are as follows: • 1024 × 768 or higher resolution In Adobe Acrobat, you can view the scanned image data with the ScanSnap. You do not have to install Adobe Acrobat if the - Fujitsu S1500M | Operator's Guide - Page 46
] folder. 3. Double-click the [Adobe Acrobat Professional] icon and follow the instructions on the screen to install. • For more details about installing Adobe Acrobat, click [Read Me] on the [Adobe Acrobat 8 Professional] window in Step 2. to read its procedure. • For details about using Adobe - Fujitsu S1500M | Operator's Guide - Page 47
■ Installing ScanSnap Manager on Windows For S1500M Follow the procedure to install ScanSnap Manager from the Setup DVD-ROM supplied with the ScanSnap. For details about system requirements, refer to "System Requirements" (page 21). • After installing ScanSnap Manager, connect the ScanSnap to the - Fujitsu S1500M | Operator's Guide - Page 48
6. Click the [Next] button. For S1500M ⇒ The [Choose Destination Location] dialog box appears. 7. Check the destination folder and click the [Next] button. ⇒ The [ScanSnap License Agreement] dialog box appears. 8. Read the full text of the [ScanSnap License Agreement]. If you agree to the terms of - Fujitsu S1500M | Operator's Guide - Page 49
10.Click the [Finish] button. For S1500M ⇒ The [ScanSnap Setup] dialog box appears. 11.Remove the Setup DVD-ROM from the DVD-ROM drive. 49 - Fujitsu S1500M | Operator's Guide - Page 50
) This chapter describes how to perform a scan with the ScanSnap, change or save scanning settings, and other various functions of the ScanSnap. ScanSnap Manager Icon and Operations 51 How to Perform a Scan 54 Setting the ScanSnap 64 About Actions 86 Using the ScanSnap in Various Ways 149 50 - Fujitsu S1500M | Operator's Guide - Page 51
ScanSnap or not. The appearance of the icon changes according to the status of communication, as shown below. Communication Status Communication is active Icon on the Taskbar Communication is not active Clicking this icon shows menus which you can use to start scanning, change scanning settings - Fujitsu S1500M | Operator's Guide - Page 52
of the document are scanned at the same time. Scanning is performed according to the settings configured in [Scan Button Settings]. Only one side of the document is scanned at one time. Scanning is performed according to the settings configured in [Scan Button Settings]. The ScanSnap setup dialog - Fujitsu S1500M | Operator's Guide - Page 53
■ Left-Click Menu This menu appears when you left-click the [ScanSnap Manager] icon . Selectable profiles are listed on the Left-Click Menu. Left-click By selecting a profile on the Left-Click Menu, you can switch to the previously saved scanning settings. When you are not using the Quick Menu, you - Fujitsu S1500M | Operator's Guide - Page 54
How to Perform a Scan (for Windows Users) How to Perform a Scan This section describes how to perform a scan with the ScanSnap. ■ Preparation 1. Make sure that the power cable is connected to the ScanSnap properly. 2. Make sure that the ScanSnap is connected to your computer properly. You can turn - Fujitsu S1500M | Operator's Guide - Page 55
Manager] → [Startup Register] to register ScanSnap Manager. 2. From the Right-Click Menu, select [Scan Button Settings]. ⇒ The ScanSnap setup dialog box appears. 3. Select the [Use Quick Menu] check box. For details about scanning documents without using the Quick Menu, refer to "Without Using - Fujitsu S1500M | Operator's Guide - Page 56
300 dpi) for image quality and default for other settings. It is recommended to select this button when you wish to reduce the scanned file size. The settings are [Best] (color/gray: 300 dpi, black and white: 600 dpi) for image quality and default for other settings. It is recommended to select this - Fujitsu S1500M | Operator's Guide - Page 57
How to Perform a Scan (for Windows Users) 7. Press the [Scan] button on the ScanSnap. ⇒ Scanning is started. • By default, the [Scan] button settings are set to [Duplex Scan (Double-sided)]. With ScanSnap Manager, you can switch the [Scan] button settings to [Simplex Scan (Single-sided)] mode. For - Fujitsu S1500M | Operator's Guide - Page 58
, refer to the ScanSnap Organizer User's Guide. Scan to CardMinder (*2) Scanned card image data are text-recognized and managed in the card database. For details about how to operate after this button is selected, refer to "Scanning Business Cards" (page 126). Scan to Folder PDF or JPEG files - Fujitsu S1500M | Operator's Guide - Page 59
(page 133). Scan to Rack2-Filer (*5) PDF files are created from the scanned image data and Scan- Snap) or Rack2-Filer (v5.0 recommended) (bundled or sold separately) is installed. • Before scanning documents of printed or handwritten text, on the ScanSnap setup dialog box, select the [Scanning - Fujitsu S1500M | Operator's Guide - Page 60
it is not registered under [Startup], select the [Start] menu → [All Programs] → [ScanSnap Manager] → [Startup Register] to register ScanSnap Manager. 2. From the Right-Click Menu, select [Scan Button Settings]. ⇒ The ScanSnap setup dialog box appears. 3. Clear the [Use Quick Menu] check box. When - Fujitsu S1500M | Operator's Guide - Page 61
be executed after scanning. Select a profile using either of the following: • [Profile] drop-down list in the ScanSnap setup dialog box • Left-Click menu 5. Load the document into the ScanSnap. For details about how to load the document into the ScanSnap, refer to "Loading Documents" (page 28). 61 - Fujitsu S1500M | Operator's Guide - Page 62
settings: [Image quality: Auto], [Color mode: Auto Color Detection], [Scanning side: Duplex Scan]. For details about how to change the settings of scanning, refer to "Changing Scanning Settings" (page 64). • Before scanning documents of printed or handwritten text, on the ScanSnap setup dia- log box - Fujitsu S1500M | Operator's Guide - Page 63
How to Perform a Scan (for Windows Users) ■ Finishing ScanSnap Operation Exiting ScanSnap Manager Select [Exit] from the Right-Click Menu. In most cases, ScanSnap Manager does not need to be exited. You can no longer use the ScanSnap after exiting ScanSnap Manager. Select the [Start] menu → [All - Fujitsu S1500M | Operator's Guide - Page 64
This section describes how to change and save scanning settings, automatically interact with applications, and about dialog boxes displayed during scanning. ■ Changing Scanning Settings To change scanning settings for the ScanSnap, use the Right-Click Menu. The following describes how to change - Fujitsu S1500M | Operator's Guide - Page 65
with the ScanSnap • [Save] tab − Folder in which scanned image data are saved − File name used for saving scanned image data • [Scanning] tab − Scan mode (Which image quality to scan with, color, gray or black-and-white, simplex or duplex, enable or disable [Setting for text only document], [Allow - Fujitsu S1500M | Operator's Guide - Page 66
to include all scanned image data in a single PDF file, or create PDF files, each of which includes a preset number of pages. − Whether to password-protect the created PDF files. • [Paper] tab − Paper size of the document to be scanned. ([Paper size] and [Carrier Sheet Settings]) − Whether to - Fujitsu S1500M | Operator's Guide - Page 67
retrieve and use the saved Left-Click Menu Once the frequently used scanning settings are saved as profiles you do not have to open the ScanSnap Manager dialog box to change settings every time you scan documents. You can switch to an appropriate profile with simple point and click operations - Fujitsu S1500M | Operator's Guide - Page 68
Setting the ScanSnap (for Windows Users) Saving Profiles 1. From the Right-Click Menu, select [Scan Button Settings]. ⇒ The ScanSnap setup dialog box appears. 2. Clear the [Use Quick Menu] check box. This function is not available when the [Use Quick Menu] check box is selected. 68 - Fujitsu S1500M | Operator's Guide - Page 69
Setting the ScanSnap (for Windows Users) 3. Change scanning settings on each tab on the ScanSnap setup dialog box. For details about each tab, refer to ScanSnap Manager Help. 4. Select [Add Profile] from the [Profile] drop-down list. ⇒ The [Add new profile] dialog box appears. 69 - Fujitsu S1500M | Operator's Guide - Page 70
Setting the ScanSnap (for Windows Users) 5. Type in a profile name, and then click the [OK] button. ⇒ The new profile name appears in the [Profile] drop-down list. 70 - Fujitsu S1500M | Operator's Guide - Page 71
] profile. 1. Select [Profile Management] from the [Profile] drop-down list in the ScanSnap setup dialog box or from the Right-Click Menu. ⇒ The [ScanSnap Manager - Profile Management] dialog box appears. 2. Select a profile from the list to arrange profiles in a different sequence. 3. Click the [Up - Fujitsu S1500M | Operator's Guide - Page 72
Users) Changing Settings for Saved Profiles 1. From the Right-Click Menu, select [Scan Button Settings]. ⇒ The ScanSnap setup dialog box appears. 2. Clear the [Use Quick Menu] check box. This function is not available when the [Use Quick Menu] check box is selected. 3. - Fujitsu S1500M | Operator's Guide - Page 73
Setting the ScanSnap (for Windows Users) 4. Change scanning settings on each tab on the ScanSnap setup dialog box. For details about each tab, refer to ScanSnap Manager Help. 5. When you finish changing the settings for the selected profile, click the [OK] button. ⇒ A confirmation message appears to - Fujitsu S1500M | Operator's Guide - Page 74
Setting the ScanSnap (for Windows Users) 6. To overwrite the profile, select the [Yes] button. When the [No] button is clicked, changes are saved to the [Standard] profile. When you have selected the [Standard] profile in Step 3., the confirmation message does not appear. 74 - Fujitsu S1500M | Operator's Guide - Page 75
Setting the ScanSnap (for Windows Users) Renaming Profiles 1. From the Right-Click Menu, select [Scan Button Settings]. ⇒ The ScanSnap setup dialog box appears. 2. Clear the [Use Quick Menu] check box. This function is not available when the [Use Quick Menu] check box is selected. 75 - Fujitsu S1500M | Operator's Guide - Page 76
Users) 3. Select [Profile Management] from the [Profile] drop-down list. You can also select [Profile Management] from the Right-Click Menu to open the [ScanSnap Manager Profile Management] dialog box. ⇒ The [ScanSnap Manager - Profile Management] dialog box appears. 4. Select the profile you - Fujitsu S1500M | Operator's Guide - Page 77
Setting the ScanSnap (for Windows Users) 5. Type in a new name, and then click the [OK] button. ⇒ The selected profile is renamed. 6. Click the [Close] button to close the [ScanSnap Manager - Profile Man- agement] dialog box. 77 - Fujitsu S1500M | Operator's Guide - Page 78
Setting the ScanSnap (for Windows Users) Deleting Profiles 1. From the Right-Click Menu, select [Scan Button Settings]. ⇒ The ScanSnap setup dialog box appears. 2. Clear the [Use Quick Menu] check box. This function is not available when the [Use Quick Menu] check box is selected. 78 - Fujitsu S1500M | Operator's Guide - Page 79
Setting the ScanSnap (for Windows Users) 3. Select [Profile Management] from the [Profile] drop-down list. You can also select [Profile Management] from the Right-Click Menu to open the [ScanSnap Manager Profile Management] dialog box. ⇒ The [ScanSnap Manager - Profile Management] dialog box appears - Fujitsu S1500M | Operator's Guide - Page 80
you want to delete from the list, and then click the [Delete] button. The [Standard] profile cannot be deleted. ⇒ The [Delete Profile] dialog box appears. 5. Click the [Yes] button. ⇒ The selected profile is deleted. 6. Click the [Close] button to close the [ScanSnap Manager - Profile Man- agement - Fujitsu S1500M | Operator's Guide - Page 81
is clicked on the taskbar and its window is brought to the front, scanning the document by pressing the [Scan] button automatically starts interaction between the ScanSnap and the active application in which the scanned document image is displayed. Even when the ScanSnap is in Quick Menu mode, the - Fujitsu S1500M | Operator's Guide - Page 82
application selected in the [Application] drop-down list on the [Application] tab on the ScanSnap setup dialog box is automatically switched to the running application. When you scan documents by pressing the [Scan] button, the ScanSnap automatically interacts with the active application, in which - Fujitsu S1500M | Operator's Guide - Page 83
with an application that is running and has higher priority. When ScanSnap Organizer, CardMinder, or Rack2-Filer is running, an application selected in the [Application] drop-down list on the [Application] tab on the ScanSnap setup dialog box is automatically switched to the running application. 83 - Fujitsu S1500M | Operator's Guide - Page 84
been saved, and overview of the current settings for scanning. You can also stop scanning with the ScanSnap by clicking the [Stop] button. After the image data of the document scanned last is saved, the [ScanSnap Manager - Image scanning and file saving] dialog box automatically closes. Hiding the - Fujitsu S1500M | Operator's Guide - Page 85
Setting the ScanSnap (for Windows Users) 2. In the [Show Scan Progress Status] tab, clear the [Show the scan progress status (recommended)] check box and click the [OK] button. ⇒ The [ScanSnap Manager - Image scanning and file saving] dialog box is hidden from the next scanning. 85 - Fujitsu S1500M | Operator's Guide - Page 86
copy machine, to make copies of documents. ⇒ Simply press the [Scan] button, and you can print documents with a printer. • you want to use text in your paper documents but do not want to type it manually. ⇒ Simply press the [Scan] button, and you can get the scanned image data text recog- nized and - Fujitsu S1500M | Operator's Guide - Page 87
About Actions (for Windows Users) ■ Saving Data in the Specified Folder This section describes how to save the scanned image data in a shared folder. By using this action, you can save the scanned image data in a networked folder to share information among group members. In addition, all members are - Fujitsu S1500M | Operator's Guide - Page 88
to use. 3. Select [Set this program as default] and click the [OK] button. Windows XP/Windows 2000 An e-mail program selected in the Internet Explorer [Tools] menu → [Internet Options] → [Programs] tab → [E-mail] drop-down list is used. If no e-mail program is selected, select an e-mail program you - Fujitsu S1500M | Operator's Guide - Page 89
) Using the Quick Menu 1. Load the document into the ScanSnap. For details, refer to "Paper Sizes of Documents to Be Scanned" (page 26) and "Loading Documents" (page 28). 2. Press the [Scan] button on the ScanSnap. ⇒ Scanning is started. ⇒ When scanning is complete, the Quick Menu appears. 3. Click - Fujitsu S1500M | Operator's Guide - Page 90
About Actions (for Windows Users) 4. Check the scanned image in the [Scan to Folder] dialog box. You can also change file names and destination folders and specify whether to state a path to a destination folder in an e-mail message to notify other members. For details about the [Scan to Folder] - Fujitsu S1500M | Operator's Guide - Page 91
Quick Menu is displayed, the ScanSnap does not perform a scan even if you press the [Scan] button, unless the [Scan to Folder] dialog box is closed. Close the [Scan to Folder] dialog box before scanning another document. • Do not move, delete, or rename scanned image data in other applications after - Fujitsu S1500M | Operator's Guide - Page 92
Menu from the next time you scan documents. For details about how to save scanning settings, refer to "Saving Scanning Settings" (page 67). 3. Click the [OK] button to close the ScanSnap setup dialog box. Even if the [Scan] button on the ScanSnap is pressed, the ScanSnap setup dialog box closes. 92 - Fujitsu S1500M | Operator's Guide - Page 93
, refer to "Paper Sizes of Documents to Be Scanned" (page 26) and "Loading Documents" (page 28). 5. Press the [Scan] button on the ScanSnap. ⇒ Scanning is started. ⇒ When scanning is complete, the [Scan to Folder] dialog box appears. 6. Check the scanned image in the [Scan to Folder] dialog box. You - Fujitsu S1500M | Operator's Guide - Page 94
path to the destination folder stated. • When the [Scan to Folder] dialog box is displayed, scanning cannot be performed with the ScanSnap. Close the [Scan to Folder] dialog box before scanning another document. • Do not move, delete, or rename the scanned image data in other applications when the - Fujitsu S1500M | Operator's Guide - Page 95
■ Sending Files by E-Mail About Actions (for Windows Users) This section describes how to send the scanned image data by e-mail. 95 - Fujitsu S1500M | Operator's Guide - Page 96
to use. 3. Select [Set this program as default] and click the [OK] button. Windows XP/Windows 2000 An e-mail program selected in the Internet Explorer [Tools] menu → [Internet Options] → [Programs] tab → [E-mail] drop-down list is used. If no e-mail program is selected, select an e-mail program you - Fujitsu S1500M | Operator's Guide - Page 97
multiple files. Pay attention to the number of sheets of the loaded document. • File format: JPEG(*.jpg) • [Generate one PDF file per (n) page(s)] check box is selected 2. Press the [Scan] button on the ScanSnap. ⇒ Scanning is started. ⇒ When scanning is complete, the Quick Menu appears. 3. Change - Fujitsu S1500M | Operator's Guide - Page 98
Users) 2. Change settings. For details about the [Scan to E-mail - Options] dialog box, refer to ScanSnap Manager Help. 3. Click the [OK] button to close the [Scan to E-mail -Options] dialog box. 4. Click the [Scan to E-mail] icon. ⇒ The [Scan to E-mail] dialog box appears. When you have cleared - Fujitsu S1500M | Operator's Guide - Page 99
Actions (for Windows Users) 5. Check the scanned image on the [Scan to E-mail] dialog box. You can also change file names, specify whether to set a "Document Open Password", and specify whether to save scanned files attached to an e-mail message after scanning. For details about the [Scan to E-mail - Fujitsu S1500M | Operator's Guide - Page 100
About Actions (for Windows Users) 6. Click the [Attach] button. ⇒ When the [Set a "Document Open password" for PDF files] check box is selected in the [Scan to E-mail - Options] dialog box or [Scan to E-mail] dialog box, the [Scan to E-mail - Set a password] dialog box appears. Enter a password, and - Fujitsu S1500M | Operator's Guide - Page 101
] from the Right-Click Menu. ⇒ The ScanSnap setup dialog box appears. 2. In the [Application] drop-down list on the [Application] tab, select [Scan to E-mail]. • The profiles can also be set by selecting [Scan to E-mail] from the [Profile] drop-down list or from the Left-Click Menu. • Finishing - Fujitsu S1500M | Operator's Guide - Page 102
E-mail - Options] dialog box, refer to ScanSnap Manager Help. 3. Click the [OK] button to close the [Scan to E-mail -Options] dialog box. 4. Click the [OK] button to close the ScanSnap setup dialog box. Even if the [Scan] button on the ScanSnap is pressed, the ScanSnap setup dialog box closes. 102 - Fujitsu S1500M | Operator's Guide - Page 103
. Pay attention to the number of sheets of the loaded document. • File format: JPEG(*.jpg) • [Generate one PDF file per (n) page(s)] check box is selected 6. Press the [Scan] button on the ScanSnap. ⇒ Scanning is started. ⇒ When scanning is complete, the [Scan to E-mail] dialog box appears. When - Fujitsu S1500M | Operator's Guide - Page 104
About Actions (for Windows Users) 8. Click the [Attach] button. ⇒ When the [Set a "Document Open password" for PDF files] check box is selected in the [Scan to E-mail - Options] dialog box or [Scan to E-mail] dialog box, the [Scan to E-mail - Set a password] dialog box appears. Enter a password, and - Fujitsu S1500M | Operator's Guide - Page 105
machine. • By default, a printer that is [Set as Default Printer] in Windows Control Panel is used. You may also change settings so that a printer can be changed after scanning. • Depending on the document conditions and scanning settings, the printed image data may contain shadows (which appear as - Fujitsu S1500M | Operator's Guide - Page 106
) Using the Quick Menu 1. Load the document into the ScanSnap. For details, refer to "Paper Sizes of Documents to Be Scanned" (page 26) and "Loading Documents" (page 28). 2. Press the [Scan] button on the ScanSnap. ⇒ Scanning is started. ⇒ When scanning is complete, the Quick Menu appears. 3. Change - Fujitsu S1500M | Operator's Guide - Page 107
Print] icon. About Actions (for Windows Users) ⇒ The [Scan to Print] dialog box appears. If the [Show "Print" dialog] check box is cleared in Step 3., printing is immediately performed. 5. Check the scanned image on the [Scan to Print] dialog box. You can select the printer to be used and specify - Fujitsu S1500M | Operator's Guide - Page 108
the Quick Menu is displayed, the ScanSnap does not perform a scan even if you press the [Scan] button, unless the [Scan to Print] dialog box is closed. Close the [Scan to Print] dialog box before scanning another document. • Do not move, delete, or rename the scanned image data in other applications - Fujitsu S1500M | Operator's Guide - Page 109
] from the Right-Click Menu. ⇒ The ScanSnap setup dialog box appears. 2. In the [Application] drop-down list on the [Application] tab, select [Scan to Print]. • The profiles can also be set by selecting [Scan to Print] from the [Profile] drop-down list or from the Left-Click Menu. • Finishing - Fujitsu S1500M | Operator's Guide - Page 110
the [OK] button to close the ScanSnap setup dialog box. Even if the [Scan] button on the ScanSnap is pressed, the ScanSnap setup dialog box closes. 5. Load the document into the ScanSnap. For details, refer to "Paper Sizes of Documents to Be Scanned" (page 26) and "Loading Documents" (page 28). 110 - Fujitsu S1500M | Operator's Guide - Page 111
[Print] button. ⇒ Printing is performed. • When the [Scan to Print] dialog box is displayed, scanning cannot be performed with the ScanSnap. Close the [Scan to Print] dialog box before scanning another document. • Do not move, delete, or rename the scanned image data in other applications when the - Fujitsu S1500M | Operator's Guide - Page 112
describes how to save scanned image data in the pictures folder. By default, the following folder is set as the "Pictures folder". • Windows Vista Drive name (such as C):\Users\(User_name)\Pictures\ScanSnap • Windows XP/Windows 2000 Drive name (such as C):\Documents and Settings\(User_name)\My - Fujitsu S1500M | Operator's Guide - Page 113
) Using the Quick Menu 1. Load the document into the ScanSnap. For details, refer to "Paper Sizes of Documents to Be Scanned" (page 26) and "Loading Documents" (page 28). 2. Press the [Scan] button on the ScanSnap. ⇒ Scanning is started. ⇒ When scanning is complete, the Quick Menu appears. 3. Change - Fujitsu S1500M | Operator's Guide - Page 114
About Actions (for Windows Users) 4. Click the [Scan to Picture Folder] icon. ⇒ The [Scan to Picture Folder] dialog box appears. When you have cleared the [Show preview] check box in Step 3., the scanned image data is saved in the pictures folder. 114 - Fujitsu S1500M | Operator's Guide - Page 115
folder. • When the Quick Menu is displayed, the ScanSnap does not perform a scan even if you press the [Scan] button, unless the [Scan to Picture Folder] dialog box is closed. Close the [Scan to Picture Folder] dialog box before scanning another document. • Do not move, delete, or rename the - Fujitsu S1500M | Operator's Guide - Page 116
The ScanSnap setup dialog box appears. 2. In the [Application] drop-down list on the [Application] tab, select [Scan to Picture Folder]. Finishing the procedure above, you can save desired settings as profiles. The profiles can be selected in the Left-Click Menu from the next time you scan documents - Fujitsu S1500M | Operator's Guide - Page 117
the [OK] button to close the ScanSnap setup dialog box. Even if the [Scan] button on the ScanSnap is pressed, the ScanSnap setup dialog box closes. 5. Load the document into the ScanSnap. For details, refer to "Paper Sizes of Documents to Be Scanned" (page 26) and "Loading Documents" (page 28). 117 - Fujitsu S1500M | Operator's Guide - Page 118
to Picture Folder] dialog box is displayed, scanning cannot be per- formed with the ScanSnap. Close the [Scan to Picture Folder] dialog box before scanning another document. • Do not move, delete, or rename the scanned image data in other applications when the [Scan to Picture Folder] dialog box is - Fujitsu S1500M | Operator's Guide - Page 119
) ■ Converting into Word/Excel/PowerPoint Documents This section describes how to convert the scanned image data into Word/Excel/PowerPoint files through ABBYY FineReader for ScanSnap, which is supplied with the ScanSnap. 㪘 㪙 㪚 • ABBYY FineReader for ScanSnap must be installed in your - Fujitsu S1500M | Operator's Guide - Page 120
by using simple page layout with one or two columns - Documents not suitable for conversion Documents created by using complex page layout comprised of diagrams, tables, and letters, such as a brochure, magazine, and newspaper Scan to Excel - Documents suitable for conversion Simple tables in which - Fujitsu S1500M | Operator's Guide - Page 121
) You can change the scanning settings applied during conversion to Word, Excel, or PowerPoint documents in the ABBYY FineReader for ScanSnap setup dialog box. Select the [Start] menu → [All Programs] → [ABBYY FineReader for ScanSnap(TM) 4.0] → [ABBYY FineReader for ScanSnap(TM) 4.0] to show the - Fujitsu S1500M | Operator's Guide - Page 122
, refer to "Paper Sizes of Documents to Be Scanned" (page 26) and "Loading Documents" (page 28). 2. Press the [Scan] button on the ScanSnap. ⇒ Scanning is started. ⇒ When scanning is complete, the Quick Menu appears. 3. Click the [Scan to Word], [Scan to Excel], or [Scan to PowerPoint(R)] icon. When - Fujitsu S1500M | Operator's Guide - Page 123
recommended to select [Better (Color/Gray: 200 dpi, B&W: 400 dpi)] or higher reso- lution for [Image quality] in the [Scanning] tab on the ScanSnap setup dialog box. • Word documents are saved in RTF format (.rtf), Excel documents, in XLS format (.xls), and PowerPoint documents, in PPT format (.ppt - Fujitsu S1500M | Operator's Guide - Page 124
Menu. ⇒ The ScanSnap setup dialog box appears. 2. In the [Application] drop-down list on the [Application] tab, select [ABBYY Scan to Word], [ABBYY Scan to Excel], or [ABBYY Scan to PowerPoint(R)]. • The profiles can also be set by selecting [Scan to Word], [Scan to Excel], or [Scan to PowerPoint - Fujitsu S1500M | Operator's Guide - Page 125
recommended to select [Better (Color/Gray: 200 dpi, B&W: 400 dpi)] or higher reso- lution for [Image quality] in the [Scanning] tab on the ScanSnap setup dialog box. • Word documents are saved in RTF format (.rtf), Excel documents, in XLS format (.xls), and PowerPoint documents, in PPT format (.ppt - Fujitsu S1500M | Operator's Guide - Page 126
About Actions (for Windows Users) This section describes how to use scanned image data of business cards in CardMinder. • When interacting with CardMinder, blank pages are not removed, regardless of the [Allow automatic blank page removal] setting. • Up to 500 sheets (1,000 pages), including - Fujitsu S1500M | Operator's Guide - Page 127
the two-sided business card faces the ADF paper chute (cover). • To scan multiple business cards, load business cards in a pile. • Move the side guides so that there is no gap between the business cards edge and the side guide on both sides. 2. Press the [Scan] button on the ScanSnap. ⇒ Scanning is - Fujitsu S1500M | Operator's Guide - Page 128
icon. ⇒ CardMinder starts up. • When the Quick Menu is displayed, scanning cannot be performed with the ScanSnap. Complete the interaction with CardMinder before scanning another document. • Do not move, delete, or rename the scanned image data in other applications while the Quick Menu is displayed - Fujitsu S1500M | Operator's Guide - Page 129
About Actions (for Windows Users) 4. Check the scanned card image and text recognition result. For details about the functions of and how to use CardMinder, refer to CardMinder User's Guide and CardMinder Help. 129 - Fujitsu S1500M | Operator's Guide - Page 130
Button Settings] from the Right-Click Menu. ⇒ The ScanSnap setup dialog box appears. 2. In the [Application] drop-down list on the [Application] tab, select [Card- Minder]. • It is recommended to select [Auto] or [Best] for [Image quality] in the [Scanning] tab. • The profiles can also be set by - Fujitsu S1500M | Operator's Guide - Page 131
the two-sided business card faces the ADF paper chute (cover). • To scan multiple business cards, load business cards in a pile. • Move the side guides so that there is no gap between the business cards edge and the side guide on both sides. 5. Press the [Scan] button on the ScanSnap. ⇒ Scanning is - Fujitsu S1500M | Operator's Guide - Page 132
About Actions (for Windows Users) 6. Check the scanned card image and text recognition result. For details about the functions of and how to use CardMinder, refer to CardMinder User's Guide and CardMinder Help. 132 - Fujitsu S1500M | Operator's Guide - Page 133
■ Saving Data in SharePoint About Actions (for Windows Users) You can easily save the scanned image data in SharePoint and Office Live. 133 - Fujitsu S1500M | Operator's Guide - Page 134
) Using the Quick Menu 1. Load the document into the ScanSnap. For details, refer to "Paper Sizes of Documents to Be Scanned" (page 26) and "Loading Documents" (page 28). 2. Press the [Scan] button on the ScanSnap. ⇒ Scanning is started. ⇒ When scanning is complete, the Quick Menu appears. 3. Change - Fujitsu S1500M | Operator's Guide - Page 135
SharePoint starts up. • When the Quick Menu is displayed, scanning cannot be performed with the ScanSnap. Complete the interaction with Scan to Microsoft SharePoint before scanning another document. • Do not move, delete, or rename the scanned image data in other applications while the Quick Menu is - Fujitsu S1500M | Operator's Guide - Page 136
. 2. Enter necessary information such as a title in the Index pane of Scan to Microsoft SharePoint, and click the [Accept] button. ⇒ The scanned image data is saved in the specified folder. • Connecting to Office Live Support for Office Live varies according to country. For more details, refer to - Fujitsu S1500M | Operator's Guide - Page 137
Live logon dialog box, and then click the [Sign In] button. ⇒ After the ScanSnap is connected with Office Live, the [Scan to Microsoft SharePoint] dialog box appears. 3. Select a folder in which you want to save the scanned image data. 4. Enter necessary information such as a title in the Index pane - Fujitsu S1500M | Operator's Guide - Page 138
ScanSnap setup dialog box appears. 2. In the [Application] drop-down list on the [Application] tab, select [Scan to SharePoint]. Finishing the procedure above, you can save desired settings as profiles. The profiles can be selected in the Left-Click Menu from the next time you scan documents. For - Fujitsu S1500M | Operator's Guide - Page 139
if the [Scan] button on the ScanSnap is pressed, the ScanSnap setup dialog box closes. 5. Load the document into the ScanSnap. For details, refer to "Paper Sizes of Documents to Be Scanned" (page 26) and "Loading Documents" (page 28). 6. Press the [Scan] button on the ScanSnap. ⇒ Scanning is started - Fujitsu S1500M | Operator's Guide - Page 140
SharePoint. Once you save a SharePoint site, the ScanSnap is automatically connected with Scan to Microsoft SharePoint from the next startup. For details about Scan to Microsoft SharePoint, refer to the Scan to Microsoft SharePoint User Guide. • Connecting to SharePoint 1. Select a folder in which - Fujitsu S1500M | Operator's Guide - Page 141
About Actions (for Windows Users) • Connecting to Office Live Support for Office Live varies according to country. For , and then click the [Sign In] button. ⇒After the ScanSnap is connected with Office Live, the [Scan to Microsoft SharePoint] dialog box appears. 3. Select a folder in which you want - Fujitsu S1500M | Operator's Guide - Page 142
About Actions (for Windows Users) 4. Enter necessary information such as a title in the Index pane, and click the [Accept] button. ⇒The scanned image data is saved in the specified folder. For details, refer to the Scan to Microsoft SharePoint User Guide. 142 - Fujitsu S1500M | Operator's Guide - Page 143
). • Rack2-Filer trial version supplied with the ScanSnap or Rack2-Filer (V5.0 recommended) (bundled or sold separately) is required to use this function. Rack2-Filer is a software program that converts paper documents and electronic documents into PDF files and manages them in a computer. You - Fujitsu S1500M | Operator's Guide - Page 144
) Using the Quick Menu 1. Load the document into the ScanSnap. For details, refer to "Paper Sizes of Documents to Be Scanned" (page 26) and "Loading Documents" (page 28). 2. Press the [Scan] button on the ScanSnap. ⇒ Scanning is started. ⇒ When scanning is complete, the Quick Menu appears. 3. Change - Fujitsu S1500M | Operator's Guide - Page 145
out and cannot be selected. • When the Quick Menu is displayed, scanning cannot be performed with the ScanSnap. Complete the interaction with Rack2-Filer before scanning another document. • Do not move, delete, or rename the scanned image data in other applications while the Quick Menu is displayed - Fujitsu S1500M | Operator's Guide - Page 146
Users) Without using the Quick Menu 1. Select [Scan Button Settings] from the Right-Click Menu. ⇒ The ScanSnap setup dialog box appears. 2. In the [Application] drop-down list on the [Application] tab, select [Rack2-Filer]. • You can set the profile by selecting Rack2-Filer from the [Profile] drop - Fujitsu S1500M | Operator's Guide - Page 147
. 2. Change settings. In this dialog box, specify the destination to save the scanned image data. For details about the [ScanSnap -> Rack2] dialog box, refer to Rack2-Filer Help. Click the [Help] button in the [ScanSnap -> Rack2] dialog box to display Rack2-Filer Help. 3. Click the [OK] button - Fujitsu S1500M | Operator's Guide - Page 148
details, refer to "Paper Sizes of Documents to Be Scanned" (page 26) and "Loading Documents" (page 28). 6. Press the [Scan] button on the ScanSnap. ⇒ Scanning is started. ⇒ When scanning is complete, Rack2-Filer starts up, and the PDF file created by the ScanSnap is saved to Rack2-Filer according to - Fujitsu S1500M | Operator's Guide - Page 149
in Various Ways This section describes a variety of ways you can use the ScanSnap. ■ Scanning Only One Side of a Document By default, pressing the [Scan] button starts scanning in Duplex mode. When you wish to scan in Simplex mode, change the settings by following the procedure below. 1. Select - Fujitsu S1500M | Operator's Guide - Page 150
to "Paper Sizes of Documents to Be Scanned" (page 26) and "Loading Documents" (page 28). 5. Press the [Scan] button on the ScanSnap. If you select [Simplex scan] from the Right-Click Menu, even if [Duplex Scan (Doublesided)] is set in [Scanning side] on the [Scanning] tab, the scan will be performed - Fujitsu S1500M | Operator's Guide - Page 151
by following the procedure below. 1. Select [Scan Button Settings] from the Right-Click Menu. ⇒ The ScanSnap setup dialog box appears. 2. In the [Color mode] drop-down list on the [Scanning] tab, select [Gray] or [B&W]. To scan color documents in color, select [Color]. 3. Click the [OK] button to - Fujitsu S1500M | Operator's Guide - Page 152
in Various Ways (for Windows Users) 4. Load the document into the ScanSnap. For details, refer to "Paper Sizes of Documents to Be Scanned" (page 26) and "Loading Documents" (page 28). 5. Press the [Scan] button on the ScanSnap. ⇒ Scanned image data is output in gray or in black-and-white. 152 - Fujitsu S1500M | Operator's Guide - Page 153
Ways (for Windows Users) ■ Scanning Color Documents in High Compression Mode The ScanSnap can save image data of scanned color documents in high compression mode. You can scan an large quantity of documents in high compression mode and save them as a space-saving PDF file. To scan color documents in - Fujitsu S1500M | Operator's Guide - Page 154
Various Ways (for Windows Users) 4. Load the document into the ScanSnap. For details, refer to "Paper Sizes of Documents to Be Scanned" (page 26) and "Loading Documents" (page 28). 5. Press the [Scan] button on the ScanSnap. ⇒ The scanned document is output as highly compressed color image data. 154 - Fujitsu S1500M | Operator's Guide - Page 155
of only one color (including black) and without any patterns, lines, or charac- ters When you scan such documents, clear the [Allow automatic blank page removal] check box. When discarding the scanned image data, check the image data for pages accidentally removed. • When the ScanSnap is used with - Fujitsu S1500M | Operator's Guide - Page 156
4. Click the [OK] button to close all the open dialog boxes. 5. Load the document into the ScanSnap. For details, refer to "Paper Sizes of Documents to Be Scanned" (page 26) and "Loading Documents" (page 28). 6. Press the [Scan] button on the ScanSnap. ⇒ Image data without blank pages is output. 156 - Fujitsu S1500M | Operator's Guide - Page 157
Carrier Sheet, skewed character strings are not corrected. For documents skewed while being scanned, the skew is always corrected regardless of whether [Correct skewed character strings automatically] is enabled or not. 1. Select [Scan Button Settings] from the Right-Click Menu. ⇒ The ScanSnap setup - Fujitsu S1500M | Operator's Guide - Page 158
to close all the open dialog boxes. 5. Load the document into the ScanSnap. For details, refer to "Paper Sizes of Documents to Be Scanned" (page 26) and "Loading Documents" (page 28). 6. Press the [Scan] button on the ScanSnap. ⇒ All image data are output with skewed character strings corrected - Fujitsu S1500M | Operator's Guide - Page 159
page orientations, even if the paper sizes are the same. For the case of double-sided documents in calendar style, the reverse sides are printed upside down. The ScanSnap is able to automatically correct the orientation of scanned images for such sets of pages. To correct the orientation of - Fujitsu S1500M | Operator's Guide - Page 160
the [OK] button to close all the open dialog boxes. 5. Load the document into the ScanSnap. For details, refer to "Paper Sizes of Documents to Be Scanned" (page 26) and "Loading Documents" (page 28). 6. Press the [Scan] button on the ScanSnap. ⇒ All image data are output in the same orientation. 160 - Fujitsu S1500M | Operator's Guide - Page 161
Widths or Sizes at the Same Time The ScanSnap is able to scan documents of different widths or sizes in one batch. To scan documents of different widths or sizes in one batch, change the settings by following the procedure below. 1. Select [Scan Button Settings] from the Right-Click Menu. ⇒ The - Fujitsu S1500M | Operator's Guide - Page 162
time with [Check Length] selected, results in a scanning failure due to a multifeed error detection. 4. Click the [OK] button to close the ScanSnap setup dialog box. 5. Load the document into the ScanSnap. 1. Align the edge of all documents. 2. Place the document on the center of the ADF paper chute - Fujitsu S1500M | Operator's Guide - Page 163
Ways (for Windows Users) • Place all documents under the pick roller (center). Documents that are not under the pick roller cannot be fed. Width of the pick roller • Adjust the side guides to the widest document to be scanned. • For smaller documents which cannot contact the side guide, carefully - Fujitsu S1500M | Operator's Guide - Page 164
in Various Ways (for Windows Users) ■ Scanning Documents Larger Than A4/Letter Size The ScanSnap is able to scan documents larger than A4/Letter size, such as A3, Double Letter, and B4 sizes, using the Carrier Sheet. Fold the document in half, scan it in Duplex mode, and then merge both front - Fujitsu S1500M | Operator's Guide - Page 165
Various Ways (for Windows Users) 3. Select [Create facing pages in one image] in the [Mode] drop-down list, and then click the [OK] button. For details about Carrier Sheet settings, refer to the ScanSnap Manager Help. 4. Select [Automatic detection] in the [Paper size] drop-down list on the [Paper - Fujitsu S1500M | Operator's Guide - Page 166
box. 7. Load the document into the ScanSnap. 1. Fold the document in half so that the side to be scanned is on the external side. Fold the sheet tightly and smooth out the crease. Otherwise, the sheet may be skewed during scanning. 2. Open the Carrier Sheet and insert the document. Align the fold - Fujitsu S1500M | Operator's Guide - Page 167
up. − Adjust the side guides to the width of the Carrier Sheet to avoid skewing. − When scanning the Carrier Sheet mixed with regular size and shape documents, select an option other than [Check Length] in the [Multifeed Detection] drop-down list on the [Paper] tab in the ScanSnap setup dialog box - Fujitsu S1500M | Operator's Guide - Page 168
get scratches on a photograph, or want to scan an irregular-shaped document such as a clipping of an article that is difficult to scan as it is, you can use the Carrier Sheet to scan with the ScanSnap. To scan photographs and irregular-shaped documents, change the settings by following the procedure - Fujitsu S1500M | Operator's Guide - Page 169
front and back images separately] in the [Mode] drop- down list, and then click the [OK] button. For details about Carrier Sheet settings, refer to the ScanSnap Manager Help. 4. Select [Automatic detection] in the [Paper size] drop-down list on the [Paper] tab. 5. Click the [OK] button to close - Fujitsu S1500M | Operator's Guide - Page 170
up. − Adjust the side guides to the width of the Carrier Sheet to avoid skewing. − When scanning the Carrier Sheet mixed with regular size and shape documents, select an option other than [Check Length] in the [Multifeed Detection] drop-down list on the [Paper] tab in the ScanSnap setup dialog box - Fujitsu S1500M | Operator's Guide - Page 171
. • When [Automatic detection] is selected from the [Output image size] drop-down list on the [Carrier Sheet Settings] dialog box, the size of the produced image data may be smaller than the original, or parts may be lost. Example: When you scan the A5 size image printed at the center of an A4 size - Fujitsu S1500M | Operator's Guide - Page 172
-mm-long (34 inches) documents can be scanned. The following describes how to scan long pages. 1. Load the document into the ScanSnap. For details about document types that can be loaded, refer to "Paper Sizes of Documents to Be Scanned" (page 26). • Load only one document onto the ADF paper chute - Fujitsu S1500M | Operator's Guide - Page 173
in Various Ways (for Windows Users) 2. Press the [Scan] button on the ScanSnap until it blinks blue for 3 sec- onds or longer. ⇒ Scanning is started. If the first sheet scanned is scanned a long page, and scanning is continued, subsequent sheets will also be scanned as long pages. • When [Image - Fujitsu S1500M | Operator's Guide - Page 174
procedure below. 1. Select [Scan Button Settings] from the Right-Click Menu. ⇒ The ScanSnap setup dialog box appears. 2. Click the [Option] button on the [File option] tab. ⇒ The [PDF file format option] dialog box appears. Check that [PDF(*.pdf)] is selected in the [File format] drop-down list. 174 - Fujitsu S1500M | Operator's Guide - Page 175
in Various Ways (for Windows Users) 3. Select [Generate one PDF file per (n) page(s)] and enter a number. One PDF file is created every time the number of pages specified here have been scanned. In Duplex mode, two pages (front/back) are created per document sheet. It is recommended that you - Fujitsu S1500M | Operator's Guide - Page 176
a searchable PDF file. To create searchable PDF files, change the settings by following the procedure below. 1. Select [Scan Button Settings] from the Right-Click Menu. ⇒ The ScanSnap setup dialog box appears. 2. In the [File format] drop-down list on the [File option] tab, select [PDF (*.pdf)]. 176 - Fujitsu S1500M | Operator's Guide - Page 177
in Various Ways (for Windows Users) 3. Select the [Convert to Searchable PDF] check box. ⇒ The following message appears: the ScanSnap setup dialog box. 5. Load the document into the ScanSnap. For details, refer to "Paper Sizes of Documents to Be Scanned" (page 26) and "Loading Documents" (page - Fujitsu S1500M | Operator's Guide - Page 178
ScanSnap may fail to correctly text recognize the following types of documents (characters) as text. However, by changing [Color mode] and/or increasing [Image quality] for scanning, such documents may be successfully text-recognized. - Documents with handwritten characters - Documents scanned in - Fujitsu S1500M | Operator's Guide - Page 179
the PDF file ScanSnap + Scan Keyword Convert a character string in a marked section into text Scan Image The file can be searched for because a keyword has been set Mark black-and-white documents in the following way. • Any regular highlight pen can be used. The recommended highlight pen colors - Fujitsu S1500M | Operator's Guide - Page 180
mm or more (length) • For the following types of documents, marked sections cannot be recognized and set as key- words. - Color documents such as catalogues or pamphlets - Documents in which two or more colors are used for marking - Documents containing colors other than for marking (pens other than - Fujitsu S1500M | Operator's Guide - Page 181
in Various Ways (for Windows Users) To automatically set keywords to PDF files, change the settings by following the procedure below. 1. Select [Scan Button Settings] from the Right-Click Menu. ⇒ The ScanSnap setup dialog box appears. 2. In the [File format] drop-down list on the [File option - Fujitsu S1500M | Operator's Guide - Page 182
in Various Ways (for Windows Users) 3. Select the [Set the marked text as a keyword for the PDF file] check box. • Target document as a key- word for the PDF file. Example: When only a title of a document is marked, the marked character string is set as a keyword for the PDF file, and the PDF - Fujitsu S1500M | Operator's Guide - Page 183
box. 5. Load the document into the ScanSnap. For details, refer to "Paper Sizes of Documents to Be Scanned" (page 26) and "Loading Documents" (page 28). 6. Press the [Scan] button on the ScanSnap. ⇒ Scanning is started. Marked character strings are text-recognized and the PDF file with keywords is - Fujitsu S1500M | Operator's Guide - Page 184
to scanned documents. 1. Select [Scan Button Settings] from the Right-Click Menu. ⇒ The ScanSnap setup dialog box appears. 2. Click the [Option] button on the [File option] tab. ⇒The [PDF file format option] dialog box appears. Check that [PDF (*.pdf)] is selected in the [File format] drop-down list - Fujitsu S1500M | Operator's Guide - Page 185
Using the ScanSnap in Various Ways (for Windows Users) 3. Select the [Set a password for PDF file] check box. • To set a different password per scan Clear the [Use a fixed password] check box. ⇒You can set a different password per scan. 185 - Fujitsu S1500M | Operator's Guide - Page 186
in Various Ways (for Windows Users) • To use a preset password 1. Select the [Use a fixed password] check box. ⇒The same password is used for all PDF files. You do not have to type in a password every time a document is scanned. 2. Type in the same password in the [Password] and [Confirm] fields - Fujitsu S1500M | Operator's Guide - Page 187
in Various Ways (for Windows Users) 6. Press the [Scan] button on the ScanSnap. ⇒ Scanning is started. ⇒ When the [Use a If you click the [Cancel] button, the PDF file is saved without a password. ⇒ The scanned image data is saved as a password-protected PDF file. If you forget a password, there - Fujitsu S1500M | Operator's Guide - Page 188
Using the ScanSnap (for Mac OS Users) This chapter describes how to perform a scan with the ScanSnap, change or save scanning settings, and other various functions of the ScanSnap. ScanSnap Manager Icon and Operations 189 How to Perform a Scan 192 Setting the ScanSnap 203 About Actions 222 Using - Fujitsu S1500M | Operator's Guide - Page 189
icon appears auto- matically in the Dock when Mac OS starts. The icon also indicates whether ScanSnap Manager is successfully communicating with the ScanSnap or not. The appearance of the icon which you can use to start scanning, change scanning settings, and check the status of consumables. 189 - Fujitsu S1500M | Operator's Guide - Page 190
(for Mac OS Users) ■ ScanSnap Manager Menu This menu appears when you click and hold the [ScanSnap Manager] icon . Click and hold Item Function Duplex scan Simplex scan Settings Profile Profile Management Check consumable supplies Both the front and back of the document are scanned at the - Fujitsu S1500M | Operator's Guide - Page 191
Icon and Operations (for Mac OS Users) ■ [Profile] Menu This window appears when the [ScanSnap Manager] icon The currently saved profiles are shown as a list. is clicked. Click By selecting a profile on the [Profile] menu, you can switch to the previously saved scanning settings. When you are - Fujitsu S1500M | Operator's Guide - Page 192
How to Perform a Scan (for Mac OS Users) How to Perform a Scan This section describes how to perform a scan with the ScanSnap. ■ Preparation 1. Make sure that the power cable is connected to the ScanSnap properly. 2. Make sure that the ScanSnap is connected to your computer properly. You can turn - Fujitsu S1500M | Operator's Guide - Page 193
How to Perform a Scan (for Mac OS Users) 4. Open the ADF paper chute (cover) of the ScanSnap. ADF paper chute (cover) ⇒ The ScanSnap is turned on and the [ScanSnap Manager] icon changes from to . There may be a slight delay before the [ScanSnap Manager] icon changes to depending on the computer - Fujitsu S1500M | Operator's Guide - Page 194
[Accounts] → [My Account] → [Login Items ScanSnap Manager] to register ScanSnap Manager. 2. From the ScanSnap Manager menu, select [Settings]. ⇒ The ScanSnap setup window appears. 3. Select the [Use Quick Menu] checkbox. For details about scanning documents without using the Quick Menu, refer to - Fujitsu S1500M | Operator's Guide - Page 195
dpi) for image quality, and default for other settings. It is recommended to select this button when you wish to reduce the scanned file size. The settings are [Best] (Color/Gray: 300 dpi, B&W: 600 dpi) for image quality, and default for other settings. It is recommended to select this button when - Fujitsu S1500M | Operator's Guide - Page 196
How to Perform a Scan (for Mac OS Users) 8. Press the [Scan] button on the ScanSnap. ⇒ Scanning is started. • By default, the [Scan] button settings are set to [Duplex Scan (Double-sided)]. With ScanSnap Manager, you can switch the [Scan] button settings to [Simplex Scan (Single-sided)] mode. For - Fujitsu S1500M | Operator's Guide - Page 197
to Perform a Scan (for Mac OS Users) 9. From the Quick Menu, click an icon for the item to be performed. ⇒ The corresponding action of the selected item is performed. Item Scan to Folder Scan to E-mail Scan to Print Scan to Word (*1) Scan to Excel (*1) Cardiris (*2) iPhoto (*3) Description PDF or - Fujitsu S1500M | Operator's Guide - Page 198
How to Perform a Scan (for Mac OS Users) • Before scanning documents of printed or handwritten text, on the ScanSnap setup window, select the [Scanning] tab → the [Option] button → the [Setting for text only document] checkbox. For details on how to change scanning settings, refer to "Changing - Fujitsu S1500M | Operator's Guide - Page 199
How to Perform a Scan (for Mac OS Users) ■ Without Using the Quick Menu The scanning method described below is for the case when you are not using the Quick Menu. 1. Check for the [ScanSnap Manager] icon in the Dock as shown below. When the [ScanSnap Manager] icon is not displayed, from the Finder, - Fujitsu S1500M | Operator's Guide - Page 200
an action from the Quick Menu after documents are scanned. 4. Select a profile to be executed after scanning. Select a profile using either of the following: • [Profile] pop-up menu in the ScanSnap setup window • [Profile] menu 5. Load the document into the ScanSnap. For details about how to load - Fujitsu S1500M | Operator's Guide - Page 201
quality: Auto], [Color mode: Auto Color Detection], [Scanning side: Duplex Scan]. For details about how to change settings, refer to "Changing Scanning Settings" (page 203). • Before scanning documents of printed or handwritten text, on the ScanSnap setup win- dow, select the [Scanning] tab → the - Fujitsu S1500M | Operator's Guide - Page 202
Perform a Scan (for Mac OS Users) ■ Finishing ScanSnap Operation Exiting ScanSnap Manager From the ScanSnap Manager menu, select [Quit]. In most cases, ScanSnap Manager does not need to be exited. You can no longer use the ScanSnap after exiting ScanSnap Manager. To start up ScanSnap Manager, from - Fujitsu S1500M | Operator's Guide - Page 203
Setting the ScanSnap (for Mac OS Users) Setting the ScanSnap This section describes how to change and save scanning settings, automatically interact with applications, and about windows displayed during scanning. ■ Changing Scanning Settings To change scanning settings for the ScanSnap, use the - Fujitsu S1500M | Operator's Guide - Page 204
with the ScanSnap • [Save] tab − Folder in which scanned image data are saved − File name used for saving scanned image data • [Scanning] tab − Scan mode (Which image quality to scan with, color, gray or black-and-white, simplex or duplex, enable or disable [Setting for text only document], [Allow - Fujitsu S1500M | Operator's Guide - Page 205
Setting the ScanSnap (for Mac OS Users) • [Paper] tab − Size of a document to be scanned ([Paper size] and [Carrier Sheet Settings]) − Whether to detect multifeed • [Compression] tab − File size of scanned image data (compression rate) Settings for scanning vary depending on the scanning method For - Fujitsu S1500M | Operator's Guide - Page 206
can easily retrieve and use the saved [Profile] menu Once the frequently used scanning settings are saved as profiles you do not have to open the ScanSnap Manager window to change settings every time you scan documents. You can switch to an appropriate profile with simple point and click operations - Fujitsu S1500M | Operator's Guide - Page 207
Setting the ScanSnap (for Mac OS Users) Saving Profiles 1. From the ScanSnap Manager menu, select [Settings]. ⇒ The ScanSnap setup window appears. 2. Clear the [Use Quick Menu] checkbox. This function is not available when the [Use Quick Menu] checkbox is selected. 207 - Fujitsu S1500M | Operator's Guide - Page 208
Setting the ScanSnap (for Mac OS Users) 3. Change scanning setting on each tab on the ScanSnap setup window. For details about each tab, refer to ScanSnap Manager Help. 4. Select [Add Profile] from the [Profile] pop-up menu. ⇒ The [Add new profile] window appears. 208 - Fujitsu S1500M | Operator's Guide - Page 209
Setting the ScanSnap (for Mac OS Users) 5. Type in a profile name, and then click the [OK] button. ⇒ The new profile appears in the [Profile] pop-up menu. 209 - Fujitsu S1500M | Operator's Guide - Page 210
Setting the ScanSnap (for Mac OS Users) 6. Click the [Apply] button. ⇒ Now, you have finished saving a new from the [Profile] pop-up menu in the ScanSnap setup window or from the ScanSnap Manager menu. ⇒ The [ScanSnap Manager - Profile Management] window appears. 2. Drag the profile you want to move - Fujitsu S1500M | Operator's Guide - Page 211
Setting the ScanSnap (for Mac OS Users) Changing Settings for Saved Profiles 1. From the ScanSnap Manager menu, select [Settings]. ⇒ The ScanSnap setup window appears. 2. Clear the [Use Quick Menu] checkbox. This function is not available when the [Use Quick Menu] checkbox is selected. 211 - Fujitsu S1500M | Operator's Guide - Page 212
Setting the ScanSnap (for Mac OS Users) 3. Select the profile you want to change from the [Profile] pop-up menu. 4. Change scanning settings on each tab on the ScanSnap setup window. For details about each tab, refer to ScanSnap Manager Help. 5. When you finish changing the settings for the selected - Fujitsu S1500M | Operator's Guide - Page 213
Setting the ScanSnap (for Mac OS Users) Renaming Profiles 1. From the ScanSnap Manager menu, select [Settings]. ⇒ The ScanSnap setup window appears. 2. Clear the [Use Quick Menu] checkbox. This function is not available when the [Use Quick Menu] checkbox is selected. 213 - Fujitsu S1500M | Operator's Guide - Page 214
Setting the ScanSnap (for Mac OS Users) 3. Select [Profile Management] from the [Profile] pop-up menu. You can also select [Profile Management] from the ScanSnap Manager menu to open the [ScanSnap Manager - Profile Management] window. ⇒ The [ScanSnap Manager - Profile Management] window appears. - Fujitsu S1500M | Operator's Guide - Page 215
5. Type in a new name. Setting the ScanSnap (for Mac OS Users) ⇒ The selected profile is renamed. 6. Click the [ ] button in the upper left corner of the window or press the [esc] key to close the [ScanSnap Manager - Profile Management] window. 215 - Fujitsu S1500M | Operator's Guide - Page 216
Setting the ScanSnap (for Mac OS Users) Deleting Profiles 1. From the ScanSnap Manager menu, select [Settings]. ⇒ The ScanSnap setup window appears. 2. Clear the [Use Quick Menu] checkbox. This function is not available when the [Use Quick Menu] checkbox is selected. 216 - Fujitsu S1500M | Operator's Guide - Page 217
Setting the ScanSnap (for Mac OS Users) 3. Select [Profile Management] from the [Profile] pop-up menu. You can also select [Profile Management] from the ScanSnap Manager menu to open the [ScanSnap Manager - Profile Management] window. ⇒ The [ScanSnap Manager - Profile Management] window appears. 217 - Fujitsu S1500M | Operator's Guide - Page 218
ScanSnap (for Mac OS Users) 4. Select the profile you want to delete from the list, and then click the [ ] button. The [Standard] profile cannot be deleted. ⇒ The selected profile is deleted. 5. Click the [ ] button in the upper left corner of the window or press the [esc] key to close the [ScanSnap - Fujitsu S1500M | Operator's Guide - Page 219
interacts with Cardiris, in which the scanned card image is displayed. Even when the ScanSnap is in Quick Menu mode, the Quick Menu does not appear after scanning; the ScanSnap automatically interacts with the active application, in which the scanned document image is displayed. When the application - Fujitsu S1500M | Operator's Guide - Page 220
. After the image data of the document scanned last is saved, the [ScanSnap Manager - Image scanning and file saving] window automatically closes. Hiding the Scan Progress Status You can hide the [ScanSnap Manager - Image scanning and file saving] window. Perform this setting as follows. 1. From - Fujitsu S1500M | Operator's Guide - Page 221
Setting the ScanSnap (for Mac OS Users) 2. Clear the [Show the scan progress status (recommended)] checkbox. 3. Click the [ ] button in the upper left corner of the window or press the [esc] key to close the [ScanSnap Manager - Preferences] window. ⇒ The [ScanSnap Manager - Image scanning and file - Fujitsu S1500M | Operator's Guide - Page 222
About Actions (for Mac OS Users) The ScanSnap has frequently-used functions at the ready as Actions to help you make efficient use of your time at your office. Actions are helpful when: • you want to share the scanned document files with other members. ⇒ You can save the scanned image data directly - Fujitsu S1500M | Operator's Guide - Page 223
About Actions (for Mac OS Users) ■ Saving Data in the Specified Folder This section describes how to save the scanned image data in a shared folder. By using this action, you can save the scanned image data in a networked folder to share information among group members. In addition, all members are - Fujitsu S1500M | Operator's Guide - Page 224
About Actions (for Mac OS Users) Using the Quick Menu 1. Load the document into the ScanSnap. For details, refer to "Paper Sizes of Documents to Be Scanned" (page 26) and "Loading Documents" (page 28). 2. Press the [Scan] button on the ScanSnap. ⇒ Scanning is started. ⇒ When scanning is complete, - Fujitsu S1500M | Operator's Guide - Page 225
Mac OS Users) 4. Check the scanned image in the [Scan to Folder] window. You can also change file names and destination folders and specify whether to state a path to a destination folder in an e-mail message to notify other members. For details about the [Scan to Folder] window, refer to ScanSnap - Fujitsu S1500M | Operator's Guide - Page 226
the Quick Menu is displayed, the ScanSnap does not perform a scan even if you press the [Scan] button, unless the [Scan to Folder] window is closed. Close the [Scan to Folder] window before scanning another document. • Do not move, delete, or rename the scanned image data in other applications after - Fujitsu S1500M | Operator's Guide - Page 227
About Actions (for Mac OS Users) Without using the Quick Menu 1. From the ScanSnap Manager menu, select [Settings]. ⇒ The ScanSnap setup window appears. 2. In the [Application] pop-up menu on the [Application] tab, select [Scan to Folder]. • The profiles can also be set by selecting [Scan to Folder] - Fujitsu S1500M | Operator's Guide - Page 228
About Actions (for Mac OS Users) 4. Click the [ ] button in the upper left corner of the window or press the [esc] key to close the ScanSnap setup window. Even if the [Scan] button on the ScanSnap is pressed, the ScanSnap setup window closes. 5. Load the document into the ScanSnap. For details, - Fujitsu S1500M | Operator's Guide - Page 229
with the path to the destination folder stated. • When the [Scan to Folder] window is displayed, scanning cannot be performed with the ScanSnap. Close the [Scan to Folder] window before scanning another document. • Do not move, delete, or rename the scanned image data in other applications when the - Fujitsu S1500M | Operator's Guide - Page 230
■ Sending Files by E-Mail About Actions (for Mac OS Users) This section describes how to send scanned image data by e-mail. The e-mail program used for this action is the application specified in [Default email reader] in the [General] pane, which is - Fujitsu S1500M | Operator's Guide - Page 231
(for Mac OS Users) Using the Quick Menu 1. Load the document into the ScanSnap. For details, refer to "Paper Sizes of Documents to Be Scanned" (page 26) and "Loading Documents" (page 28). Up to ten files can be sent by e-mail. Scanning multiple sheets of documents with the scanning settings shown - Fujitsu S1500M | Operator's Guide - Page 232
] icon. About Actions (for Mac OS Users) ⇒ The [Scan to E-mail] window appears. When you have cleared the [Show preview] checkbox in Step 3., an e-mail program starts, and the files are attached to an e-mail message. 5. Check the scanned image on the [Scan to E-mail] window. You can also change - Fujitsu S1500M | Operator's Guide - Page 233
the Quick Menu is displayed, the ScanSnap does not perform a scan even if you press the [Scan] button, unless the [Scan to E-mail] window is closed. Close the [Scan to E-mail] window before scanning another document. • Do not move, delete, or rename the scanned image data in other applications after - Fujitsu S1500M | Operator's Guide - Page 234
About Actions (for Mac OS Users) Without using the Quick Menu 1. From the ScanSnap Manager menu, select [Settings]. ⇒ The ScanSnap setup window appears. 2. In the [Application] pop-up menu on the [Application] tab, select [Scan to E-mail]. • The profiles can also be set by selecting [Scan to E-mail] - Fujitsu S1500M | Operator's Guide - Page 235
(for Mac OS Users) 3. Change settings for the [Scan to E-mail] action (If you do not want to change settings, go to Step 4.). 1. Click the [Application Setting] button. ⇒The [Scan to E-mail - Options] window appears. 2. Change settings. For details about the [Scan to E-mail - Options] window, refer - Fujitsu S1500M | Operator's Guide - Page 236
About Actions (for Mac OS Users) 6. Load the document into the ScanSnap. For details, refer to "Paper Sizes of Documents to Be Scanned" (page 26) and "Loading Documents" (page 28). Up to ten files can be sent by e-mail. Scanning multiple sheets of documents with the scanning settings shown below - Fujitsu S1500M | Operator's Guide - Page 237
sage. • When the [Scan to E-mail] window is displayed, scanning cannot be performed with the ScanSnap. Close the [Scan to E-mail] window before scanning another document. • Do not move, delete, or rename the scanned image data in other applications when the [Scan to E-mail] window is displayed. 237 - Fujitsu S1500M | Operator's Guide - Page 238
section describes how to print scanned image data with a printer. By printing scanned image data directly from the ScanSnap, you can use the ScanSnap as a copy machine. • By default, a printer that is set as [Default Printer] in the Mac OS is used. After a document is scanned, you can change the - Fujitsu S1500M | Operator's Guide - Page 239
About Actions (for Mac OS Users) Using the Quick Menu 1. Load the document into the ScanSnap. For details, refer to "Paper Sizes of Documents to Be Scanned" (page 26) and "Loading Documents" (page 28). 2. Press the [Scan] button on the ScanSnap. ⇒ Scanning is started. ⇒ When scanning is complete, - Fujitsu S1500M | Operator's Guide - Page 240
• When the Quick Menu is displayed, the ScanSnap does not perform a scan even if you press the [Scan] button, unless the [Print] window is closed. Close the [Print] window before scanning another document. • Do not move, delete, or rename the scanned image data in other applications after the Quick - Fujitsu S1500M | Operator's Guide - Page 241
About Actions (for Mac OS Users) Without using the Quick Menu 1. From the ScanSnap Manager menu, select [Settings]. ⇒ The ScanSnap setup window appears. 2. In the [Application] pop-up menu on the [Application] tab, select [Scan to Print]. • The profiles can also be set by selecting [Scan to Print] - Fujitsu S1500M | Operator's Guide - Page 242
(for Mac OS Users) 3. Change settings for the [Scan to Print] action (If you do not want to change settings, go to Step 4.). 1. Click the [Application Setting] button. ⇒The [Scan to Print - Options] window appears. 2. Change settings. For details about the [Scan to Print - Options] window, refer - Fujitsu S1500M | Operator's Guide - Page 243
. 9. Click the [Print] button. ⇒ Printing is performed. • When the [Print] window is displayed, scanning cannot be performed with the Scan- Snap. Close the [Print] window before scanning another document. • Do not move, delete, or rename the scanned image data in other applications when the [Print - Fujitsu S1500M | Operator's Guide - Page 244
files cannot be viewed. To view and check converted documents on your computer, install these software. • ABBYY FineReader for ScanSnap can be used with the following versions of Word and Excel. - Word: 2004 / 2008 - Excel: 2004 / 2008 • Do not scan Word/Excel files while you are working on Word or - Fujitsu S1500M | Operator's Guide - Page 245
by using simple page layout with one or two columns - Documents not suitable for conversion Documents created by using complex page layout comprised of diagrams, tables, and letters, such as a brochure, magazine, and newspaper Scan to Excel - Documents suitable for conversion Simple tables in which - Fujitsu S1500M | Operator's Guide - Page 246
About Actions (for Mac OS Users) You can change the scanning settings applied during conversion to Word or Excel documents in the ABBYY FineReader for ScanSnap setup window. Select the [Applications] → [ABBYY FineReader for ScanSnap 4.0] → [FineReader for ScanSnap Preferences]. Then, on the menu bar - Fujitsu S1500M | Operator's Guide - Page 247
About Actions (for Mac OS Users) Using the Quick Menu 1. Load the document into the ScanSnap. For details, refer to "Paper Sizes of Documents to Be Scanned" (page 26) and "Loading Documents" (page 28). 2. Press the [Scan] button on the ScanSnap. ⇒ Scanning is started. ⇒ When scanning is complete, - Fujitsu S1500M | Operator's Guide - Page 248
(for Mac OS Users) Without using the Quick Menu 1. From the ScanSnap Manager menu, select [Settings]. ⇒ The ScanSnap setup window appears. 2. In the [Application] pop-up menu on the [Application] tab, select [Scan to Word] or [Scan to Excel]. • The profiles can also be set by selecting [Scan to - Fujitsu S1500M | Operator's Guide - Page 249
About Actions (for Mac OS Users) 4. Click the [ ] button in the upper left corner of the window or press the [esc] key to close the ScanSnap setup window. Even if the [Scan] button on the ScanSnap is pressed, the ScanSnap setup window closes. 5. Load the document into the ScanSnap. For details, - Fujitsu S1500M | Operator's Guide - Page 250
■ Scanning Business Cards About Actions (for Mac OS Users) This section describes how to use scanned image data of business cards in Cardiris. 250 - Fujitsu S1500M | Operator's Guide - Page 251
(for Mac OS Users) Using the Quick Menu 1. Load the business card into the ScanSnap. • Load the business card so that the front side of the two-sided business card faces the ADF paper chute (cover). • To scan multiple business cards, load business cards in a pile. • Move the side guides so that - Fujitsu S1500M | Operator's Guide - Page 252
Mac OS Users) ⇒ The Cardiris window appears. • When the Quick Menu is displayed, scanning cannot be performed with the ScanSnap. Complete the interaction with Cardiris before scanning another document. • Do not move, delete, or rename the scanned -right. A list of already scanned business cards is - Fujitsu S1500M | Operator's Guide - Page 253
appears. 2. In the [Application] pop-up menu on the [Application] tab, select [Cardi- ris]. • On the ScanSnap setup window, it is recommended to select [Auto] or [Best] for [Image quality] in the [Scanning] tab. • The profiles can also be set by selecting [Cardiris] from the [Profile] pop-up menu or - Fujitsu S1500M | Operator's Guide - Page 254
the two-sided business card faces the ADF paper chute (cover). • To scan multiple business cards, load business cards in a pile. • Move the side guides so that there is no gap between the business cards edge and the side guide on both sides. 6. Press the [Scan] button on the ScanSnap. ⇒ Scanning is - Fujitsu S1500M | Operator's Guide - Page 255
current card image is displayed on the top-right. A list of already scanned business cards is displayed in the card toolbar. The recognition result is displayed under the card image. Do not exit Cardiris while setup or message windows are open. • To recognize a business card of a different language - Fujitsu S1500M | Operator's Guide - Page 256
About Actions (for Mac OS Users) Using Cardiris and Address Book To register the recognized characters of a scanned business cards in the Address Book, perform the following procedure. Do not exit Cardiris while setup or message windows are open. 1. Click the [Format] button or select [Settings] → [ - Fujitsu S1500M | Operator's Guide - Page 257
About Actions (for Mac OS Users) 4. Click the [Send] button or select [Process] → [Send] on the menu bar. ⇒ The Address Book window appears, and the recognized characters of all scanned business cards in the card toolbar are registered in the Address Book. 5. On the menu bar, select [Cardiris] → [ - Fujitsu S1500M | Operator's Guide - Page 258
■ Saving Data in iPhoto About Actions (for Mac OS Users) This section describes how to save scanned image data in iPhoto. 258 - Fujitsu S1500M | Operator's Guide - Page 259
About Actions (for Mac OS Users) Using the Quick Menu 1. Load the document into the ScanSnap. For details, refer to "Paper Sizes of Documents to Be Scanned" (page 26) and "Loading Documents" (page 28). 2. Press the [Scan] button on the ScanSnap. ⇒ Scanning is started. ⇒ When scanning is complete, - Fujitsu S1500M | Operator's Guide - Page 260
4. Check the scanned image data. About Actions (for Mac OS Users) 260 - Fujitsu S1500M | Operator's Guide - Page 261
for Mac OS Users) Without using the Quick Menu 1. From the ScanSnap Manager menu, select [Settings]. ⇒ The ScanSnap setup window scan documents. For details about how to save scanning settings, refer to "Saving Scanning Settings" (page 206). 3. Click the [Apply] button in the ScanSnap setup window - Fujitsu S1500M | Operator's Guide - Page 262
About Actions (for Mac OS Users) 4. Click the [ ] button in the upper left corner of the window or press the [esc] key to close the ScanSnap setup window. Even if the [Scan] button on the ScanSnap is pressed, the ScanSnap setup window closes. 5. Load the document into the ScanSnap. For details, - Fujitsu S1500M | Operator's Guide - Page 263
in Various Ways (for Mac OS Users) Using the ScanSnap in Various Ways This section describes a variety of ways you can use the ScanSnap. ■ Scanning Only One Side of a Document By default, pressing the [Scan] button starts scanning in Duplex mode. When you wish to scan in Simplex mode, change - Fujitsu S1500M | Operator's Guide - Page 264
(for Mac OS Users) 3. Click the [Apply] button in the ScanSnap setup window. 4. Click the [ ] button in the upper left corner of the window or press the [esc] key to close the ScanSnap setup window. 5. Load the document into the ScanSnap. For details, refer to "Paper Sizes of Documents to Be Scanned - Fujitsu S1500M | Operator's Guide - Page 265
in Various Ways (for Mac OS Users) ■ Scanning Color Documents in Black and White or Gray Mode By default, the ScanSnap automatically recognizes whether scanned documents are color, gray or black-and-white, and outputs color documents in color mode, gray documents in gray mode, and black-and-white - Fujitsu S1500M | Operator's Guide - Page 266
(for Mac OS Users) 3. Click the [Apply] button in the ScanSnap setup window. 4. Click the [ ] button in the upper left corner of the window or press the [esc] key to close the ScanSnap setup window. 5. Load the document into the ScanSnap. For details, refer to "Paper Sizes of Documents to Be Scanned - Fujitsu S1500M | Operator's Guide - Page 267
in Various Ways (for Mac OS Users) ■ Removing Blank Pages from the Scanned Image Data The ScanSnap is able to recognize and remove blank pages automatically from the scanned image data. When you scan documents in Duplex mode, both sides of the documents are scanned regardless if the back is printed - Fujitsu S1500M | Operator's Guide - Page 268
or press the [esc] key to close the ScanSnap setup window. 7. Load the document into the ScanSnap. For details, refer to "Paper Sizes of Documents to Be Scanned" (page 26) and "Loading Documents" (page 28). 8. Press the [Scan] button on the ScanSnap. ⇒ Image data without blank pages are output. 268 - Fujitsu S1500M | Operator's Guide - Page 269
] checkbox. • When scanning with the Carrier Sheet, skewed character strings are not corrected. For documents skewed while being scanned, the skew is always corrected regardless of whether [Correct skewed character strings automatically] is enabled or not. 1. From the ScanSnap Manager menu, select - Fujitsu S1500M | Operator's Guide - Page 270
the [Apply] button in the ScanSnap setup window. 6. Click the [ ] button in the upper left corner of the window or press the [esc] key to close the ScanSnap setup window. 7. Load the document into the ScanSnap. For details, refer to "Paper Sizes of Documents to Be Scanned" (page 26) and "Loading - Fujitsu S1500M | Operator's Guide - Page 271
Using the ScanSnap in Various Ways (for Mac OS Users) 8. Press the [Scan] button on the ScanSnap. ⇒ All image data are output with skewed character strings corrected. 271 - Fujitsu S1500M | Operator's Guide - Page 272
Using the ScanSnap in Various Ways (for Mac OS Users) ■ Correcting the Orientation of Scanned Images In an office environment, it is often the case that a single batch contains documents of different page orientations, even if the paper sizes are the same. For the case of double-sided documents in - Fujitsu S1500M | Operator's Guide - Page 273
the [Apply] button in the ScanSnap setup window. 6. Click the [ ] button in the upper left corner of the window or press the [esc] key to close the ScanSnap setup window. 7. Load the document into the ScanSnap. For details, refer to "Paper Sizes of Documents to Be Scanned" (page 26) and "Loading - Fujitsu S1500M | Operator's Guide - Page 274
Using the ScanSnap in Various Ways (for Mac OS Users) 8. Press the [Scan] button on the ScanSnap. ⇒ All image data are output in the same orientation. 274 - Fujitsu S1500M | Operator's Guide - Page 275
in Various Ways (for Mac OS Users) ■ Scanning Documents of Differing Widths or Sizes at the Same Time The ScanSnap is able to scan documents of different widths or sizes in one batch. To scan documents of different widths or sizes in one batch, change the settings by following the procedure below - Fujitsu S1500M | Operator's Guide - Page 276
Using the ScanSnap in Various Ways (for Mac OS Users) 3. Select a setting other than [Check Length] in [Multifeed Detection]. Scanning documents of different widths or sizes at the same time with [Check Length] selected, results in a scanning failure due to a multifeed error detection. 4. Click the - Fujitsu S1500M | Operator's Guide - Page 277
ScanSnap in Various Ways (for Mac OS Users) 2. Place the document on the center of the ADF paper chute (cover). • Place all documents under the pick roller (center). Documents that are not under the pick roller cannot be fed. Width of the pick roller • Adjust the side guides to the widest document - Fujitsu S1500M | Operator's Guide - Page 278
Using the ScanSnap in Various Ways (for Mac OS Users) 7. Press the [Scan] button on the ScanSnap. ⇒ The size of all output image data conforms to the respective documents. If a document is scanned at an angle, an image may be output that does not match the document size. 278 - Fujitsu S1500M | Operator's Guide - Page 279
in Various Ways (for Mac OS Users) ■ Scanning Documents Larger Than A4/Letter Size The ScanSnap is able to scan documents larger than A4/Letter size, such as A3, Double Letter, and B4 sizes, using the Carrier Sheet. Fold the document in half, scan it in Duplex mode, and then merge both front - Fujitsu S1500M | Operator's Guide - Page 280
in Various Ways (for Mac OS Users) 3. Select [Create facing pages in one image] in the [Mode] pop-up menu, and then click the [OK] button. For details about the Carrier Sheet settings, refer to the ScanSnap Manager Help. 4. Select [Automatic detection] in the [Paper size] pop-up menu on the [Paper - Fujitsu S1500M | Operator's Guide - Page 281
[ ] button in the upper left corner of the window or press the [esc] key to close the ScanSnap setup window. 8. Load the document into the ScanSnap. 1. Fold the document in half so that the side to be scanned is on the external side. Fold the sheet tightly and smooth out the crease. Otherwise, the - Fujitsu S1500M | Operator's Guide - Page 282
the Carrier Sheet so that the document fits into the Carrier Sheet at the upper corner. 3. Load the Carrier Sheet into the ScanSnap. − Load the Carrier Sheet with the portion striped in black and white as the top edge. − Place the document so that the back is face up. − Adjust the side guides to the - Fujitsu S1500M | Operator's Guide - Page 283
loaded). Troubleshoot the problem as follows, and the situation may be improved. - Is the document neatly folded? If not, fold it neatly. - Is the edge of the document aligned with the edge of the Carrier Sheet? If not, align the document with the Carrier Sheet edge. - Try scanning the document with - Fujitsu S1500M | Operator's Guide - Page 284
for Mac OS Users) ■ Scanning Photographs and Irregular-shaped Documents When you do not want to get scratches on a photograph, or want to scan an irregular-shaped document such as a clipping of an article that is difficult to scan as it is, you can use the Carrier Sheet to scan with the ScanSnap. To - Fujitsu S1500M | Operator's Guide - Page 285
Mac OS Users) 2. Click the [Carrier Sheet Settings] button on the [Paper] tab. ⇒ The [Carrier Sheet Settings] window appears. 3. Select [Create front and back images separately] in the [Mode] pop-up menu, and then click the [OK] button. For details about Carrier Sheet settings, refer to the ScanSnap - Fujitsu S1500M | Operator's Guide - Page 286
Various Ways (for Mac OS Users) 4. Select [Automatic detection] in the [Paper size] pop-up menu on the [Paper] tab. 5. Click the [Apply] button in the ScanSnap setup window. 6. Click the [ ] button in the upper left corner of the window or press the [esc] key to close the ScanSnap setup window. 286 - Fujitsu S1500M | Operator's Guide - Page 287
the Carrier Sheet into the ScanSnap. − Load the Carrier Sheet with the portion striped in black and white as the top edge. − Place the document so that the back of it faces up. − Adjust the side guides to the width of the Carrier Sheet to avoid skewing. − When scanning the Carrier Sheet mixed with - Fujitsu S1500M | Operator's Guide - Page 288
[Carrier Sheet Settings] window, the size of the produced image data may be smaller than the original, or parts may be lost. Example: When you scan the document size in the [Output image size] pop-up menu. If the following symptoms are observed, lay the material over a piece of white paper to scan. - Fujitsu S1500M | Operator's Guide - Page 289
Ways (for Mac OS Users) ■ Scanning Long Pages Up to 863-mm-long (34 inches) documents can be scanned. The following describes how to scan long pages. 1. Load the document into the ScanSnap. For details about document types that can be loaded, refer to "Paper Sizes of Documents to Be Scanned" (page - Fujitsu S1500M | Operator's Guide - Page 290
in Various Ways (for Mac OS Users) 2. Press the [Scan] button on the ScanSnap until it blinks blue for 3 sec- onds or longer. ⇒ Scanning is started. If the first sheet scanned is scanned a long page, and scanning is continued, subsequent sheets will also be scanned as long pages. • When [Excellent - Fujitsu S1500M | Operator's Guide - Page 291
in Various Ways (for Mac OS Users) ■ Saving Scanned Images in Multiple PDF Files The ScanSnap is able to save scanned image data in multiple PDF files based on the selected number of pages. For example, you can scan a batch of slips, and save each slip as a PDF file. To save image data in multiple - Fujitsu S1500M | Operator's Guide - Page 292
Using the ScanSnap in Various Ways (for Mac OS Users) 3. Select [Generate one PDF file per (n) page(s)] and enter a number. One PDF file is created every time the number of pages specified here have been scanned. In Duplex mode, two pages (front/back) are created per document sheet. It is - Fujitsu S1500M | Operator's Guide - Page 293
Ways (for Mac OS Users) ■ Creating Searchable PDF Files The ScanSnap is able to text-recognize the scanned image data automatically and create a searchable PDF file. To create searchable PDF files, change the settings by following the procedure below. 1. From the ScanSnap Manager menu, select - Fujitsu S1500M | Operator's Guide - Page 294
the [Apply] button in the ScanSnap setup window. 5. Click the [ ] button in the upper left corner of the window or press the [esc] key to close the ScanSnap setup window. 6. Load the document into the ScanSnap. For details, refer to "Paper Sizes of Documents to Be Scanned" (page 26) and "Loading - Fujitsu S1500M | Operator's Guide - Page 295
ScanSnap may fail to correctly text recognize the following types of documents (characters) as text. However, by changing [Color mode] and/or increasing [Image quality] for scanning, such documents may be successfully text-recognized. - Documents with handwritten characters - Documents scanned in - Fujitsu S1500M | Operator's Guide - Page 296
the PDF file ScanSnap + Scan Keyword Convert a character string in a marked section into text Scan Image The file can be searched for because a keyword has been set Mark black-and-white documents in the following way. • Any regular highlight pen can be used. The recommended highlight pen colors - Fujitsu S1500M | Operator's Guide - Page 297
mm or more (length) • For the following types of documents, marked sections cannot be recognized and set as key- words. - Color documents such as catalogues or pamphlets - Documents in which two or more colors are used for marking - Documents containing colors other than for marking (pens other than - Fujitsu S1500M | Operator's Guide - Page 298
Ways (for Mac OS Users) To automatically set keywords to PDF files, change the settings by following the procedure below. 1. From the ScanSnap Manager menu, select [Settings]. ⇒ The ScanSnap setup window appears. 2. In the [File format] pop-up menu on the [File option] tab, select [PDF(*.pdf)]. 298 - Fujitsu S1500M | Operator's Guide - Page 299
Using the ScanSnap in Various Ways (for Mac OS Users) 3. Select the [Set the marked text as a keyword for the PDF file] checkbox. document as a key- word for the PDF file. Example: When only a title of a document is marked, the marked character string is set as a keyword for the PDF file, and the PDF - Fujitsu S1500M | Operator's Guide - Page 300
(for Mac OS Users) 4. Click the [Apply] button in the ScanSnap setup window. 5. Click the [ ] button in the upper left corner of the window or press the [esc] key to close the ScanSnap setup window. 6. Load the document into the ScanSnap. For details, refer to "Paper Sizes of Documents to Be Scanned - Fujitsu S1500M | Operator's Guide - Page 301
Troubleshooting This chapter describes how to remove jammed documents and resolve other problems. Clearing Document Jams 302 Troubleshooting for Multifeed 304 Troubleshooting Checklist 312 301 - Fujitsu S1500M | Operator's Guide - Page 302
. • Be careful not to touch any sharp edges when removing the jammed document. • When removing the jammed document, be careful not to get neckties, necklaces or hair entangled in the ScanSnap. • The surface of the scan glass becomes hot during operation. Take care not to get burned. Clean the - Fujitsu S1500M | Operator's Guide - Page 303
3. Remove the jammed document. Clearing Document Jams 4. Close the ADF top section. ADF top section ADF paper chute (cover) ⇒ You should hear the ADF top section click when it returns to - Fujitsu S1500M | Operator's Guide - Page 304
for Multifeed Troubleshooting for Multifeed The ScanSnap can detect multifeed with an ultrasonic sensor. Multifeed is an error that occurs when two or more sheets are fed into the ScanSnap simultaneously. When a multifeed error occurs while sheets are scanned, part of the scanned image data - Fujitsu S1500M | Operator's Guide - Page 305
• If multifeed is to be detected, the fol- 50 mm lowing conditions are required. - Documents set in the ScanSnap to be scanned at once must be of the same thickness. Basic scanning point Front Top edge of the sheet - Document thickness: 52 g/m2 to 127 g/m2 (0.065 mm to 0.15 mm) Feed direction - Fujitsu S1500M | Operator's Guide - Page 306
Troubleshooting for Multifeed ■ When a Multifeed Is Detected When a multifeed is detected during scanning, scanning operation is paused and the multifeed detection window appears. The following describes the multifeed detection window operation procedure. 1. Check that the front and back images are - Fujitsu S1500M | Operator's Guide - Page 307
scanning settings are as follows: - [Auto Color Detection], [Gray], [B&W], [Color high compression] (Windows only), for [Color mode] - [Allow automatic blank page removal] - [Correct skewed character strings automatically] - [Allow automatic image rotation] - Carrier Sheet (the image of the document - Fujitsu S1500M | Operator's Guide - Page 308
Troubleshooting for Multifeed 2. Select what to do with the thumbnails. • If documents are scanned in the order of the original document Select [Keep], and then click the [Continue Scanning] button or press the [Scan] button on the ScanSnap. For envelopes or documents attached with stamps, sticky - Fujitsu S1500M | Operator's Guide - Page 309
Troubleshooting for Multifeed • If documents are not scanned in the order of the original document 1. Open the ADF top section, remove the documents (1) and realign the edges of the sheets. 1 2. Remove documents to be rescanned (2) (normally two sheets or more) from the stacker, and reload in - Fujitsu S1500M | Operator's Guide - Page 310
Troubleshooting for Multifeed 4. Select [Discard], and click the [Continue Scanning] button, or the [Scan] button on the ScanSnap. 310 - Fujitsu S1500M | Operator's Guide - Page 311
Troubleshooting for Multifeed ⇒Scanning is started. When scanning is complete, the image data is saved. • If it is not necessary to continue scanning, press the [Quit] button, and select [No] on the message dialog box/window that appears. • To quit scanning and delete the image data, press the [Quit - Fujitsu S1500M | Operator's Guide - Page 312
service, perform simple troubleshooting steps in the table below. If performing these troubleshooting steps does not resolve your problem, contact your FUJITSU scanner dealer or an authorized FUJITSU scanner service provider. Symptom The ScanSnap The [Scan] button may turn off while the computer is - Fujitsu S1500M | Operator's Guide - Page 313
Troubleshooting Checklist Symptom Scanning does not start. Check This Item Resolution Is ScanSnap Manager supplied with your ScanSnap installed in your computer? Install ScanSnap Manager. For details about how to install the software, refer to "Getting Started". Does the [Scan] button blink - Fujitsu S1500M | Operator's Guide - Page 314
Manager], select [Imaging devices], right-click [ScanSnap S1500] and select [Update Driver Software] from the menu displayed. If this does not improve the situation, perform Step 2. 2. Turn the ScanSnap off and on again. Wait at least 5 seconds before turning the scanner on. If this does not improve - Fujitsu S1500M | Operator's Guide - Page 315
are blurred. Example: Ruled lines on a table cannot be seen. Are you scanning in color mode, documents including handwritten or typed text, tables or frames with ruled lines? From the ScanSnap setup dialog box/ window, select the [Scanning] tab → [Option] and select the [Setting for text only - Fujitsu S1500M | Operator's Guide - Page 316
scanners connection a USB 1.1 connection? Note: When using an USB1.1 interface, the data transfer rate become slower due to large data sizes. If your computer has an USB 2.0 port, connect the ScanSnap to this port. If using a USB hub, it must also support USB 2.0 interfaces. (*1) Are you scanning - Fujitsu S1500M | Operator's Guide - Page 317
to "Cleaning the Inside of the ScanSnap" (page 327). Replace the pad assembly. For details about how to replace the pad assembly, refer to "Replacing the Pad Assembly" (page 335). Check the number of sheets to scan. For the scannable number of sheets, refer to "Loading Documents" (page 28). 317 - Fujitsu S1500M | Operator's Guide - Page 318
that of a scanned color document image. Is the black & white document scanned in color or gray mode? Select the [Scanning] tab from the ScanSnap setup dialog box/window and change the setting for [Color mode] to [B&W]. Color documents are not scanned as color. Documents in a dark color close to - Fujitsu S1500M | Operator's Guide - Page 319
images up to +/-5 degrees. Neatly align the edges of paper sheets with the side guide so that the document skew does not exceed this limit. For details about how to load the document into the ScanSnap, refer to "Loading Documents" (page 28). For details about the [Correct skewed character strings - Fujitsu S1500M | Operator's Guide - Page 320
Menu] check box in the ScanSnap setup dialog box/window. For details about how to save the settings, refer to the following: "Saving Scanning Settings" (page 67) When the document is scanned with the Carrier Sheet, a message "Document size incorrect" appears or a part of the image data is lost - Fujitsu S1500M | Operator's Guide - Page 321
size] drop-down list, was the document skewed during a scan? Was the document scanned with the edges of paper sheets aligned with the side guide? Resolution • Neatly align the edges of paper sheets with the side guide. For details about how to load the document into the ScanSnap, refer to "Loading - Fujitsu S1500M | Operator's Guide - Page 322
. For more information, refer to the ABBYY FineReader for ScanSnap Help. Is the document to scan skewed? The more the document is skewed, the greater the possibility of character misrecognition is. Neatly align the edges of paper sheets with the side guide. *1 : If you are not sure about the USB - Fujitsu S1500M | Operator's Guide - Page 323
Troubleshooting Checklist On the ScanSnap Manager Menu, select [Help] → [About ScanSnap Manager]. Then, in the [ScanSnap Manager - Version Information] window, click the [Detail] button to open the [ScanSnap Manager - Scanner and driver information] window. Check [USB type] under [Scanner - Fujitsu S1500M | Operator's Guide - Page 324
chapter describes how to clean the ScanSnap. WARNING • Before you clean the ScanSnap, turn off the ScanSnap and disconnect the power cable from the AC outlet. Not doing so may cause a fire or electric shock. • To avoid injuries, do not place internal parts such as pad assembly and pick roller in an - Fujitsu S1500M | Operator's Guide - Page 325
Materials To obtain these parts, contact your FUJITSU dealer or an authorized FUJITSU scanner service provider. Cleaning Materials Cleaner F1 (*1) Parts No. PA03950-0352 Unit 1 bottle Remarks Size: 100 ml Cleaning Wipe (*2) PA03950-0419 1 pack Contains 24 sheets PFU LIMITED Lint-free - Fujitsu S1500M | Operator's Guide - Page 326
. • It may take a long time before the cleaner vaporizes if a large quantity is used. When clean- ing the ScanSnap parts, moisten a cloth with modest quantities of the cleaner. In addition, wipe off the cleaner completely with a soft lint-free cloth to leave no residue on - Fujitsu S1500M | Operator's Guide - Page 327
scanning documents, the accumulated paper-powder and dust inside the ScanSnap causes a scanner error. As a guideline, clean the inside of the ScanSnap every 1,000 scans cloth to leave no residue on the surface of the cleaned parts. 1. Pull the ADF release catch to open the ADF top section. ADF - Fujitsu S1500M | Operator's Guide - Page 328
residue on the surface of the cleaned parts. Turn off the ScanSnap before cleaning the following locations. • Pad assembly (× 1) Wipe the pad assembly downwards. When cleaning the pad assembly, take care to prevent the cloth from catching on the metal parts. • Scan glass (× 2, located on the ADF top - Fujitsu S1500M | Operator's Guide - Page 329
Cleaning the Inside of the ScanSnap Turn on the ScanSnap before cleaning the following locations, and clean the rollers since debris on these rollers adversely affect the pickup performance. Holding the [Scan] button down for 3 seconds while the ADF top section is open activates the cleaning mode - Fujitsu S1500M | Operator's Guide - Page 330
the interior of the Carrier Sheet with Cleaner F1 or mild detergent, dry the Car- rier Sheet completely before closing it. • As a guideline, it is recommended to replace the Carrier Sheet with new one every 500 scans. For details about purchasing Carrier Sheet, refer to "Purchasing the Carrier - Fujitsu S1500M | Operator's Guide - Page 331
it is used, it does not affect ScanSnap operation, or cause any bodily harm. Be careful not to hit it to the ground when you move the ScanSnap. Part Numbers and Replacement Cycle of Consumables 332 Replacing the Pad Assembly 335 Replacing the Pick Roller 339 Purchasing the Carrier Sheet 347 331 - Fujitsu S1500M | Operator's Guide - Page 332
The following table lists the part numbers of consumables and rough guidelines for replacing these parts. No. 1 Cleaning Materials PAD ASSY (Pad assembly) Parts No. Standard Replacement Cycle PA03586-0002 50,000 sheets or one year 2 Pick roller PA03586-0001 100,000 sheets or one year - Fujitsu S1500M | Operator's Guide - Page 333
Part Numbers and Replacement Cycle of Consumables By the following procedure, you can check how many sheets have been scanned using the consumables. 1. Select [Check consumable supplies] from the Right-Click Menu. ⇒ The [ScanSnap Manager - Check consumable status] dialog box appears. 2. Check how - Fujitsu S1500M | Operator's Guide - Page 334
Part Numbers and Replacement Cycle of Consumables 1. Select [Check consumable supplies] from the ScanSnap Manager menu. ⇒ The [ScanSnap Manager - Check consumable status] window appears. 2. Check how many times consumables have been used. ⇒ Replace consumables referring to [Target value to change - Fujitsu S1500M | Operator's Guide - Page 335
the Pad Assembly Replacing the Pad Assembly Replace the pad assembly following the procedure below. 1. Remove the documents on the ADF paper chute (cover). 2. Pull the ADF release catch to open the ADF top section. ADF paper chute (cover) ADF top section ADF release catch 3. Remove the pad - Fujitsu S1500M | Operator's Guide - Page 336
4. Attach the new pad assembly. ADF top section Replacing the Pad Assembly Pad assembly Make sure that the pad assembly is completely attached. Otherwise, document jams or other feeding errors may occur. 5. Close the ADF top section. ADF top section ADF paper chute (cover) ⇒ You should hear the - Fujitsu S1500M | Operator's Guide - Page 337
7. Reset the consumable use count. Replacing the Pad Assembly 1. Select [Check consumable supplies] from the Right-Click Menu. ⇒The [ScanSnap Manager - Check consumable status] dialog box appears. 2. Click the [Reset] button for the [Pad ASSY Count]. ⇒The confirmation message appears. ⇒Clicking - Fujitsu S1500M | Operator's Guide - Page 338
Replacing the Pad Assembly 1. Select [Check consumable supplies] from the ScanSnap Manager menu. ⇒The [ScanSnap Manager - Check consumable status] window appears. 2. Click the [Reset] button for the [Pad ASSY Count]. ⇒The confirmation message appears. ⇒Click the [Yes] button to reset the [Pad ASSY - Fujitsu S1500M | Operator's Guide - Page 339
the pick roller by first removing the pick roller from the ScanSnap. Pick roller Shaft Replace the pick roller following the procedure below. 1. Remove the documents on the ADF paper chute (cover). 2. Pull the ADF release catch to open the ADF top section. ADF paper chute (cover) ADF top section - Fujitsu S1500M | Operator's Guide - Page 340
3. Adjust the side guide to the "A5" size. Replacing the Pick Roller A5 A5 4. Remove the sheet guide. Hold the pickup tabs on the sheet guide between the thumb and index finger, and then pull up the sheet guide to remove. Sheet guide Pickup tab Pickup tab 340 - Fujitsu S1500M | Operator's Guide - Page 341
pick roller bushing (left). Replacing the Pick Roller Pick roller Bushing Shaft 6. Remove the pick roller with its shaft. Slightly pull up the left part of the pick roller shaft (about 5 mm), move it towards the left side, and then raise it to remove from the ScanSnap. Shaft Pick roller If - Fujitsu S1500M | Operator's Guide - Page 342
Replacing the Pick Roller 7. Remove the pick roller from its shaft. ⇒ Pull out the shaft from the pick roller while lifting up its tab. Pickup tab - Fujitsu S1500M | Operator's Guide - Page 343
Replacing the Pick Roller 9. Install the pick roller with its shaft to the ScanSnap. Insert the right end of the shaft to the bushing (right), and set the shaft to the slot while lowering it. Shaft Pick roller 10.Secure the bushing (left) by rotating it in the direction of the arrow. Pick roller - Fujitsu S1500M | Operator's Guide - Page 344
and index finger, and then attach the sheet guide to the ScanSnap. Pickup tab Pickup tab Sheet guide ⇒ The sheet guide makes a clicking sound when the pickup tabs fix into position. Make sure that the sheet guide is completely attached. Otherwise, document jams or other feeding errors may occur - Fujitsu S1500M | Operator's Guide - Page 345
14. Reset the consumable use count. Replacing the Pick Roller 1. Select [Check consumable supplies] from the Right-Click Menu. ⇒The [ScanSnap Manager - Check consumable status] dialog box appears. 2. Click the [Reset] button for the [Pick Roller Count]. ⇒ The confirmation message appears. ⇒ - Fujitsu S1500M | Operator's Guide - Page 346
Replacing the Pick Roller 1. Select [Check consumable supplies] from the ScanSnap Manager menu. ⇒The [ScanSnap Manager - Check consumable status] window appears. 2. Click the [Reset] button for the [Pick Roller Count]. ⇒ The confirmation message appears. ⇒ Click the [Yes] button to reset the [Pick - Fujitsu S1500M | Operator's Guide - Page 347
are conspicuous, replace the Carrier Sheet accordingly. The description of the Carrier Sheet and its part number are as follows: Description ScanSnap Carrier Sheet Quantity 5 pcs P/N PA03360-0013 To obtain this parts, contact your FUJITSU dealer or an authorized FUJITSU scanner service provider - Fujitsu S1500M | Operator's Guide - Page 348
Appendix This appendix describes how to update ScanSnap Manager, how to uninstall software, setting items, and ScanSnap installation conditions. Updating ScanSnap Manager 349 Uninstalling the Software 355 Setting Items With/Without Quick Menu 361 Installation Specifications 364 348 - Fujitsu S1500M | Operator's Guide - Page 349
ScanSnap Manager, software updates are released regularly. This section describes how to update ScanSnap Manager. ■ Updating on a Windows OS By selecting and performing [Help] → [Online Update] from the Right-click Menu, ScanSnap . When updating ScanSnap Manager, follow the instructions below. • - Fujitsu S1500M | Operator's Guide - Page 350
2. Click the [Yes] button. Updating ScanSnap Manager ⇒ If the latest update pack is available, a message appears for the confirmation of the download and installation of the software. If the latest update is already installed, an informational message appears. Click the [OK] button to close the - Fujitsu S1500M | Operator's Guide - Page 351
Manager When you click the [Information] button, Internet Explorer opens and information about the latest update for ScanSnap Manager appears. ⇒ Installation starts, and the [Welcome to InstallShield Wizard for ScanSnap Manager] window appears. Follow the instructions on the screen to install. 351 - Fujitsu S1500M | Operator's Guide - Page 352
Updating on a Mac OS By selecting and performing [Help] → [Online Update] from the ScanSnap Manager menu, ScanSnap Manager can automatically detect that you update your pro- gram regularly. When updating ScanSnap Manager, follow the instructions below. When updating, it is essential that a browser - Fujitsu S1500M | Operator's Guide - Page 353
2. Click the [Yes] button. Updating ScanSnap Manager ⇒ If the latest update pack is available, a message appears for the confirmation of the download and installation of the software. If the latest update is already installed, an informational message appears. Click the [OK] button to close the - Fujitsu S1500M | Operator's Guide - Page 354
5. Click the [Install] button. Updating ScanSnap Manager When you click the [Information] button, the browser opens and information about the latest update for ScanSnap Manager appears. ⇒ The ScanSnap Manager installer starts. Follow the instructions on the screen to install. 354 - Fujitsu S1500M | Operator's Guide - Page 355
how to uninstall software supplied with the ScanSnap. ■ Uninstalling on a Windows OS Follow the procedure below to uninstall software (ScanSnap Manager, ScanSnap Organizer, CardMinder, ABBYY FineReader for ScanSnap, and Scan to Microsoft SharePoint) supplied with the ScanSnap S1500. 1. Start your - Fujitsu S1500M | Operator's Guide - Page 356
Uninstalling the Software 6. Click the [Yes] button. ⇒ This executes the uninstallation. Screen displays may vary slightly depending on the operating system of your computer. Follow the on-screen instructions of the operating system. Example: • [Change/Remove] button For Windows XP: [Add or Remove - Fujitsu S1500M | Operator's Guide - Page 357
Uninstalling the Software ■ Uninstalling on a Mac OS Follow the procedure below to uninstall software supplied with the ScanSnap S1500M (ScanSnap Manager, ABBYY FineReader for ScanSnap, and Cardiris). When uninstalling ScanSnap Manager 1. Start your computer. 2. Exit ScanSnap Manager if it is - Fujitsu S1500M | Operator's Guide - Page 358
Uninstalling the Software 11.In a multi-user environment, every user must perform Steps 2 to 10. 12.Log in with an account that has admin rights. With Finder, select [Applications] → [ScanSnap], and drag the [ScanSnap] folder into the Trash. 13.With Finder, select [volume_name] → [Library] → [ - Fujitsu S1500M | Operator's Guide - Page 359
Uninstalling the Software When uninstalling Cardiris 1. Start your computer, and log in with an account that has admin rights. 2. Exit Cardiris if it is running. (Select [Quit] from the Cardiris menu.) 3. Insert the Setup DVD-ROM into the DVD-ROM drive. ⇒ The [ScanSnap] window appears. 4. Scroll - Fujitsu S1500M | Operator's Guide - Page 360
Uninstalling the Software 11.Close the [ScanSnap] window. 12.With Finder, select [volume_name] → [Library] → [Receipts], and drag [Cardiris.pkg] into the Trash. 13.Empty the Trash. ⇒ Cardiris is uninstalled. 14.Remove the Setup DVD-ROM from the DVD-ROM drive. 360 - Fujitsu S1500M | Operator's Guide - Page 361
Menu OK OK OK OK OK ScanSnap Organizer (*1) Adobe(R) Acrobat(R) Adobe(R) Acrobat(R) Reader(TM) or Adobe(R) Reader(R) Scan to E-mail NA OK NA OK NA OK NA OK Scan to CardMinder (*1) Scan to Folder NA OK NA OK Scan to Picture Folder Scan to Print Scan to Excel Scan to Word NA OK NA - Fujitsu S1500M | Operator's Guide - Page 362
Menu OK OK OK OK OK OK OK OK OK OK OK Color high compression Scanning side Duplex Scan Simplex Scan Continue scanning after current scan is finished Option Brightness (Black and White scanning only) Setting for text only document Allow automatic blank page removal Correct skewed character strings - Fujitsu S1500M | Operator's Guide - Page 363
OK OK OK OK OK OK OK OK OK OK OK OK Set a password for PDF file NA OK Paper Paper size OK Automatic detection OK Letter (8.5 × 11 in ( Sheet Settings OK Com- Compression rate OK pression 1 OK 2 OK 3 OK 4 OK 5 OK *1 : Can only be used with S1500. *2 : Can only be used with S1500M - Fujitsu S1500M | Operator's Guide - Page 364
Installation Specifications Installation Specifications The following table summarizes the installation specifications of the ScanSnap. Item Dimensions (Width × Depth × Height) Weight Input power supply Voltage Number of phases Frequency Power consumption Temperature/ humidity allowable - Fujitsu S1500M | Operator's Guide - Page 365
Book 256 CardMinder 35 Carrier Sheet cleaning 330 purchasing 347 Cleaner F1 325 Cleaning Wipe 325 clearing document jams 302 color high compression 153 consumables 332 copy Mac OS 238 Windows 105 correct skewed character strings automatically Mac OS 270 Windows 157 D daily care 324 - Fujitsu S1500M | Operator's Guide - Page 366
a scan Mac OS 192 Windows 54 I installing for S1500 35 for S1500M 44 installing Adobe Acrobat Mac OS 45 Windows 36 iPhoto 259 L Left-Click Menu 53 loading documents 28 M multifeed 317 O online update Mac OS 352 Windows 349 operating system Mac OS 23 Windows 21 P pad assembly 332 PAD - Fujitsu S1500M | Operator's Guide - Page 367
35 Scan to Picture Folder 114 Scan to PowerPoint(R 122 Scan to Print Mac OS 240 Windows 107 Scan to Rack2-Filer 145 Scan to SharePoint 135 Scan to Word Mac OS 247 Windows 122 scanning color document in black and white Mac OS 265 Windows 151 scanning method Mac OS 194, 199 Windows 55 - Fujitsu S1500M | Operator's Guide - Page 368
supplied software S1500 35 S1500M 44 system requirements Mac OS 23 Windows 21 T tape seal 20 turning on/off ScanSnap 25 U uninstalling Mac OS 357 Windows 355 updating Mac OS 352 Windows 349 USB connector 20 V ventilation ports 20 Index 368 - Fujitsu S1500M | Operator's Guide - Page 369
ScanSnap S1500/S1500M Operator's Guide P3PC-2432-01ENZ0 Issue date December 2008 Issued by PFU LIMITED z The contents of this manual are subject to change without Copying of the contents of this manual, in whole or in part, as well as the scanner applications is prohibited under the copyright law.
-
 1
1 -
 2
2 -
 3
3 -
 4
4 -
 5
5 -
 6
6 -
 7
7 -
8
-
9
-
10
-
11
-
12
-
13
-
14
-
15
-
16
-
17
-
18
-
19
-
20
-
21
-
22
-
23
-
24
-
25
-
26
-
27
-
28
-
29
-
30
-
31
-
32
-
33
-
34
-
35
-
36
-
37
-
38
-
39
-
40
-
41
-
42
-
43
-
44
-
45
-
46
-
47
-
48
-
49
-
50
-
51
-
52
-
53
-
54
-
55
-
56
-
57
-
58
-
59
-
60
-
61
-
62
-
63
-
64
-
65
-
66
-
67
-
68
-
69
-
70
-
71
-
72
-
73
-
74
-
75
-
76
-
77
-
78
-
79
-
80
-
81
-
82
-
83
-
84
-
85
-
86
-
87
-
88
-
89
-
90
-
91
-
92
-
93
-
94
-
95
-
96
-
97
-
98
-
99
-
100
-
101
-
102
-
103
-
104
-
105
-
106
-
107
-
108
-
109
-
110
-
111
-
112
-
113
-
114
-
115
-
116
-
117
-
118
-
119
-
120
-
121
-
122
-
123
-
124
-
125
-
126
-
127
-
128
-
129
-
130
-
131
-
132
-
133
-
134
-
135
-
136
-
137
-
138
-
139
-
140
-
141
-
142
-
143
-
144
-
145
-
146
-
147
-
148
-
149
-
150
-
151
-
152
-
153
-
154
-
155
-
156
-
157
-
158
-
159
-
160
-
161
-
162
-
163
-
164
-
165
-
166
-
167
-
168
-
169
-
170
-
171
-
172
-
173
-
174
-
175
-
176
-
177
-
178
-
179
-
180
-
181
-
182
-
183
-
184
-
185
-
186
-
187
-
188
-
189
-
190
-
191
-
192
-
193
-
194
-
195
-
196
-
197
-
198
-
199
-
200
-
201
-
202
-
203
-
204
-
205
-
206
-
207
-
208
-
209
-
210
-
211
-
212
-
213
-
214
-
215
-
216
-
217
-
218
-
219
-
220
-
221
-
222
-
223
-
224
-
225
-
226
-
227
-
228
-
229
-
230
-
231
-
232
-
233
-
234
-
235
-
236
-
237
-
238
-
239
-
240
-
241
-
242
-
243
-
244
-
245
-
246
-
247
-
248
-
249
-
250
-
251
-
252
-
253
-
254
-
255
-
256
-
257
-
258
-
259
-
260
-
261
-
262
-
263
-
264
-
265
-
266
-
267
-
268
-
269
-
270
-
271
-
272
-
273
-
274
-
275
-
276
-
277
-
278
-
279
-
280
-
281
-
282
-
283
-
284
-
285
-
286
-
287
-
288
-
289
-
290
-
291
-
292
-
293
-
294
-
295
-
296
-
297
-
298
-
299
-
300
-
301
-
302
-
303
-
304
-
305
-
306
-
307
-
308
-
309
-
310
-
311
-
312
-
313
-
314
-
315
-
316
-
317
-
318
-
319
-
320
-
321
-
322
-
323
-
324
-
325
-
326
-
327
-
328
-
329
-
330
-
331
-
332
-
333
-
334
-
335
-
336
-
337
-
338
-
339
-
340
-
341
-
342
-
343
-
344
-
345
-
346
-
347
-
348
-
349
-
350
-
351
-
352
-
353
-
354
-
355
-
356
-
357
-
358
-
359
-
360
-
361
-
362
-
363
-
364
-
365
-
366
-
367
-
368
-
369
 |
 |

Operator's Guide
P3PC-2432-01ENZ0