Ganz Security Z8-D2M-2 Z8-D2_VD2 Series Operation Guide - Page 22
D-effect
 |
View all Ganz Security Z8-D2M-2 manuals
Add to My Manuals
Save this manual to your list of manuals |
Page 22 highlights
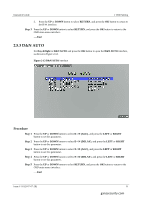
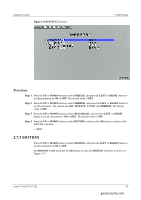
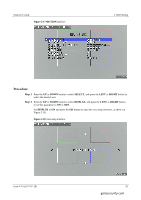
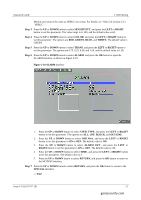
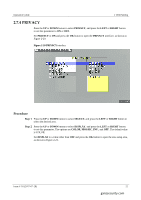
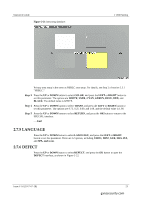
Operation Guide 2 OSD Setting : Press this button to move the cursor to the previous character. Press the UP, DOWN, LEFT, and RIGHT buttons to select , and press the OK button to move the cursor backward by one character. If you press the OK button again, the cursor continues to move backward by one character. Move the cursor to the character to be modified, select the correct character, and press the OK button. Then the original character is replaced by the selected character. : Press this button to move the cursor to the next character. Press the UP, DOWN, LEFT, and RIGHT buttons to select , and press the OK button to move the cursor forward by one character. If you press the OK button again, the cursor continues to move forward by one character. Move the cursor to the character to be modified, select the correct character, and press the OK button. Then the original character is replaced by the selected character. CLR: Press the UP, DOWN, LEFT, and RIGHT buttons to select CLR to clear the camera title. POS: Press the UP, DOWN, LEFT, and RIGHT buttons to select POS to complete the setting or modification of the camera title. END: Press the UP, DOWN, LEFT, and RIGHT buttons to select END to return to the OSD main menu interface. Procedure Step 1 Press the UP, DOWN, LEFT, and RIGHT buttons to select numbers, letters, or symbols. Step 2 Select a character and press the OK button to confirm the selection. Step 3 Repeat Steps 1 and 2 to set the camera title. Step 4 Press the UP, DOWN, LEFT, and RIGHT buttons to select POS to complete the camera title setting. Open the real-time video interface, which displays the camera title. ----End 2.7.2 D-EFFECT Press the UP or DOWN button to select D-EFFECT, and press the OK button to open the DEFFECT interface, as shown in Figure 2-16. Issue V1.0 (2017-07-28) 18 ganzsecurity.com
-
 1
1 -
2
-
3
-
4
-
5
-
6
-
7
-
8
-
9
-
10
-
11
-
12
-
13
-
14
-
15
-
16
-
 17
17 -
 18
18 -
 19
19 -
 20
20 -
 21
21 -
 22
22 -
 23
23 -
 24
24 -
 25
25 -
 26
26 -
 27
27 -
28
-
29
-
30
-
31
-
32
-
33
-
34
-
35
-
36
-
37
 |
 |
