Garmin eTrex Touch 35t Owners Manual - Page 6
Where To? Menu, Navigation
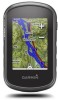 |
View all Garmin eTrex Touch 35t manuals
Add to My Manuals
Save this manual to your list of manuals |
Page 6 highlights
7 Select Finish. Starting an Adventure Before you can start an adventure, you must send an adventure from BaseCamp to your device. 1 Select Adventures. 2 Select an adventure. 3 Select Start. Where To? Menu You can use the Where To? menu to find a destination to navigate to. Not all Where To? categories are available in all areas and maps. Optional Maps You can use additional maps with the device, such as BirdsEye satellite imagery, BlueChart® g2, and City Navigator® detailed maps. Detailed maps may contain additional points of interest, such as restaurants or marine services. For more information, go to http://buy.garmin.com or contact your Garmin dealer. Finding a Location Near Another Location 1 From an activity screen, select > > Search Near. 2 Select an option. 3 Select a location. Finding an Address You can use optional City Navigator maps to search for addresses. 1 Select Where To? > Addresses. 2 Select the country or state, if necessary. 3 Enter the city or postal code. NOTE: Not all map data provides postal code searching. 4 Select the city. 5 Enter the house number. 6 Enter the street. Navigation You can navigate routes and tracks, to a waypoint, geocache, photo, or any saved location in the device. You can use the map or the compass to navigate to your destination. Navigating to a Destination 1 From an activity screen, select . 2 Select a category. 3 Select a destination. 4 Select Go. The map opens and your route is marked with a magenta line. 5 Navigate using the map (Navigating with the Map, page 4) or compass (Navigating with the Compass, page 4). Stopping Navigation 1 From the map or compass, swipe up from the bottom of the screen. 2 Select Stop. Acquiring Satellite Signals Before you can use the GPS navigation features, such as recording a track, you must acquire satellite signals. The device may need a clear view of the sky to acquire satellite signals. It may take 30 to 60 seconds to acquire satellite signals. 1 Hold . 2 Select an activity. 3 Wait until the GPS indicator bars turn green. Navigating with the Map 1 Begin navigating to a destination (Navigating to a Destination, page 4). 2 Select Map. A blue triangle represents your location on the map. As you travel, the blue triangle moves and leaves a track log (trail). 3 Complete one or more actions: • Select , and drag the map to view different areas. • Select and to zoom in and out of the map. • Select a location on the map (represented by a pin), and select the information bar at the top of the screen to view information about the selected location. Navigating a Driving Route Before you can navigate street routes, you must purchase and load City Navigator maps. 1 Select Profile Change > Automotive. 2 Select a destination. 3 Navigate using the map. Turns appear in the text bar along the top of the map. Audible tones signal turns in the route. Navigating with the Compass When navigating to a destination, points to your destination, regardless of the direction you are moving. 1 Begin navigating to a destination (Navigating to a Destination, page 4). 2 Select Compass. 3 Turn until points toward the top of the compass, and continue moving in that direction to the destination. Calibrating the Compass NOTICE Calibrate the electronic compass outdoors. To improve heading accuracy, do not stand near objects that influence magnetic fields, such as vehicles, buildings, and overhead power lines. Your device was already calibrated at the factory, and the device uses automatic calibration by default. If you experience irregular compass behavior, for example, after moving long distances or after extreme temperature changes, you can manually calibrate the compass. 1 Select Compass. 2 Swipe up from the bottom of the screen, and select > Calibrate Compass > Start. 3 Follow the on-screen instructions. Course Pointer The course pointer is most useful if you are navigating on water or where there are no major obstacles in your path. It also can also help you avoid hazards to either side of the course, such as shoals or submerged rocks. To enable the course pointer, from the compass, select Setup > Heading > Go To Line (Pointer) > Course (CDI). 4 Where To? Menu
-
 1
1 -
 2
2 -
 3
3 -
 4
4 -
 5
5 -
 6
6 -
 7
7 -
 8
8 -
 9
9 -
 10
10 -
 11
11 -
 12
12 -
13
-
14
-
15
-
16
-
17
-
18
 |
 |
