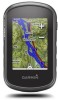
Garmin eTrex Touch 35t Owners Manual - Page 8
Viewing the Calendar and Almanacs
 |
View all Garmin eTrex Touch 35t manuals
Add to My Manuals
Save this manual to your list of manuals |
Page 8 highlights
2 Select chirp Searching > On. Finding a Geocache with a chirp 1 Select Geocaching > Find a Geocache. 2 Select a geocache. 3 Select Go. 4 Navigate using the map (Navigating with the Map, page 4) or compass (Navigating with the Compass, page 4). When you are within approximately 32.9 ft (10 m) of the geocache that contains a chirp, details about the chirp appear. 5 If necessary, select Geocaching > Show chirp Details. 6 If available, select Go to navigate to the next stage of the geocache. Logging the Attempt After you have attempted to find a geocache, you can log your results. You can verify some geocaches at www.opencaching.com. 1 Select Geocaching > Log Attempt. 2 Select Found, Did Not Find, or Needs Repair. 3 Select an option: • To begin navigation to the geocache nearest you, select Find Next Closest. • To stop logging, select Done. • To enter a comment about looking for the cache or about the cache itself, select Edit Comment, enter a comment, and select . • To rate the geocache, select Rate Geocache, and enter a rating for each category. You can go to www.opencaching.com to upload your rating. Applications Sending and Receiving Data Wirelessly Before you can share data wirelessly, you must be within 10 feet (3 m) of a compatible device. Your device can send and receive data when paired with another compatible device or smartphone using ANT+® wireless technology. You can share waypoints, geocaches, routes, and tracks. NOTE: This feature is not available for all device models. 1 Select Share Wirelessly. 2 Select an option: • Select Send, and select a type of data. • Select Receive to receive data from another device. The other compatible device must be attempting to send data. 3 Follow the on-screen instructions. Setting a Proximity Alarm Proximity alarms alert you when you are within a specified range of a particular location. 1 Select Proximity Alarms > Create Alarm. 2 Select a category. 3 Select a location. 4 Select Use. 5 Enter a radius, and select . When you enter an area with a proximity alarm, the device sounds a tone. Calculating the Size of an Area 1 Select Area Calculation > Start. 2 Walk around the perimeter of the area you want to calculate. 3 Select Calculate when finished. Using the Calculator The device has a standard calculator and a scientific calculator. Select Calculator. Viewing the Calendar and Almanacs You can view device activity, such as when a waypoint was saved, and almanac information for the sun and moon, and hunting and fishing. 1 Select an option: • To view device activity for specific days, select Calendar. • To view the sunrise, sunset, moonrise, and moonset information, select Sun and Moon. • To view the predicted best times for hunting and fishing, select Hunt and Fish. 2 If necessary, select or to view a different month. 3 Select a day. Setting an Alarm If you are not currently using the device, you can set the device to turn on at a specific time. 1 Select Alarm Clock. 2 Select and to set the time. 3 Select Turn Alarm On. 4 Select an option. The alarm sounds at the selected time. If the device is off at the alarm time, the device turns on and sounds the alarm. Starting the Countdown Timer 1 Select Alarm Clock > > Timer. 2 Select and to set the time. 3 Select Start Timer. Opening the Stopwatch Select Stopwatch. Satellite Page The satellite page shows your current location, GPS accuracy, satellite locations, and signal strength. Changing the Satellite View 1 Select Satellite. 2 Swipe up from the bottom of the screen, and select . 3 Select Track Up to orient the satellite view with your current track toward the top of the screen. 4 Select Multicolor to assign a specific color to the satellite and to the signal strength bar of that satellite. Turning Off GPS 1 Select Satellite. 2 Swipe up from the bottom of the screen, and select With GPS Off. > Use Simulating a Location 1 Select Satellite. 2 Swipe up from the bottom of the screen, and select With GPS Off. 3 Swipe up from the bottom of the screen, and select Loc. On Map. > Use > Set 6 Applications
-
 1
1 -
2
-
 3
3 -
 4
4 -
 5
5 -
 6
6 -
 7
7 -
 8
8 -
 9
9 -
 10
10 -
 11
11 -
 12
12 -
 13
13 -
14
-
15
-
16
-
17
-
18
 |
 |
