GE PSB48YSXSS Use and Care Manual
GE PSB48YSXSS - 48" - Refrigerator Manual
 |
UPC - 084691175933
View all GE PSB48YSXSS manuals
Add to My Manuals
Save this manual to your list of manuals |
GE PSB48YSXSS manual content summary:
- GE PSB48YSXSS | Use and Care Manual - Page 1
Sounds 41 Consumer Support Consumer Support Back Cover Performance Data Sheet 47 Product Registration 49, 50 State of California Water Treatment Device Certificate 48 Warranty (Canadian 45 Warranty (U.S 46 Owner's Manual and Installation Instructions Model 42, 48 GE Profile Côte à Côte - GE PSB48YSXSS | Use and Care Manual - Page 2
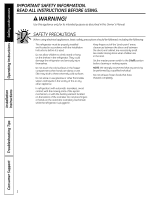
as described in this Owner's Manual. SAFETY PRECAUTIONS When using electrical appliances, basic safety precautions should be followed, including the following: s This refrigerator must be properly installed and located in accordance with the Installation Instructions before it is used. s Do - GE PSB48YSXSS | Use and Care Manual - Page 3
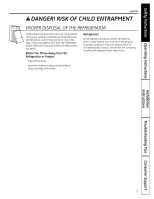
All refrigeration products contain refrigerants, which under federal law must be removed prior to product disposal. If you are getting rid of an old refrigeration product, check with the company handling the disposal about what to do. Installation Instructions Troubleshooting Tips Consumer Support - GE PSB48YSXSS | Use and Care Manual - Page 4
outlet to minimize the possibility of electric shock hazard from this appliance. refrigerator to a 2-prong outlet. Do not use an extension cord with this appliance. READ AND FOLLOW THIS SAFETY INFORMATION CAREFULLY. SAVE THESE INSTRUCTIONS Installation Instructions Consumer Support Troubleshooting - GE PSB48YSXSS | Use and Care Manual - Page 5
Safety Instructions Operating Instructions About the temperature controls. ge.com Installation Instructions Troubleshooting Tips Consumer Support The temperature controls are preset in the factory at 37°F for the refrigerator compartment and 0°F for the freezer compartment. Allow 24 hours for - GE PSB48YSXSS | Use and Care Manual - Page 6
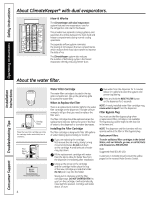
system also reduces the number of defrosting cycles in the freezer evaporator, thereby reducing freezer burn. Installation Instructions Consumer Support Troubleshooting Tips About the water filter. Cartridge Holder Place the top of the cartridge up inside the cartridge holder and slowly turn it - GE PSB48YSXSS | Use and Care Manual - Page 7
Safety Instructions Operating Instructions About the shelves and bins. Not all features are on all models. Snugger Refrigerator bins Refrigerator . ge.com CAUTION: Make sure that items do not block or fall into the ice chute. Installation Instructions Troubleshooting Tips Consumer Support 7 - GE PSB48YSXSS | Use and Care Manual - Page 8
the pin from turning unless a wrench is used.) After one or two turns of the wrench, open and close the refrigerator door and check the alignment at the top of the doors. Bushing Door Hinge Case Hinge 7/32" Wrench Raise Clockwise Installation Instructions Consumer Support Troubleshooting Tips 8 - GE PSB48YSXSS | Use and Care Manual - Page 9
Instructions Operating Instructions About the drawers and baskets. Not all features are on all models. Fruit and Vegetable Drawers Excess water that may accumulate in the bottom of the drawers should be wiped dry. ge the freezer. Installation Instructions Troubleshooting Tips Consumer Support 9 - GE PSB48YSXSS | Use and Care Manual - Page 10
drip from the chute. s The first glass of water dispensed may be warmer than the following ones. This is normal. Installation Instructions Consumer Support Troubleshooting Tips Automatic Icemaker A newly-installed refrigerator may take 12-24 hours to begin making ice. The icemaker will produce - GE PSB48YSXSS | Use and Care Manual - Page 11
To reduce water spotting, the shelf and its grille should be cleaned regularly. If no water is dispensed when the refrigerator is first installed, there may be air in the water line system. replaced with a 6 watt 12V maximum bulb. Installation Instructions Troubleshooting Tips Consumer Support 11 - GE PSB48YSXSS | Use and Care Manual - Page 12
refrigerator parts in the dishwasher. Avoid cleaning cold glass shelves with hot water because the extreme temperature difference may cause them to break. Handle glass shelves carefully. Bumping tempered glass can cause it to shatter. Installation Instructions Consumer Support Troubleshooting - GE PSB48YSXSS | Use and Care Manual - Page 13
personal injury or damage to the product, A MINIMUM OF 4 PEOPLE ARE REQUIRED TO BRING THE UNIT INTO THE HOME AND 2 PEOPLE ARE REQUIRED FOR PROPER INSTALLATION. Be sure the refrigerator stays in an upright position during moving. Installation Instructions Troubleshooting Tips Consumer Support 13 - GE PSB48YSXSS | Use and Care Manual - Page 14
Instructions Safety Instructions Installation Instructions Replacing the light bulbs. Setting the controls to OFF does not remove power to the light circuit. (appearance may vary) Refrigerator Compartment the I (on) position and close the grille panel. Consumer Support Troubleshooting Tips 14 - GE PSB48YSXSS | Use and Care Manual - Page 15
Installation Instructions Built-In Side-By-Side Refrigerators PSB42YS, PSB42YG, PSB48YS, PSB48YG If you have questions, call 800.GE.CARES (800.432.2737) or visit our website at: ge.com In Canada, call 1.800.561.3344 or visit our website at: www.geappliances.ca BEFORE YOU BEGIN Read these - GE PSB48YSXSS | Use and Care Manual - Page 16
Installation Instructions HARDWARE SUPPLIED • Water filter bypass plug • Anti-Tip brackets Anti-Tip Brackets Water Filter Bypass Plug MATERIALS REQUIRED • 36″ long, 2″ x 4″ wood block for Anti-Tip bracket installation • #12 or #14 wood screws for Anti-Tip bracket • Screws to secure refrigerator - GE PSB48YSXSS | Use and Care Manual - Page 17
42″ models and 47-1/2″ for 48″ models Water and Electrical Locations The opening must be prepared with the electrical and water supply located as shown. The cutout depth must be 24″ The refrigerator will project forward, slightly beyond adjacent cabinets, depending on your installation. Additional - GE PSB48YSXSS | Use and Care Manual - Page 18
Installation Instructions Refrigerator Top View 130° Door Swing (factory setting) Scale 1:1 23-7/8" From Rear of Refrigerator Case Trim 1" 3/4" 2" 1-3/4" 3" 2-3/4" 1/2" 1-1/2" 2-1/2" 1/4" 1-1/4" 2-1/4" 1/4" 1/2" 3/4" 1" 3/4" Custom Panel (Nominal Size) Fresh Food Door Backer Panel - GE PSB48YSXSS | Use and Care Manual - Page 19
Installation Instructions Refrigerator Case Trim 23-7/8" From Rear of Refrigerator 1/4" 1/2" 3/4" 1" 1-1/4" 1-1/2" Top View 90° Door Swing (optional setting) Scale 1:1 Fresh Food Door Backer Panel 1/4" 1/2" 3/4" 1" 3/4" Custom Panel (Nominal Size) 19 - GE PSB48YSXSS | Use and Care Manual - Page 20
Installation Instructions CUSTOMIZATION BASICS: Stainless Steel Wrapped Models 42″ wide model-PSB42YS 48″ wide model-PSB48YS Stainless Steel wrapped refrigerators have wrapped doors and grille panels, and beveled edges. These models are shipped ready for installation. Trimmed Models 42″ wide models - GE PSB48YSXSS | Use and Care Manual - Page 21
E D Front Panel Dimensions (in inches) A B C 42″ Models 39-15/16 10-3/4 67-7/8 48″ Models 45-31/32 10-3/4 67-7/8 D 22-11/32 26-15/32 E 16-7/16 18-15/32 F 35-5/32 35-5/32 G 17-13/16 17-13/16 IMPORTANT NOTE: Dispenser Trim The refrigerator is supplied with factory installed dispenser trim - GE PSB48YSXSS | Use and Care Manual - Page 22
Installation Instructions 3/4″ FRAMED CUSTOM PANEL OPTION For a more custom appearance, 3/4″ framed custom panels may be installed on trimmed models .750 = 1.100 Maximum Total Panel Thickness IMPORTANT NOTE: Maximum total weight is 70 pounds for any assembled Fresh Food panel, 45 pounds total for - GE PSB48YSXSS | Use and Care Manual - Page 23
Installation Instructions 3/4″ FRAMED CUSTOM WOOD PANELS WITH PRE-INSTALLED HANDLES Secured to a 1/4″ finished backer panel. Optimal Handle Clearance 1/4" Max. 3-1/8" Min. 2-1/2" B 42″ Models 1/4″ Backer Panel 3/4″ Overlay Panel 48″ Models 1/4″ Backer Panel 3/4″ Overlay Panel A 22-5/16″ 18-13/ - GE PSB48YSXSS | Use and Care Manual - Page 24
Installation Instructions 3/4″ FRAMED CUSTOM WOOD PANELS WITH PRE-INSTALLED HANDLES Secured to a 1/4″ finished backer panel. This design provides a framed appearance. Grille Panel 1" Thick Max. or 3/4" Plus 1/4" 1/4" Backer 1/4" 42″ Models A B 1/4″ Backer Panel 39-15/16″ 10-3/4″ 5/16" B - GE PSB48YSXSS | Use and Care Manual - Page 25
Installation Instructions 3/4″ FULL-WIDTH OVERLAY CUSTOM PANELS WITH PRE-INSTALLED HANDLES This panel design provides a nearly trimless appearance. Fresh Food Panel 3-5/8" Assemble the spacer panel onto the finished backer panel. Allow 1/2″ clearance on the top, bottom and hinge side. Allow - GE PSB48YSXSS | Use and Care Manual - Page 26
Installation Instructions 3/4″ FULL-WIDTH OVERLAY CUSTOM PANELS WITH PRE-INSTALLED HANDLES This panel design provides a nearly trimless appearance. Assemble the spacer panel onto the backer panel. Allow 1/2″ clearance on all four sides -11/16″ 34-15/16″ 48″ Models 1/4″ Backer Panel 0.10″ Spacer - GE PSB48YSXSS | Use and Care Manual - Page 27
Installation Instructions 3/4″ FRAMED CUSTOM WOOD PANELS WITH CUSTOM HANDLES Secured to a 1/4″ finished backer panel. This design provides a framed appearance. Fresh Food Panel 42″ Models 1/4″ Backer Panel 3/4″ Overlay Panel 48″ Models 1/4″ Backer Panel 3/4″ Overlay Panel A 22-5/16″ 21-15/16″ A 26 - GE PSB48YSXSS | Use and Care Manual - Page 28
Installation Instructions 3/4″ FRAMED CUSTOM WOOD PANELS WITH CUSTOM HANDLES Secured to a 1/4″ finished backer panel. This design provides a framed appearance. Grille Panel 42″ Models 1/4″ Backer Panel 3/4″ Overlay Panel A 39-15/16″ 39-7/16″ B 10-3/4″ 10-1/8″ 48″ Models 1/4″ Backer Panel 3/4″ - GE PSB48YSXSS | Use and Care Manual - Page 29
Installation Instructions 3/4″ FULL-WIDTH OVERLAY CUSTOM PANELS WITH CUSTOM HANDLES This panel design provides a nearly trimless appearance. Fresh Food Panel Assemble the spacer panel onto the finished backer panel. Allow 1/2″ clearance on all sides. Secure the panels with glue. Be sure to observe - GE PSB48YSXSS | Use and Care Manual - Page 30
Installation Instructions 3/4″ FULL-WIDTH OVERLAY CUSTOM PANELS WITH CUSTOM HANDLES This panel design provides a nearly trimless appearance. Assemble the spacer panel onto the backer panel. Allow 1/2″ clearance on all four sides 33-11/16″ 34-15/16″ 48″ Models 1/4″ Backer Panel 0.10″ Spacer Panel - GE PSB48YSXSS | Use and Care Manual - Page 31
Installation Instructions SIDE PANELS Side panels (not supplied) must be used whenever the sides of the refrigerator will be exposed. The 1/4″ side panels will slip into the side case trim. Order side panels from your cabinet manufacturer. * Depending on installation of electric shock hazard - GE PSB48YSXSS | Use and Care Manual - Page 32
Installation Instructions 1 REMOVE PACKAGING CAUTION: Refrigerator is Top-Heavy-be careful when moving. When using an appliance dolly, handle from Freezer side only. • Carefully cut banding at the top and bottom; remove outer carton. • Slide out rear corner posts (2). • Slide carton off top of - GE PSB48YSXSS | Use and Care Manual - Page 33
Installation Instructions 2 INSTALL WATER LINE • A cold water supply is required for automatic icemaker operation. The water pressure must be between 40 and 120 psi. • Route 1/4″ O.D. copper tubing or GE SmartConnect™ tubing between cold water line and the water connection location. • Tubing should - GE PSB48YSXSS | Use and Care Manual - Page 34
the refrigerator's filter bypass plug. Using the refrigerator's water filtration cartridge with the RO filter can result in hollow ice cubes. Master Power Switch Water Filter 4A ALTERNATE ANTI-TIP PRECAUTIONS SKIP THIS STEP WHEN USING ANTI-TIP BRACKETS All GE Profile™ built-in refrigerators are - GE PSB48YSXSS | Use and Care Manual - Page 35
Installation Instructions 5 CONNECT POWER • Connect refrigerator power cord plug to a properly grounded receptacle. Set the Master Power switch to the I (ON) position. Raise Grille Panel Master Power Switch Water Filter • Check to make sure power to refrigerator is on by opening refrigerator - GE PSB48YSXSS | Use and Care Manual - Page 36
Installation Instructions 8 SECURE REFRIGERATOR TO CABINETS Whenever possible, perform this step for anti-tip security. The refrigerator must be procedure on the opposite side. Raise Grille Panel to Stop Position Drive Screws Through Case Trim Into Adjacent Cabinets 10 INSTALL GRILLE PANEL • Raise - GE PSB48YSXSS | Use and Care Manual - Page 37
Installation Instructions 11 INSTALL DOOR PANELS WITH PRE-INSTALLED HANDLES Handle Fresh Food Refrigerator Door 3/4" Custom Panel if Required Install • 3/4″ Custom Decorative Panels If you choose to install custom wood panels, they must be cut to dimensions shown on pages 23-30. The panels will - GE PSB48YSXSS | Use and Care Manual - Page 38
Installation Instructions 11A INSTALL DOOR PANELS Handle Fresh Food Refrigerator Door 3/4" Custom Panel if Required Install 1/4″ Decorative Panels: • Remove Pre-Installed Custom Decorative Panels If you choose to install custom wood panels, they must be cut to dimensions shown on pages 23-30. The - GE PSB48YSXSS | Use and Care Manual - Page 39
Installation Instructions 12 CONNECT WATER SUPPLY Check to make sure that Master Power switch is in the O (OFF) position. Refrigerator Water Supply House Water Supply • Locate and bring GE SmartConnect™ tubing to the front of the cabinet. • Turn the water on to flush debris from line. Run about - GE PSB48YSXSS | Use and Care Manual - Page 40
Installation Instructions 14 START ICEMAKER Power Switch 16 DOOR ALIGNMENT • Stand back from the refrigerator to inspect the door alignment. • Shipping or the addition of heavy door panels may have align the doors and, if required, raise the left leveling leg to level the unit side to side. 40 - GE PSB48YSXSS | Use and Care Manual - Page 41
I hear? These sounds are normal. ge.com HUMMM... WHOOSH... s The new high efficiency compressor may run faster and longer than your old refrigerator and you may hear a high-pitched About the ice and water dispenser sections. Installation Instructions Troubleshooting Tips Consumer Support 41 - GE PSB48YSXSS | Use and Care Manual - Page 42
Operating Instructions Safety Instructions Troubleshooting tips... Troubleshooting Tips Save time and money! Review the charts on the following pages first and you may not need to call for service. Installation Instructions Problem Refrigerator does not operate Vibration or rattling (slight - GE PSB48YSXSS | Use and Care Manual - Page 43
in reservoir is frozen. • Call for service. Refrigerator control setting is too cold. • Set to a warmer setting. Supply line or shutoff valve is clogged. • Call a plumber. Water filter clogged. • Replace filter cartridge or remove filter and install plug. Dispenser is LOCKED. • Press and - GE PSB48YSXSS | Use and Care Manual - Page 44
Allow 24 hours for system to stabilize. • Allow 24 hours for system to stabilize. Warm food added to refrigerator. • Allow 24 hours for system to stabilize. Defrost cycle is in process. • Allow 24 hours for system to stabilize. Installation Instructions Consumer Support Troubleshooting Tips 44 - GE PSB48YSXSS | Use and Care Manual - Page 45
refrigerator is warranted to be free of defects in material and workmanship. What is covered How Long Warranted (From Date of Sale) Parts Repair or Replace at Mabe's Option Labour Compressor GE Profile™: Ten (10) Years GE Profile: Ten (10) Years GE Profile: Five (5) Years GE and All Other GE - GE PSB48YSXSS | Use and Care Manual - Page 46
of the refrigerator Any part of the water filter cartridge which fails due to a defect in materials or workmanship. During this limited thirty-day warranty, GE will also provide, free of charge, a replacement water filter cartridge. GE PROFILE MODELS ONLY: Five Years (GE Profile models only) From - GE PSB48YSXSS | Use and Care Manual - Page 47
Installation instructions, parts and service availability, and standard warranty are included with the product when shipped. This drinking water system must be maintained according to manufacturer's instructions, including replacement of filter for: General Electric Company, Louisville, KY - GE PSB48YSXSS | Use and Care Manual - Page 48
Department of Health Services Water Treatment Device Certificate Number 00 - 1434 Date Issued: May 30, 2000 Date Revised: February 9, 2001 GE Smart Water Filtration Systems - GWF06 GE Smart Water Filtration Systems - GWF Hotpoint Refrigerator Systems - HWF General Electric Appliances GWF06 GWF - GE PSB48YSXSS | Use and Care Manual - Page 49
to provide you with excellent service in a professional and timely manner. Place your confidence in GE and call us in the U.S. toll-free at 1.800.626.2224 for more information. *Most brands covered up to 15 years old in the continental U.S. SPP is a trademark of General Electric Company. ✁ Cut here - GE PSB48YSXSS | Use and Care Manual - Page 50
yt ! Model Number Serial Number First Name Mr. s Ms. s Mrs. s Miss s Street Address Last Name Apt. # City Date Placed In Use Month E-mail Address* State Zip Code Day Year Phone _ _ Number GE Consumer & Industrial Appliances General Electric Company Louisville, KY 40225 ge.com - GE PSB48YSXSS | Use and Care Manual - Page 51
paniers 58 Machine à glaçons automatique 59 Remplacement des ampoules 63 Instructions d'installation 64-89 Alimentation d'eau 88 Conduite d'eau 82, 83 Dimensions des panneaux 70-79 Dimensions et espaces libres 66 Espace pour l'installation 66 Mise à niveau 84 Panneaux des portes et de la - GE PSB48YSXSS | Use and Care Manual - Page 52
les suivantes. s Installez le réfrigérateur conformément aux directives d'installation avant de l'utiliser. s Ne laissez pas les enfants grimper, s'asseoir CONVENABLEMENT DE VOTRE ANCIEN RÉFRIGÉRATEUR Les enfants pris au piège ou morts d'asphyxie sont toujours d'actualité. Les réfrigérateurs - GE PSB48YSXSS | Use and Care Manual - Page 53
type standard à 2 alveoles. N'utilisez jamais de rallonge électrique pour cet appareil électroménager. VEUILLEZ LIRE ET SUIVRE ATTENTIVEMENT CES MESURES DE SÉCURITÉ. CONSERVEZ CES DIRECTIVES Installation Conseils de dépannage Soutien au consommateur 53 - GE PSB48YSXSS | Use and Care Manual - Page 54
réfrigérateur est expédié avec une pellicule de protection couvrant les commandes de température. Si cette pellicule n'a pas été retirée au cours de l'installation faites-le maintenant. Pour changer la température, appuyez et relâchez le bouton WARMER ou COLDER (Plus chaud ou Plus froid). SET (régl - GE PSB48YSXSS | Use and Care Manual - Page 55
support de cartouche. Placez le haut de la nouvelle cartouche à l'intérieur du support FILTER (re-réglage du filtre) sur le distributeur pendant 3 secondes. NOTE : Une cartouche de remplacement qui vient d'être install à l'adresse ge.com, ou appelez le Service des pièces et accessoires GE au 800.626 - GE PSB48YSXSS | Use and Care Manual - Page 56
l'avant de la clayette jusqu'à ce qu'elle se fixe en place. Prenez soin de pousser la clayette jusqu'au fond pour refermer la porte. Installation Conseils de dépannage Soutien au consommateur 56 - GE PSB48YSXSS | Use and Care Manual - Page 57
tourné la clé une ou deux fois, ouvrez et fermez la porte du compartiment réfrigérateur et vérifiez l'alignement des portes à la partie supérieure. Installation Conseils de dépannage Soutien au consommateur 57 - GE PSB48YSXSS | Use and Care Manual - Page 58
disponibles sur tous les modèles. Tiroirs à fruits et légumes Si une quantité d'eau excessive s'accumule dans le fond des tiroirs, essuyez-les. Installation Conseils de dépannage Tiroirs avec humidité variable Réglez la commande à HI pour que le tiroir conserve un degré d'humidité élevé pour la - GE PSB48YSXSS | Use and Care Manual - Page 59
glaçons et la machine à glaçons automatique. electromenagersge.ca Il faut prévoir entre 12 et 24 heures avant qu'un réfrigérateur nouvellement installé commence à produire des glaçons. Porte d'accès Bac à glaçons Faites tourner Le mécanisme de mise en place Bac à glaçons Pour enlever : Soulevez - GE PSB48YSXSS | Use and Care Manual - Page 60
(glaçons), CRUSHED (glace concassée) ou WATER (eau). Appuyez doucement le verre contre le milieu d'eau distribuée lorsque le réfrigérateur est initialement installé, il y a peut-être de l'air dans la . Cela augmente la production de glace pendant les 48 heures suivantes ou jusqu'à ce que vous appuyez - GE PSB48YSXSS | Use and Care Manual - Page 61
N'essuyez pas le réfrigérateur avec un linge à vaisselle sale ou une serviette humide : ils pourraient laisser un résidu adressant au Service de pièces et accessoires GE par téléphone au numéro 800.626.2002 ou à notre site Web, ge.com. Installation Conseils de dépannage Soutien au consommateur 61 - GE PSB48YSXSS | Use and Care Manual - Page 62
Mesures de sécurité Entretien et nettoyage du réfrigérateur. Départ en vacances Lorsque vous vous absentez pendant une période prolongée, videz LE RÉFRIGÉRATEUR À VOTRE MAISON ET IL FAUT 2 PERSONNES POUR BIEN L'INSTALLER. Assurez-vous que le réfrigérateur demeure debout pendant son déménagement - GE PSB48YSXSS | Use and Care Manual - Page 63
des ampoules. electromenagersge.ca Lorsque vous réglez les commandes sur OFF (Arrêt), l'alimentation électrique de l'ampoule n'est pas coupée. Installation (l'apparence peuvent varier) Compartiment réfrigérateur-lampe supérieure Soulevez le panneau de la grille, mettez l'interrupteur général - GE PSB48YSXSS | Use and Care Manual - Page 64
LA MAISON ET 2 PERSONNES POUR FAIRE L'INSTALLATION. AVERTISSEMENT : • Ces réfrigérateurs GE Profile™ au Canada, appelez 1.800.561.3344. Pour obtenir des pièces de rechange et des accessoires GE Profile, appelez 1.800.626.2002. www.electromenagersge.ca À LIRE ATTENTIVEMENT. CONSERVEZ CES INSTRUCTIONS - GE PSB48YSXSS | Use and Care Manual - Page 65
de 1/4 po de diamètre externe pour la conduite d'eau, ou kit de tube pour réfrigérateur GE SmartConnect™ • Robinet d'arrêt d'eau • Panneaux personnalisés pour les portes et grille (en cas d'installation de panneaux personnalisés) • Bande adhésive spéciale 3M Dual Lock pour les panneaux latéraux de - GE PSB48YSXSS | Use and Care Manual - Page 66
(48 GE SmartConnect™, entre la conduite d'eau froide et l'emplacement du branchement d'eau. La conduite doit être suffisamment longue pour s'étendre jusqu'à l'avant du réfrigérateur. Il est recommandé d'installer un robinet de coupure sur la conduite d'eau dans un endroit d'accès facile. DIMENSIONS - GE PSB48YSXSS | Use and Care Manual - Page 67
Instructions d'installation Réfrigérateur 606 mm (23-7/8 po) de l'arrière du réfrigérateur Moulure 25 mm (1 po) de cuve 19 mm (3/4 po) 13 mm (1/2 po) 51 - GE PSB48YSXSS | Use and Care Manual - Page 68
Instructions d'installation Réfrigérateur Moulure de cuve 606 mm (23-7/8 po) de l'arrière du réfrigérateur 6 mm (1/4 po) 13 mm (1/2 po) 19 mm (3/4 po) 25 mm (1 - GE PSB48YSXSS | Use and Care Manual - Page 69
Instructions d'installation PRINCIPES DE BASE DE LA PERSONNALISATION : Modèles recouverts d'acier inoxydable Modèle 42 po (106 cm)-PSB42YS Modèle 48 panneau d'espacement de 0,10 po (2,5 mm) doit être installé entre le panneau de support de 1/4 po (6,3 mm) et le panneau d'apparence 3/4 po (19 mm - GE PSB48YSXSS | Use and Care Manual - Page 70
Instructions d'installation DIMENSIONS DES PANNEAUX ENCADRÉS DE 6 mm (1/4 po) En cas d'installation de panneaux encadrés, ceux-ci doivent être coupés aux dimensions 273 (10-3/4) 1724 (67-7/8) 672 469 (26-15/32) (18-15/32) E D (48 po) F 893 (35-5/32) 893 (35-5/32) G 452 (17-13/16) 452 (17- - GE PSB48YSXSS | Use and Care Manual - Page 71
Instructions d'installation OPTION DE PANNEAU PERSONNALISÉ ENCADRÉ DE 19 MM Pour obtenir une apparence encore plus personnalisé, il est possible d'installer des panneaux personnalisés encadrés de 19 mm sur les modèles avec moulure. Le panneau couvrant est fixé à un panneau arrière fini de 6 mm. - GE PSB48YSXSS | Use and Care Manual - Page 72
Instructions d'installation PANNEAUX DE BOIS PERSONNALISÉS ENCADRÉS DE 19 MM À POIGNÉES PRÉ-INSTALLÉES Fixés à un panneau arrière fini de 6 mm. Cette conception donne un aspect encadré. Panneau de compartiment pour aliments frais 8 mm (5/16 po) Épaisseur - GE PSB48YSXSS | Use and Care Manual - Page 73
Instructions d'installation PANNEAUX DE BOIS PERSONNALISÉS ENCADRÉS DE 19 MM À POIGNÉES PRÉ-INSTALLÉES Fixés à un panneau arrière fini de 6 mm. Cette conception donne un aspect encadré. Panneau de grille Modèles de 1067 mm A Panneau arriè - GE PSB48YSXSS | Use and Care Manual - Page 74
Instructions d'installation PANNEAUX PERSONNALISÉS COUVRANTS PLEINE LARGEUR DE 19 MM À POIGNÉES PRÉ-INSTALLÉES Cette conception donne un aspect presque sans garniture. Panneau de compartiment pour aliments frais Assemblez le panneau d'espacement dans le panneau arrière fini. - GE PSB48YSXSS | Use and Care Manual - Page 75
Instructions d'installation PANNEAUX PERSONNALISÉS COUVRANTS PLEINE LARGEUR DE 19 MM À POIGNÉES PRÉ-INSTALLÉES Cette conception donne un aspect presque sans garniture. Assemblez le panneau d'espacement au panneau arrière. Laissez 13 mm d'espace libre des quatre côtés du - GE PSB48YSXSS | Use and Care Manual - Page 76
Instructions d'installation PANNEAUX DE BOIS PERSONNALISÉS ENCADRÉS DE 19 MM À POIGNÉES PERSONNALISÉES Fixés à un panneau arrière fini de 6 mm. Cette conception donne un aspect - GE PSB48YSXSS | Use and Care Manual - Page 77
Instructions d'installation PANNEAUX DE BOIS PERSONNALISÉS ENCADRÉS DE 19 MM À POIGNÉES PERSONNALISÉES Fixés à un panneau arrière fini de 6 mm. Cette conception donne un aspect - GE PSB48YSXSS | Use and Care Manual - Page 78
Instructions d'installation PANNEAUX PERSONNALISÉS COUVRANTS PLEINE LARGEUR DE 19 MM À POIGNÉES PERSONNALISÉES Cette conception donne un aspect presque sans garniture. Panneau de compartiment pour aliments - GE PSB48YSXSS | Use and Care Manual - Page 79
Instructions d'installation PANNEAUX PERSONNALISÉS COUVRANTS PLEINE LARGEUR DE 19 MM À POIGNÉES PERSONNALISÉES Cette conception donne un aspect presque sans garniture. Assemblez le panneau d'espacement au - GE PSB48YSXSS | Use and Care Manual - Page 80
Instructions d'installation PANNEAUX LATÉRAUX Il faut utiliser des panneaux latéraux (pas installation correcte, ce réfrigérateur doit être placé sur une surface horizontale, en matériau dur qui est au même niveau que le reste du sol. Cette surface doit être suffisamment solide pour supporter - GE PSB48YSXSS | Use and Care Manual - Page 81
Instructions d'installation 1 ENLÈVEMENT DE L'EMBALLAGE MISE EN GARDE : Le réfrigérateur est . • Enlevez la plinthe collée sur le haut de l'appareil. • Mettez la plinthe de côté en attendant l'installation finale. MISE EN GARDE : IL NE FAUT PAS ESSAYER DE ROULER OU TRAÎNER L'APPAREIL AVANT QU'IL NE - GE PSB48YSXSS | Use and Care Manual - Page 82
Instructions d'installation 2 INSTALLATION DE LA CONDUITE D'EAU • Il faut avoir une alimentation d' émité du tube et le branchez sur le robinet de coupure. Sol Tube en cuivre, ou tube GE SmartConnect™ Robinet de type à étrier Écrou de presse-garniture Écrou à compression Robinet de sortie Bague - GE PSB48YSXSS | Use and Care Manual - Page 83
Instructions d'installation 2A INSTALLATION DE LA CONDUITE D'EAU AVEC UN SYSTÈME D'OSMOSE INVERSE IGNOREZ CETTE ÉTAPE QUAND LES PATTES ANTI-BASCULEMENT SONT UTILISÉES Tous les réfrigérateurs encastrés GE Profile™ sont plus lourds en haut qu'en bas. Il faut les maintenir en place pour éviter - GE PSB48YSXSS | Use and Care Manual - Page 84
Instructions d'installation 4A AUTRES PRÉCAUTIONS CONTRE LE BASCULEMENT (suite) • Utilisez un foret de 1/16 po pour percer des trous guides les modèles ont quatre points de mise à niveau. L'avant et l'arrière sont supportés par des pattes de mise à niveau. Les deux sont accessibles de l'avant du ré - GE PSB48YSXSS | Use and Care Manual - Page 85
Instructions d'installation 8 FIXATION DU RÉFRIGÉRATEUR AUX ARMOIRES Dans la mesure et dans l'armoire adjacente, en utilisant les trous fournis. • Suivez la procédure de l'autre côté. 10 INSTALLATION DU PANNEAU DE LA GRILLE • Levez le panneau de la grille à la position en butée. Levez le panneau - GE PSB48YSXSS | Use and Care Manual - Page 86
Instructions d'installation 11 INSTALLATION DES PANNEAUX DE PORTE À POIGNÉES PRÉ-INSTALLÉES Poignée Porte de réfrigérateur pour aliments frais Panneau personnalisé de 19 mm (3/4 po) si nécessaire Installation Dans le cas d'installation de panneaux en bois, les couper aux dimensions indiquées aux - GE PSB48YSXSS | Use and Care Manual - Page 87
Instructions d'installation 11A INSTALLATION DES PANNEAUX DE PORTE Installation des panneaux décoratifs de 6 mm (1/4 po) : • Dépose des poignées pré-install de 19 mm (3/4 po) Dans le cas d'installation de panneaux en bois, les couper aux dimensions indiquées aux pages 72-79. Les panneaux glissent - GE PSB48YSXSS | Use and Care Manual - Page 88
Instructions d'installation 12 BRANCHEMENT DE L'ALIMENTATION D'EAU Vérifiez que l'interrupteur principal de l'appareil et serrez l'écrou. • Ouvrez l'eau pour vérifier qu'il n'y a pas de fuite. Tube GE SmartConnect™ • Insérez l'extrémité moulée du tube dans le raccord du réfrigérateur. Serrez l'écrou - GE PSB48YSXSS | Use and Care Manual - Page 89
Instructions d'installation 14 MISE EN MARCHE DE LA MACHINE À GLAÇONS Interrupteur Bras de détection ou l'addition de panneaux de porte lourds peut avoir changé légèrement l'alignement des portes. 15 INSTALLATION DE LA PLINTHE • Trouvez la plinthe (expédiée maintenue en place avec du ruban adhésif - GE PSB48YSXSS | Use and Care Manual - Page 90
Fonctionnement Mesures de sécurité Installation Bruits normaux de fonctionnement. Les réfrigérateurs plus récents font des bruits différents de ceux des anciens. Les réfrigérateurs modernes présentent plus - GE PSB48YSXSS | Use and Care Manual - Page 91
de l'argent! Consultez d'abord les tableaux qui suivent et vous pourrez peut-être éviter de faire appel à un réparateur. electromenagersge.ca Installation Problème Le réfrigérateur ne fonctionne pas Vibration ou bruit métallique (une légère vibration est normale) Causes possibles Correctifs Le - GE PSB48YSXSS | Use and Care Manual - Page 92
la machine à glaçons est à la position d'arrêt. •Réglez l'interrupteur d'alimentation à la position de marche. L'alimentation en eau est coupée • Consultez Installation de la conduite d'eau. ou n'est pas raccordée. Le compartiment congélateur est trop chaud. • Attendez 24 heures pour que la temp - GE PSB48YSXSS | Use and Care Manual - Page 93
sur un réglage plus chaud. L'eau jaillit du distributeur La cartouche du filtre vient d'être •Faites couler l'eau du distributeur pendant 3 minutes installée. (environ 6 litres). La machine à glaçons fonctionne, mais ne distribue pas d'eau L'eau du réservoir est gelée. Le réglage de commande - GE PSB48YSXSS | Use and Care Manual - Page 94
couche de cire de paraffine sur le joint de la porte. • Remontez le contenant d'un cran. • Consultez Nivellement du réfrigérateur. • Consultez Alignement des portes. Installation Conseils de dépannage Soutien au consommateur 94 - GE PSB48YSXSS | Use and Care Manual - Page 95
GE Profile : Cinq (5) ans GE et toutes autre marques : Un (1) an Un (1) an Un (1) an Un (1) an TERMES ET CONDITIONS : La présente garantie ne s'applique qu'à l'utilisation domestique par une seule famille au Canada, lorsque le réfrigérateur a été installé conformément aux instructions service - GE PSB48YSXSS | Use and Care Manual - Page 96
GWF/HWF du système de Filtration d'eau GE SmartWater Ce système a été essayé selon trop lent. Avis spéciaux Les directives d'installation, la disponibilité de pièces et de service ainsi que la garantie standard sont expédié Fabriquée pour : General Electric Company, Louisville, KY 40225 NSF® 96 - GE PSB48YSXSS | Use and Care Manual - Page 97
Notes. 97 Mesures de sécurité Fonctionnement Installation Conseils de dépannage Soutien au consommateur - GE PSB48YSXSS | Use and Care Manual - Page 98
Notes. 98 Soutien au consommateur Conseils de dépannage Installation Fonctionnement Mesures de sécurité - GE PSB48YSXSS | Use and Care Manual - Page 99
-nous par Internet au site electromenagersge.ca 24 heures par jour, tous les jours de l'année. Service de réparations Service de réparations GE est tout près de vous. Pour faire réparer votre électroménager GE, il suffit de nous téléphoner. 1.800.561.3344 Studio de conception réaliste Sur demande - GE PSB48YSXSS | Use and Care Manual - Page 100
Support. GE Appliances Website In the U.S.: ge.com Have a question or need assistance with your appliance? Try the GE Appliances Website 24 hours a day, any day of the year! For greater convenience and faster service, you can now download Owner's Manuals, order parts or even schedule service
-
 1
1 -
 2
2 -
 3
3 -
 4
4 -
 5
5 -
 6
6 -
 7
7 -
8
-
9
-
10
-
11
-
12
-
13
-
14
-
15
-
16
-
17
-
18
-
19
-
20
-
21
-
22
-
23
-
24
-
25
-
26
-
27
-
28
-
29
-
30
-
31
-
32
-
33
-
34
-
35
-
36
-
37
-
38
-
39
-
40
-
41
-
42
-
43
-
44
-
45
-
46
-
47
-
48
-
49
-
50
-
51
-
52
-
53
-
54
-
55
-
56
-
57
-
58
-
59
-
60
-
61
-
62
-
63
-
64
-
65
-
66
-
67
-
68
-
69
-
70
-
71
-
72
-
73
-
74
-
75
-
76
-
77
-
78
-
79
-
80
-
81
-
82
-
83
-
84
-
85
-
86
-
87
-
88
-
89
-
90
-
91
-
92
-
93
-
94
-
95
-
96
-
97
-
98
-
99
-
100
 |
 |

ge.com
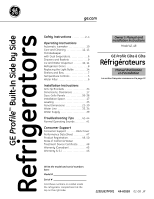
Refrigerators
GE
Profile
™
Built-In Side by Side
225D2637P001
49-60558
01-08
JR
La section française commence à la page 51
Réfrigérateurs
GE
Profile
Côte à Côte
Model 42, 48
Write the model and serial numbers
here:
Model # __________________________
Serial #
__________________________
Find these numbers on a label inside
the refrigerator compartment at the
top on the right side.
Owner’s Manual and
Installation Instructions
Manuel d’utilisation
et d’installation
Safety Instructions
. . . . . . . . . . .2–4
Operating Instructions
Automatic Icemaker . . . . . . . . . . . . . . .10
Care and Cleaning
. . . . . . . . . . . . .12, 13
ClimateKeeper
with Dual Evaporators . . . . . . . . . . . . . . .6
Drawers and Baskets
. . . . . . . . . . . . . . .9
Ice and Water Dispenser
. . . . . . .10, 11
Refrigerator Doors . . . . . . . . . . . . . . . . . .8
Replacing the Light Bulbs
. . . . . . . . . .14
Shelves and Bins . . . . . . . . . . . . . . . . . . . .7
Temperature Controls . . . . . . . . . . . . . . .5
Water Filter . . . . . . . . . . . . . . . . . . . . . . . . .6
Installation Instructions
Anti-Tip Brackets
. . . . . . . . . . . . . . . . . .34
Dimensions, Clearances . . . . . . . . . . . .17
Door, Grille Panels . . . . . . . . . . . . . .36–38
Installation Space . . . . . . . . . . . . . . . . . .17
Leveling . . . . . . . . . . . . . . . . . . . . . . . . . . .35
Panel Dimensions . . . . . . . . . . . . . .21–30
Water Line . . . . . . . . . . . . . . . . . . . . .33, 34
Water Supply . . . . . . . . . . . . . . . . . . . . . .39
Troubleshooting Tips
. . . . . .42–44
Normal Operating Sounds . . . . . . . . . .41
Consumer Support
Consumer Support . . . . . . . .Back Cover
Performance Data Sheet . . . . . . . . . . .47
Product Registration . . . . . . . . . . . .49, 50
State of California Water
Treatment Device Certificate . . . . . . .48
Warranty (Canadian) . . . . . . . . . . . . . . .45
Warranty (U.S.)
. . . . . . . . . . . . . . . . . . . .46