GE PSB48YSXSS Use and Care Manual - Page 36
Door, Grille Panels, The refrigerator must be secured to prevent, tipping.
 |
UPC - 084691175933
View all GE PSB48YSXSS manuals
Add to My Manuals
Save this manual to your list of manuals |
Page 36 highlights
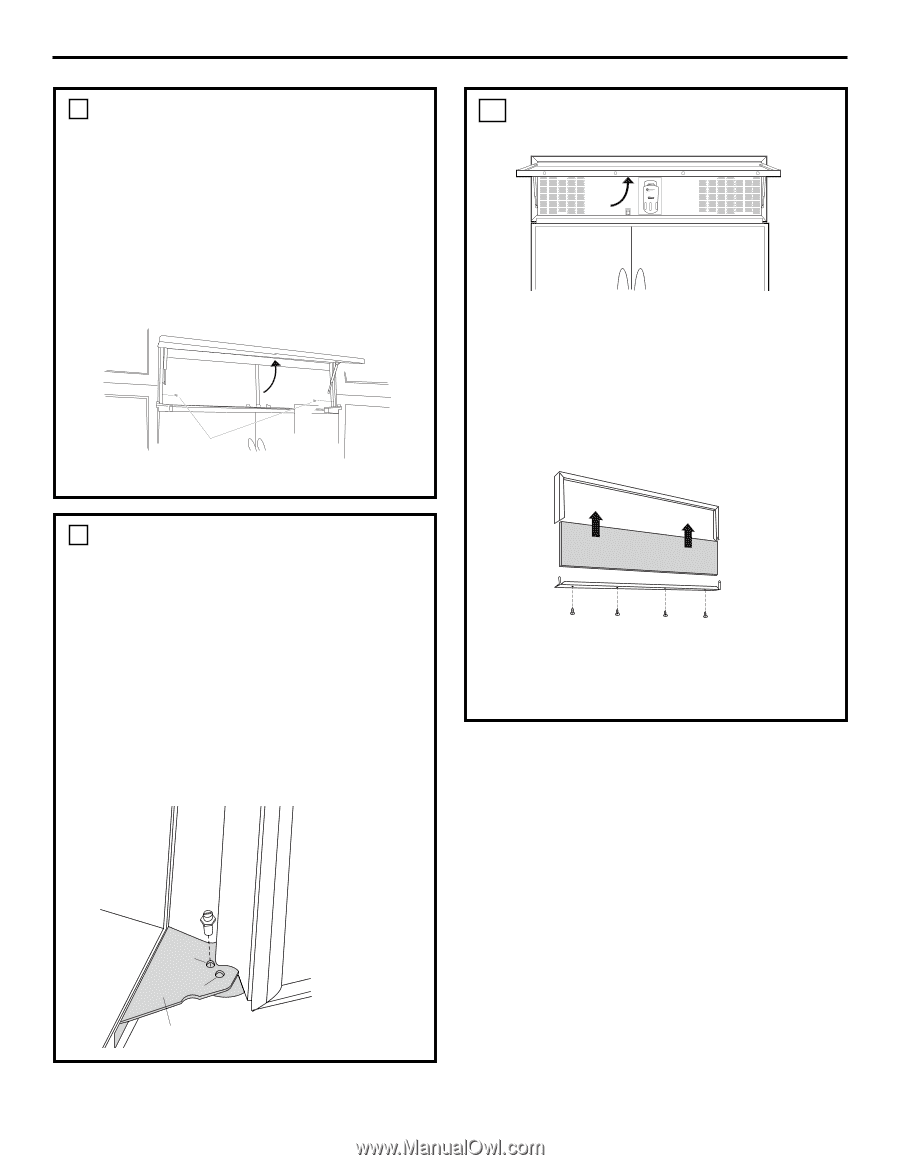
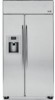
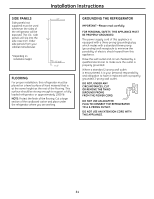
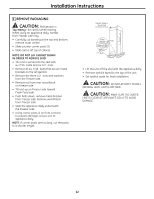
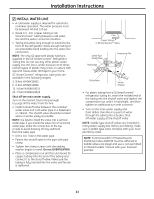
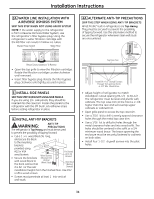
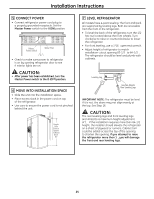
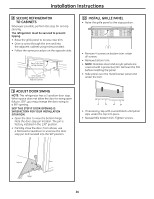
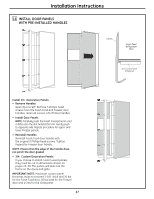
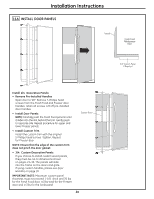
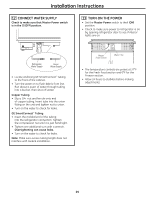
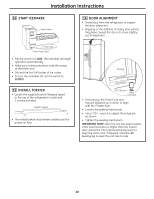
Installation Instructions 8 SECURE REFRIGERATOR TO CABINETS Whenever possible, perform this step for anti-tip security. The refrigerator must be secured to prevent tipping. • Raise the grille panel to access case trim. • Drive a screw through the trim and into the adjacent cabinet using holes provided. • Follow the same procedure on the opposite side. Raise Grille Panel to Stop Position Drive Screws Through Case Trim Into Adjacent Cabinets 10 INSTALL GRILLE PANEL • Raise the grille panel to the stop position. Raise Grille Panel • Remove 4 screws on bottom trim; retain all screws. • Remove bottom trim. • NOTE: Stainless steel and acrylic panels are covered with a protective film. Remove the film before installing the panel. • Slide panel over the metal backer panel and under the trim. 9 ADJUST DOOR SWING NOTE: This refrigerator has a 2-position door stop. When space does not allow the door to swing open fully to 130°, you may change the door swing to a 90° opening. SKIP THIS STEP IF DOOR OPENING IS SATISFACTORY FOR YOUR INSTALLATION SITUATION. • Open the door to view the bottom hinge. Note the door stop pin location. The pin is factory installed in the 130° position. • Partially close the door. From above, use a flat-head screwdriver to unscrew the door stop pin and reinstall into the 90° position. • If necessary, tap with a wood block until panel slips under the top trim piece. • Reassemble bottom trim. Tighten screws. Interior 90° Door 130° Hinge 36
-
 1
1 -
2
-
3
-
4
-
5
-
6
-
7
-
8
-
9
-
10
-
11
-
12
-
13
-
14
-
15
-
16
-
17
-
18
-
19
-
20
-
21
-
22
-
23
-
24
-
25
-
26
-
27
-
28
-
29
-
30
-
 31
31 -
 32
32 -
 33
33 -
 34
34 -
 35
35 -
 36
36 -
 37
37 -
 38
38 -
 39
39 -
 40
40 -
 41
41 -
42
-
43
-
44
-
45
-
46
-
47
-
48
-
49
-
50
-
51
-
52
-
53
-
54
-
55
-
56
-
57
-
58
-
59
-
60
-
61
-
62
-
63
-
64
-
65
-
66
-
67
-
68
-
69
-
70
-
71
-
72
-
73
-
74
-
75
-
76
-
77
-
78
-
79
-
80
-
81
-
82
-
83
-
84
-
85
-
86
-
87
-
88
-
89
-
90
-
91
-
92
-
93
-
94
-
95
-
96
-
97
-
98
-
99
-
100
 |
 |