Gigabyte GA-8I945PL-G Manual - Page 6
Auto Configuration, Setup Array Type - drive
 |
View all Gigabyte GA-8I945PL-G manuals
Add to My Manuals
Save this manual to your list of manuals |
Page 6 highlights
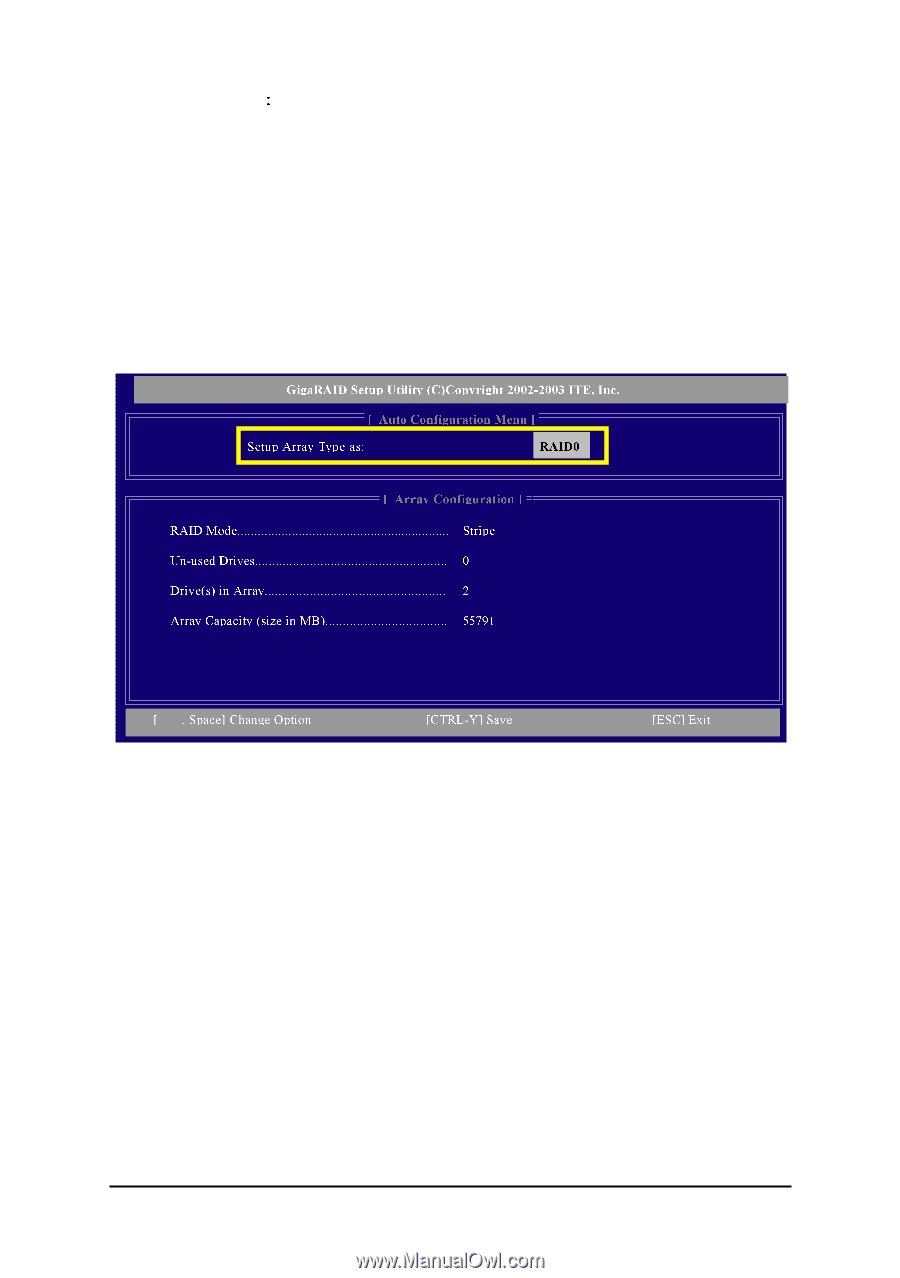
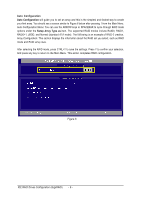
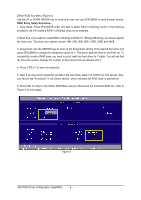
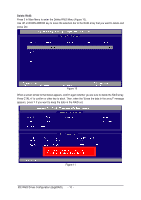
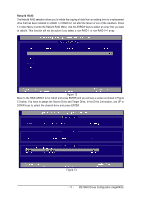
Ác Auto Configuration Åé Auto Configuration will guide you to set an array and this is the simplest and fastest way to create your first array. You should see a screen similar to Figure 6 below after pressing 1 from the Main Menu. ¤¤ Auto Configuration Menu: You can use the ARROW keys or SPACEBAR to cycle through RAID mode options under the Setup Array Type as item. The supported RAID modes include RAID0, RAID1, ¤å RAID0+1, JBOD, and Normal (standard ATA mode). The folllowing is an example of RAID 0 creation. Array Configuration: This section displays the information about the RAID set you select, such as RAID mode and RAID array size. After selecting the RAID mode, press CTRL+Y to save the settings. Press Y to confirm your selection. And press any key to return to the Main Menu. This action completes RAID configuration. 6 Figure 6 IDE RAID Drives Configuration (GigaRAID) - 6 -
-
 1
1 -
 2
2 -
 3
3 -
 4
4 -
 5
5 -
 6
6 -
 7
7 -
 8
8 -
 9
9 -
 10
10 -
 11
11 -
 12
12 -
13
-
14
-
15
-
16
-
17
-
18
 |
 |