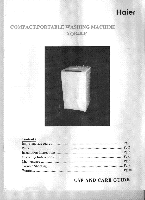
Haier XQB40-F Use and Care Guide - Page 5
connections
 |
View all Haier XQB40-F manuals
Add to My Manuals
Save this manual to your list of manuals |
Page 5 highlights
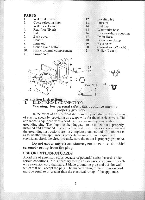
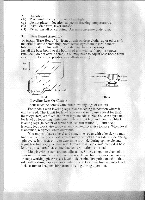
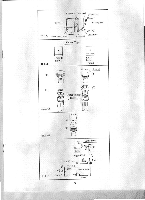
It itli Ltil'itlittilliWiLl'.4:2'it.D DIU/ 5. Drain Hose Locate drain hose clamp, squeeze clamp open and slide clamp over end of drain hose. Now push hose over drain outlet located on the side of the machine. Release tension on hose clamp to secure hose onto machine. Run the drain hose into your sink. Slide the goose neck support into position at the lip of the sink. This will hold the hose into place and limit its movement. Please note that the distance from the bottom of machine to lip of sind cannot be greater then four feet. (See illustration 3) 6. Water Supply Remove the aerator from your faucet spout and determine faucet type you have (see illustration 4). Follow one section below specific to your faucet. * For Outside Thread (see illustration 4A) (A) Make sure rubber washer is seated in silver faucet connector. (B) Screw connector on to faucet. (C) Pull down the collar on the universal joint and push universal joint onto faucet connector. Release collar. Universal joint should snap snugly into place. (D) Insert rubber washer into the other end of water supply hose and connect to the water inlet valve on top of washing machine. * For Large Inside Thread (see illustration 4B) (A) Insert large rubber washer into silver faucet connector. (B) Screw faucet connector into faucet. (C) Follow steps C and D above. Note:(1) The first time you use your machine, inspect carefully for leaks. If a leak occurs, double check your connections and if necessary, call our service hotline for assistance. (2) One end of the inlet hose is marked with red color, this end should be connected to the washing machine. 7. Mounting of castors(See ILLS) (1) Lay down the washer carefully on the,floor, To avoid any damage to surface of washer, place a soft cloth or cushion on the floor. (2) Castors are packed in the accessory bag with attachment pans. (3) FRONT Install front castors by screwing into threaded holes, tighten with castor wrench. (4) REAR Slip one end of rear castor into the slit and then secure by screw. Note: Front castor have stopper levers, be sure to lock them before using. 4
-
 1
1 -
 2
2 -
 3
3 -
 4
4 -
 5
5 -
 6
6 -
 7
7 -
 8
8 -
 9
9 -
 10
10 -
 11
11
 |
 |
