Harman Kardon AVR 325 Owners Manual - Page 26
Basic Operation, Source Selection, Volume Control, Surround Mode Selection
 |
View all Harman Kardon AVR 325 manuals
Add to My Manuals
Save this manual to your list of manuals |
Page 26 highlights
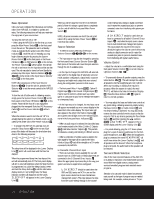
OPERATION Basic Operation Once you have completed the initial setup and configuration of the AVR 325, it is simple to operate and enjoy. The following instructions will help you maximize the enjoyment of your new receiver: Turning the AVR 325 On or Off • When using the AVR 325 for the first time, you must press the Main Power Switch 1 on the front panel to turn the unit on. This places the unit in a Standby mode, as indicated by the amber color of the Power Indicator 3. Once the unit is in Standby, you may begin a listening session by pressing the System Power Control 2 on the front panel, or the Power On Button d or AVR Selector f on the remote. The Power Indicator 3 will turn green. This will turn the unit on and return it to the input source that was last used. The unit may also be turned on from Standby by pressing any of the Input Selector Buttons eg ç∂ on the remote or the Input Source Selector Button % on the front panel. NOTE: After pressing one of the Input Selector Buttons eg to turn the unit on, press the AVR Selector f to set the remote control to the AVR 325 functions. To turn the unit off at the end of a listening session, simply press the System Power Control 2 on the front panel or the Power Off Button aå on the remote. Power will be shut off to any equipment plugged into the rear-panel Switched AC Accessory Outlet ⁄ and the Power Indicator 3 will turn amber. When the remote is used to turn the unit "off" it is actually placing the system in a Standby mode, as indicated by the amber color of the Power Indicator 3. • To program the AVR 325 for automatic turn-off, press the Sleep Button j on the remote. Each press of the button will decrease the time before shutdown in the following sequence: 90 80 70 60 50 min min min min min 40 min 30 min 20 min 10 min OFF The sleep time will be displayed in the Lower Display Line B and it will count down until the time has elapsed. When the programmed sleep time has elapsed, the unit will automatically turn off. The front-panel display will dim to one-half brightness when the Sleep function is programmed. To cancel the Sleep function, press and hold the Sleep Buttonj until the information display returns to normal brightness; the Sleep indicator numbers will disappear and the words SLEEP OFF will appear in the Lower Display Line B. When you will be away from home for an extended period of time it is always a good idea to completely turn the unit off with the front-panel Main Power Switch 1. NOTE: All preset memories are lost if the unit is left turned off by using the Main Power Switch 1 for more than two weeks. Source Selection • To select a source, press any of the Input Selector Buttons egç∂ on the remote. • The input source may also be changed by pressing the front-panel Input Source Selector Button %. Each press of the button will move the input selection through the list of available inputs. • As the input is changed, the AVR 325 will automatically switch to the digital input (if selected), surround mode, speaker configuration, output levels, crossover frequency and night mode status that were entered during the configuration process for that source. • The front-panel Video 4 Inputs (Ó, Optical 3 Digital Input & or the Coaxial 3 Digital Input * may be used to connect a device such as a video game or camcorder to your home entertainment system on a temporary basis. • As the input source is changed, the new input name will appear momentarily as an on-screen display in the lower third of the video display. The input name will also appear in the Main Information Display ˜ and a green LED will light next to the selected input's name in the front-panel Input Indicators ˆ. • When an audio source is selected, the last video input used remains routed to the Video 1/Video 2 Outputs ‡· and Video Monitor Outputs ›. This permits simultaneous viewing and listening to different sources. • When a composite or S-Video source is selected, the video signal for that input will be routed to the Video Monitor Output › and will be viewable on a TV monitor connected to the AVR 325. 6-Channel/8-Channel Direct Input • There are two input choices available for use with sources such as a DVD-Audio or SACD player that are connected to the 8-Channel Direct Inputs 40 . Select the appropriate input according to the way your system and source equipment is configured: ■ 6 CH DIRECT should be used when the SBR and SBL inputs are NOT in use and the input source device has its own internal bass management system. This input passes the input from the source directly through to the volume control without any analog to digital conversion and it mutes the unused input jacks to prevent unwanted noise from interfering with system performance. ■ 8 CH DIRECT should be used when an input is connected to all eight 8-Channel Direct Inputs 40 and when the input source device has its own internal bass management system. This input passes the input from the source directly through to the volume control without any analog-to-digital conversion and it mutes the unused input jacks to prevent unwanted noise from interfering with system performance. Volume Control • Adjust the volume to a comfortable level using the front-panel Volume Control ı or remote Volume Up/Down Buttons 40 . • To temporarily silence all speaker outputs, press the Mute Button 43 K . This will interrupt the output to all speakers and the headphone jack, but it will not affect any recording or dubbing that may be in progress. When the system is muted, the word MUTE will flash in the Main Information Display ˜. Press the Mute Buttons 43 K again to return to normal operation. • You may adjust the bass and treble tone controls at any point during a listening session by simply turning the Bass Control Ô or Treble Control Ò until the desired setting is achieved. You may also totally remove the tone controls from the circuit so that the output is "flat" at any time by pressing the Tone Mode Button 5 and then pressing the ‹/› Buttons )# so that TONE OFF appears in the onscreen display and the Lower Display Line B . • For private listening, plug the 1/4" stereo phone plug from a pair of stereo headphones into the frontpanel Headphone Jack 4. When the headphone's plug is connected, the word HEADPHONE will scroll once across the Lower Display Line B and all speakers will be silenced. When the headphone plug is removed, the audio feed to the speakers will be restored. Surround Mode Selection One of the most important features of the AVR 325 is its ability to reproduce a full multichannel surround sound field from digital sources, analog matrix surround-encoded programs and standard stereo programs. Selection of a surround mode is based on personal taste, as well as the type of program source material being used. For example, motion pictures or TV pro- 26 OPERATION
-
 1
1 -
2
-
3
-
4
-
5
-
6
-
7
-
8
-
9
-
10
-
11
-
12
-
13
-
14
-
15
-
16
-
17
-
18
-
19
-
20
-
 21
21 -
 22
22 -
 23
23 -
 24
24 -
 25
25 -
 26
26 -
 27
27 -
 28
28 -
 29
29 -
 30
30 -
 31
31 -
32
-
33
-
34
-
35
-
36
-
37
-
38
-
39
-
40
-
41
-
42
-
43
-
44
-
45
-
46
-
47
-
48
-
49
-
50
-
51
-
52
-
53
-
54
-
55
-
56
 |
 |