Harman Kardon CD191 Owners Manual - Page 10
Troubleshooting, Checklist
 |
View all Harman Kardon CD191 manuals
Add to My Manuals
Save this manual to your list of manuals |
Page 10 highlights
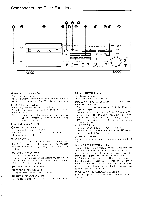
Troubleshooting Checklist Most of the problems are due to incorrect operation of this unit. If this unit does not operate as you intended, first check the items in the checklist. Also check other related components such as the amplifier, speakers and other electrical equipment you use with this cassette deck. Problem The tape does not run. (Playback or recording state is not provided.) No sound is heard. Recording cannot be made. Sound is distorted and has much noise. High frequency sound is not reproduced clearly. Cause •The power l ine cord is not plugged in. •The tape is at its end. •PAUSE mode is activated. •Sound is not recorded on the tape. • Incorrect operation of the amplifier. • Incorrect connection to the amplifier. •The erase-prevention tabs are removed. • Incorrect connection to the amplifier. •Distorted sound is recorded on the tape. •The tape is worn out. •A Dolby-encoded tape is reproduced with DOLBY NR switch OFF. •Tape head has gotten dirty or magnet- ized. •Tape head is dirty or magnetized. •TAPE SELECTOR is not set to the cor- rect position. •A tape not recorded with the Dolby NR system is reproduced with the DOLBY NR switch ON. •The bias fine trim is misadjusted. Remedy •Plug the power l ine cord. •Rewind the tape. •Cancel the pause mode by pressing the PLAY button. •Exchange with a recorded tape. •Turn on the power switch and tape monitor switch of the amplifier. • Reconnect this unit to the amplifier, re- ferring to page 6. •Change the tape, or cover the holes with adhesive tape. (See page 2.) •Reconnect this unit to the amplifier, referring to page 6. •Record again by setting correct recording level. (See page 8.) •Change with a new tape. •Press the DOLBY NR system button. •Clean the tape head with a cotton swab or demagnetize the tape head with a head eraser. •Clean the tape head or demagnetize it. •Set the TAPE SELECTOR according to the tape. •Turn the DOLBY NR switch OFF. •Adjust the BIAS FINE TRIM knob according to the instructions on page 8. 9
-
 1
1 -
2
-
3
-
4
-
 5
5 -
 6
6 -
 7
7 -
 8
8 -
 9
9 -
 10
10 -
 11
11
 |
 |
