Harman Kardon CD191 Owners Manual - Page 9
Recording, Level, Adjustment, Erasing, Recorded, Signals
 |
View all Harman Kardon CD191 manuals
Add to My Manuals
Save this manual to your list of manuals |
Page 9 highlights
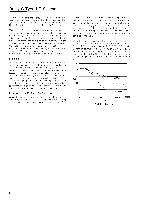
Operation Procedures Recording Level Adjustment With keeping INPUT BALANCE control at 12 o'clock position, adjust the recording level by turning the INPUT LEVEL control while observing the LED LEVEL DISPLAY. Make adjustment as described below when the sound level is relatively high. When using a metal tape 20 15 10 7 -5 -3 -1 0 +1 +3 +5 +8 Momentary i l lumination up to +5 dB is allowable. When using chrome tape 20 15 10 7 5 3 -1 0 +1 +3 +5 +8 '6 C 1 °' When using a normal tape 20 15 10 7 5 3 1 0 +1 +3 +5 +8 Adjustment of the Bias Fine Trim Knob For precise adjustment of the bias to the record head. Normally set this knob in the center (12 o'clock) position. If a recording sounds too bright, turn this knob counterclockwise and re-record the program material. If a recording sounds dull, turn this knob clockwise and re-record the program material. This feature has no effect during the playback of a tape. Erasing the Recorded Signals When a new recording is made on a recorded tape, the recorded sound on that part of the tape is automatically erased. To erase the recorded sound on the tape without recording, operate as follows: 1. Be sure that erase-prevention tabs of the cassette are not broken out. If broken, cover the holes with adhesive tape. 2. Turn the INPUT LEVEL control surely to the "0" position. 3. Press the TAPE SELECTOR button corresponding to the tape type being erased. 4. Press the RECORD and PLAY buttons at the same time. The following adjustments will cause excessive sound distortion or tape noise. •Too high an input level setting (illumination up to +8 dB). 20 15 10 7 5 3 1 0 +1 +3 +5 +8 A recording with excessive distortion will result. •Too low an input level setting (peak i l lumination of less then 0 dB). -20 -15 -10 -7 -5 -3 -1 0 +1 +3 +5 +8 A recording with excessive tape noise will result. 8
-
 1
1 -
2
-
3
-
 4
4 -
 5
5 -
 6
6 -
 7
7 -
 8
8 -
 9
9 -
 10
10 -
 11
11
 |
 |
