Hayward SharkVAC XL Model: SharkVac XL - Page 12
Fig. 7, Fig. 8
 |
View all Hayward SharkVAC XL manuals
Add to My Manuals
Save this manual to your list of manuals |
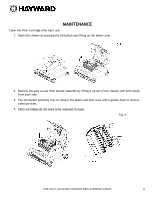
Page 12 highlights
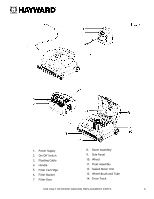
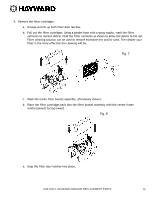
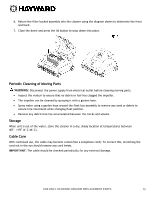
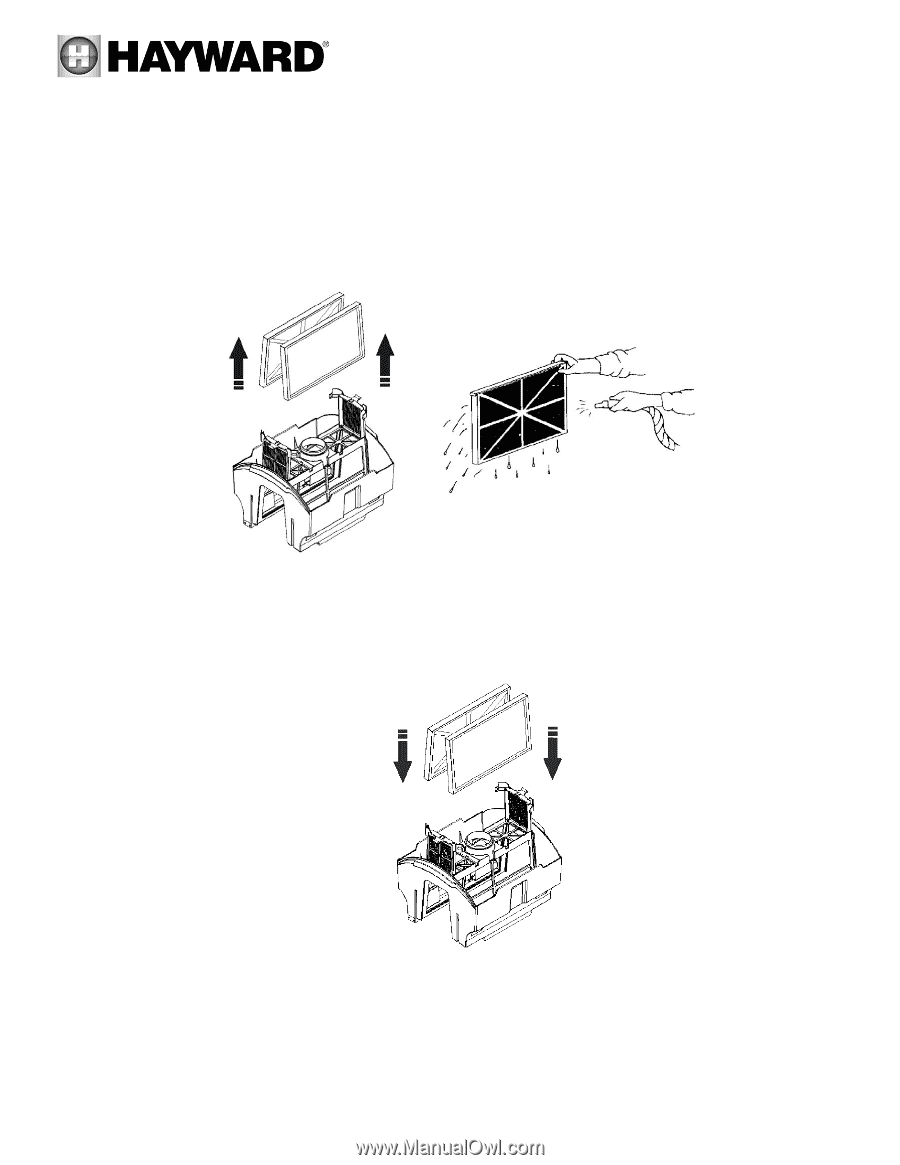
5. Remove the filter cartridges: a. Unsnap and lift up both filter door latches. b. Pull out the filter cartridges. Using a garden hose with a spray nozzle, wash the filter elements to remove debris. Hold the filter elements as shown to allow the debris to fall out. Filter cleaning solution can be used to remove excessive dirt and/or sand. The cleaner your filter is the more effective the cleaning will be. Fig. 7 c. Wash the entire filter bucket assembly. (Previously shown). d. Place the filter cartridges back into the filter bucket assembly with the center frame reinforcements facing inward. Fig. 8 e. Snap the filter door latches into place. USE ONLY HAYWARD GENUINE REPLACEMENT PARTS 12
-
 1
1 -
2
-
3
-
4
-
5
-
6
-
 7
7 -
 8
8 -
 9
9 -
 10
10 -
 11
11 -
 12
12 -
 13
13 -
 14
14 -
 15
15 -
 16
16 -
 17
17 -
18
-
19
-
20
-
21
-
22
-
23
-
24
-
25
-
26
-
27
-
28
-
29
-
30
-
31
-
32
-
33
-
34
-
35
-
36
-
37
-
38
-
39
-
40
-
41
-
42
-
43
-
44
-
45
-
46
-
47
-
48
-
49
-
50
-
51
-
52
-
53
-
54
-
55
-
56
-
57
-
58
-
59
-
60
-
61
-
62
-
63
-
64
-
65
 |
 |
12
USE ONLY HAYWARD GENUINE REPLACEMENT PARTS
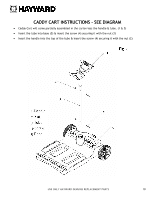
5.
Remove the filter cartridges:
a.
Unsnap and lift up both filter door latches.
b.
Pull out the filter cartridges. Using a garden hose with a spray nozzle, wash the filter
elements to remove debris. Hold the filter elements as shown to allow the debris to fall out.
Filter cleaning solution can be used to remove excessive dirt and/or sand. The cleaner your
filter is the more effective the cleaning will be.
Fig. 7
c.
Wash the entire filter bucket assembly. (Previously shown).
d.
Place the filter cartridges back into the filter bucket assembly with the center frame
reinforcements facing inward.
Fig. 8
e.
Snap the filter door latches into place.