HP 2000-bf00 HP 2000 Notebook PC Compaq Presario CQ58 Notebook PC Maintenance - Page 42
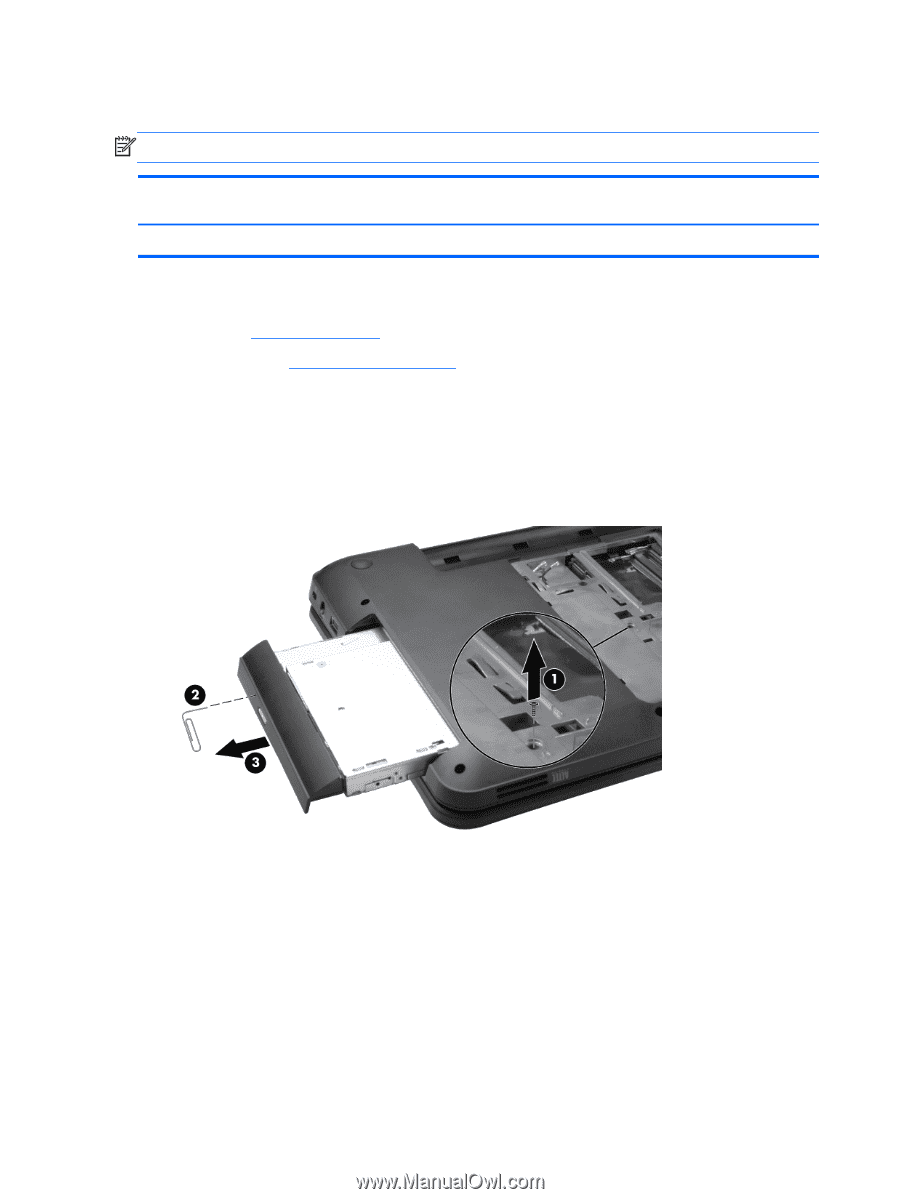
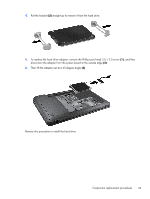
Optical drive, into the release access opening in the bezel, and then press
 |
View all HP 2000-bf00 manuals
Add to My Manuals
Save this manual to your list of manuals |
Page 42 highlights
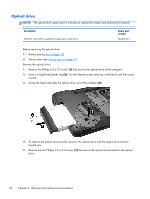
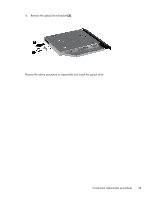
Optical drive NOTE: The optical drive spare part kit includes an optical drive bezel and optical drive bracket. Description DVD±RW and CD-RW SuperMulti Double-Layer Combo Drive Spare part number 660833-001 Before removing the optical drive: 1. Battery (see Battery on page 30) 2. Service door (see Service door on page 31) Remove the optical drive: 1. Remove the Phillips 6.0 x 2.5 screw (1) that secures the optical drive to the computer. 2. Insert a straightened paper clip (2), into the release access opening in the bezel, and then press inward. 3. Grasp the bezel and slide the optical drive out of the computer (3). 4. To replace the optical drive bracket, position the optical drive with the optical drive bracket toward you. 5. Remove the two Phillips 3.0 x 2.0 screws (1) that secure the optical drive bracket to the optical drive. 34 Chapter 4 Removal and replacement procedures
-
 1
1 -
2
-
3
-
4
-
5
-
6
-
7
-
8
-
9
-
10
-
11
-
12
-
13
-
14
-
15
-
16
-
17
-
18
-
19
-
20
-
21
-
22
-
23
-
24
-
25
-
26
-
27
-
28
-
29
-
30
-
31
-
32
-
33
-
34
-
35
-
36
-
 37
37 -
 38
38 -
 39
39 -
 40
40 -
 41
41 -
 42
42 -
 43
43 -
 44
44 -
 45
45 -
 46
46 -
 47
47 -
48
-
49
-
50
-
51
-
52
-
53
-
54
-
55
-
56
-
57
-
58
-
59
-
60
-
61
-
62
-
63
-
64
-
65
-
66
-
67
-
68
-
69
-
70
-
71
-
72
-
73
-
74
-
75
-
76
-
77
-
78
-
79
-
80
-
81
-
82
-
83
-
84
-
85
-
86
-
87
-
88
-
89
-
90
-
91
-
92
-
93
-
94
 |
 |