HP 2600 HP Business Inkjet 2600/2600dn - (English) User's Guide - Page 23
Connecting the printer using a network connection, Parallel - business inkjet software
 |
View all HP 2600 manuals
Add to My Manuals
Save this manual to your list of manuals |
Page 23 highlights
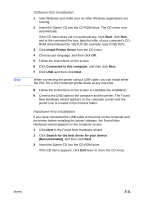
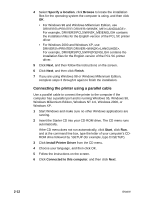
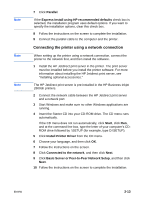
Note Note Note 7 Click Parallel. If the Express Install using HP recommended defaults check box is selected, the installation program uses default options. If you want to specify the installation options, clear this check box. 8 Follow the instructions on the screen to complete the installation. 9 Connect the parallel cable to the computer and the printer. Connecting the printer using a network connection When setting up the printer using a network connection, connect the printer to the network first, and then install the software. 1 Install the HP Jetdirect print server in the printer. The print server must be installed before you install the printer software. For more information about installing the HP Jetdirect print server, see "Installing optional accessories." The HP Jetdirect print server is pre-installed in the HP Business Inkjet 2600dn printers. 2 Connect the network cable between the HP Jetdirect print server and a network port. 3 Start Windows and make sure no other Windows applications are running. 4 Insert the Starter CD into your CD-ROM drive. The CD menu runs automatically. If the CD menu does not run automatically, click Start, click Run, and at the command line box, type the letter of your computer's CDROM drive followed by :\SETUP (for example, type D:\SETUP). 5 Click Install Printer Driver from the CD menu. 6 Choose your language, and then click OK. 7 Follow the instructions on the screen. 8 Click Connected to the network, and then click Next. 9 Click Basic Server or Peer-to-Peer Network Setup, and then click Next. 10 Follow the instructions on the screen to complete the installation. ENWW 2-13
-
 1
1 -
2
-
3
-
4
-
5
-
6
-
7
-
8
-
9
-
10
-
11
-
12
-
13
-
14
-
15
-
16
-
17
-
 18
18 -
 19
19 -
 20
20 -
 21
21 -
 22
22 -
 23
23 -
 24
24 -
 25
25 -
 26
26 -
 27
27 -
 28
28 -
29
-
30
-
31
-
32
-
33
-
34
-
35
-
36
-
37
-
38
-
39
-
40
-
41
-
42
-
43
-
44
-
45
-
46
-
47
-
48
-
49
-
50
-
51
-
52
-
53
-
54
-
55
-
56
-
57
-
58
-
59
-
60
-
61
-
62
-
63
-
64
-
65
-
66
-
67
-
68
-
69
-
70
-
71
-
72
-
73
-
74
-
75
-
76
-
77
-
78
-
79
-
80
-
81
-
82
-
83
-
84
-
85
-
86
-
87
-
88
-
89
-
90
-
91
-
92
-
93
-
94
-
95
-
96
-
97
-
98
-
99
-
100
-
101
-
102
-
103
-
104
-
105
-
106
-
107
-
108
-
109
-
110
-
111
-
112
-
113
-
114
-
115
-
116
-
117
-
118
-
119
-
120
-
121
-
122
-
123
-
124
-
125
-
126
-
127
-
128
-
129
-
130
-
131
-
132
-
133
-
134
-
135
-
136
-
137
-
138
-
139
-
140
-
141
-
142
 |
 |