HP 2605 HP Color LaserJet 2605/2605dn/2605dtn - User Guide - Page 46
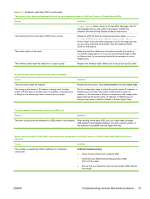
RGB Color, Edge Control, Photographs, Default sRGB, AdobeRGB, Photo Image, Device, Vivid, Maximum - color no magenta
 |
View all HP 2605 manuals
Add to My Manuals
Save this manual to your list of manuals |
Page 46 highlights
NOTE Some software programs convert text or graphics to raster images. In these cases, the Photographs settings also control text and graphics. RGB Color The RGB Color option determines how colors are rendered. ● Select Default (sRGB) for most printing needs. This setting instructs the printer to interpret RGB color as sRGB, which is the accepted standard of Microsoft and the World Wide Web Organization. ● Select AdobeRGB for documents that use the AdobeRGB color space rather than sRGB. For example, some digital cameras capture images in AdobeRGB, and documents that are produced with Adobe PhotoShop use the AdobeRGB color space. When printing from a professional software program that uses AdobeRGB, it is important that you turn off the color management in the software program and allow the printer software to manage the color space. ● Photo Image interprets the RGB color as if it were printed as a photograph using a digital minilab. It is designed to render the deeper, more saturated colors differently than Default mode. Use this setting for printing photos. ● Device sets the printer to print RGB data in raw device mode. To render photographs properly when this option is selected, you must manage color in the program in which you are working or in the operating system. ● Vivid instructs the printer to increase the color saturation in the midtones. Less colorful objects are rendered more colorfully. This value is recommended for printing business graphics. Edge Control The Edge Control setting determines how edges are rendered. Edge control has three components: adaptive halftoning, Resolution Enhancement Technology (REt), and trapping. Adaptive halftoning increases the edge sharpness. Trapping reduces the effect of incorrect color alignment by slightly overlapping the edges of adjacent objects. The color REt option smooths the edges. NOTE If you notice white gaps between objects, or if you notice areas that have a slight shadow of cyan, magenta, or yellow at the edge, choose an edge-control setting that increases the trapping level. Four levels of edge control are available: ● Maximum is the most aggressive trapping setting. Adaptive halftoning and color REt settings are on. ● Normal is the default trapping setting. Trapping is at a medium level. Adaptive halftoning and color REt settings are on. ● Light sets trapping at a minimal level. Adaptive halftoning and color REt settings are on. ● Off turns off trapping, adaptive halftoning, and color REt. 34 Chapter 3 Software for Macintosh ENWW
-
 1
1 -
2
-
3
-
4
-
5
-
6
-
7
-
8
-
9
-
10
-
11
-
12
-
13
-
14
-
15
-
16
-
17
-
18
-
19
-
20
-
21
-
22
-
23
-
24
-
25
-
26
-
27
-
28
-
29
-
30
-
31
-
32
-
33
-
34
-
35
-
36
-
37
-
38
-
39
-
40
-
 41
41 -
 42
42 -
 43
43 -
 44
44 -
 45
45 -
 46
46 -
 47
47 -
 48
48 -
 49
49 -
 50
50 -
 51
51 -
52
-
53
-
54
-
55
-
56
-
57
-
58
-
59
-
60
-
61
-
62
-
63
-
64
-
65
-
66
-
67
-
68
-
69
-
70
-
71
-
72
-
73
-
74
-
75
-
76
-
77
-
78
-
79
-
80
-
81
-
82
-
83
-
84
-
85
-
86
-
87
-
88
-
89
-
90
-
91
-
92
-
93
-
94
-
95
-
96
-
97
-
98
-
99
-
100
-
101
-
102
-
103
-
104
-
105
-
106
-
107
-
108
-
109
-
110
-
111
-
112
-
113
-
114
-
115
-
116
-
117
-
118
-
119
-
120
-
121
-
122
-
123
-
124
-
125
-
126
-
127
-
128
-
129
-
130
-
131
-
132
-
133
-
134
-
135
-
136
-
137
-
138
-
139
-
140
-
141
-
142
-
143
-
144
-
145
-
146
-
147
-
148
-
149
-
150
-
151
-
152
-
153
-
154
-
155
-
156
-
157
-
158
-
159
-
160
-
161
-
162
-
163
-
164
-
165
-
166
-
167
-
168
-
169
-
170
-
171
-
172
-
173
-
174
-
175
-
176
-
177
-
178
-
179
-
180
-
181
-
182
-
183
-
184
-
185
-
186
-
187
-
188
-
189
-
190
-
191
-
192
-
193
-
194
-
195
-
196
-
197
-
198
-
199
-
200
-
201
-
202
-
203
-
204
-
205
-
206
-
207
-
208
-
209
-
210
-
211
-
212
-
213
-
214
-
215
-
216
-
217
-
218
-
219
-
220
-
221
-
222
-
223
-
224
-
225
-
226
-
227
-
228
 |
 |