HP 4100n HP LaserJet 4100mfp -User Guide - Page 25
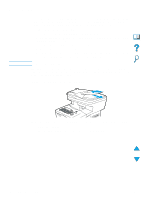
Loading Tray 1, Open Tray 1.
 |
View all HP 4100n manuals
Add to My Manuals
Save this manual to your list of manuals |
Page 25 highlights
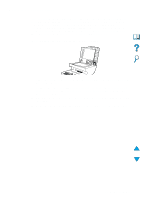
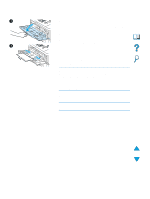
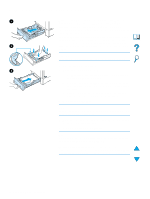
Loading Tray 1 1 3 Tray 1 is a multipurpose tray that holds as many as 100 sheets of paper, 10 envelopes, or 20 sheets of cardstock. The default action is to pull media from Tray 1 first. To change the default, see "Customizing trays for printing or copying" on page 63. Tray 1 provides a convenient way to print envelopes, transparencies, custom-size media, or other types of special media without unloading the other trays. It can also be used as an additional input tray. For supported sizes of media, see "Supported paper sizes and weights" on page 114. 1 Open Tray 1. 2 Pull out the tray extension. 3 Set the side guides to the desired width. 4 Load media in the tray. Note Make sure that the media fits under the tabs on the guides and not above the load-level indicators. Generally, load media with the side to be printed facing up, and the top, short edge toward the product. For information about loading special media, see "Using special media" on page 25. 5 Adjust the side guides so that they touch the media stack but do not bend the media. CAUTION To avoid jams, do not load trays while the product is printing. Loading Tray 1 23
-
 1
1 -
2
-
3
-
4
-
5
-
6
-
7
-
8
-
9
-
10
-
11
-
12
-
13
-
14
-
15
-
16
-
17
-
18
-
19
-
 20
20 -
 21
21 -
 22
22 -
 23
23 -
 24
24 -
 25
25 -
 26
26 -
 27
27 -
 28
28 -
 29
29 -
 30
30 -
31
-
32
-
33
-
34
-
35
-
36
-
37
-
38
-
39
-
40
-
41
-
42
-
43
-
44
-
45
-
46
-
47
-
48
-
49
-
50
-
51
-
52
-
53
-
54
-
55
-
56
-
57
-
58
-
59
-
60
-
61
-
62
-
63
-
64
-
65
-
66
-
67
-
68
-
69
-
70
-
71
-
72
-
73
-
74
-
75
-
76
-
77
-
78
-
79
-
80
-
81
-
82
-
83
-
84
-
85
-
86
-
87
-
88
-
89
-
90
-
91
-
92
-
93
-
94
-
95
-
96
-
97
-
98
-
99
-
100
-
101
-
102
-
103
-
104
-
105
-
106
-
107
-
108
-
109
-
110
-
111
-
112
-
113
-
114
-
115
-
116
-
117
-
118
-
119
-
120
-
121
-
122
-
123
-
124
-
125
-
126
-
127
-
128
-
129
-
130
-
131
-
132
-
133
-
134
-
135
-
136
-
137
-
138
-
139
-
140
-
141
-
142
-
143
-
144
-
145
-
146
-
147
-
148
-
149
-
150
-
151
-
152
-
153
-
154
-
155
-
156
-
157
-
158
-
159
-
160
-
161
-
162
-
163
-
164
 |
 |
