HP 4100n HP LaserJet 4100mfp -User Guide - Page 86
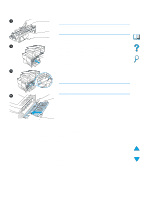
Clearing jams from the ADF, If originals jam in the ADF, follow this procedure
 |
View all HP 4100n manuals
Add to My Manuals
Save this manual to your list of manuals |
Page 86 highlights
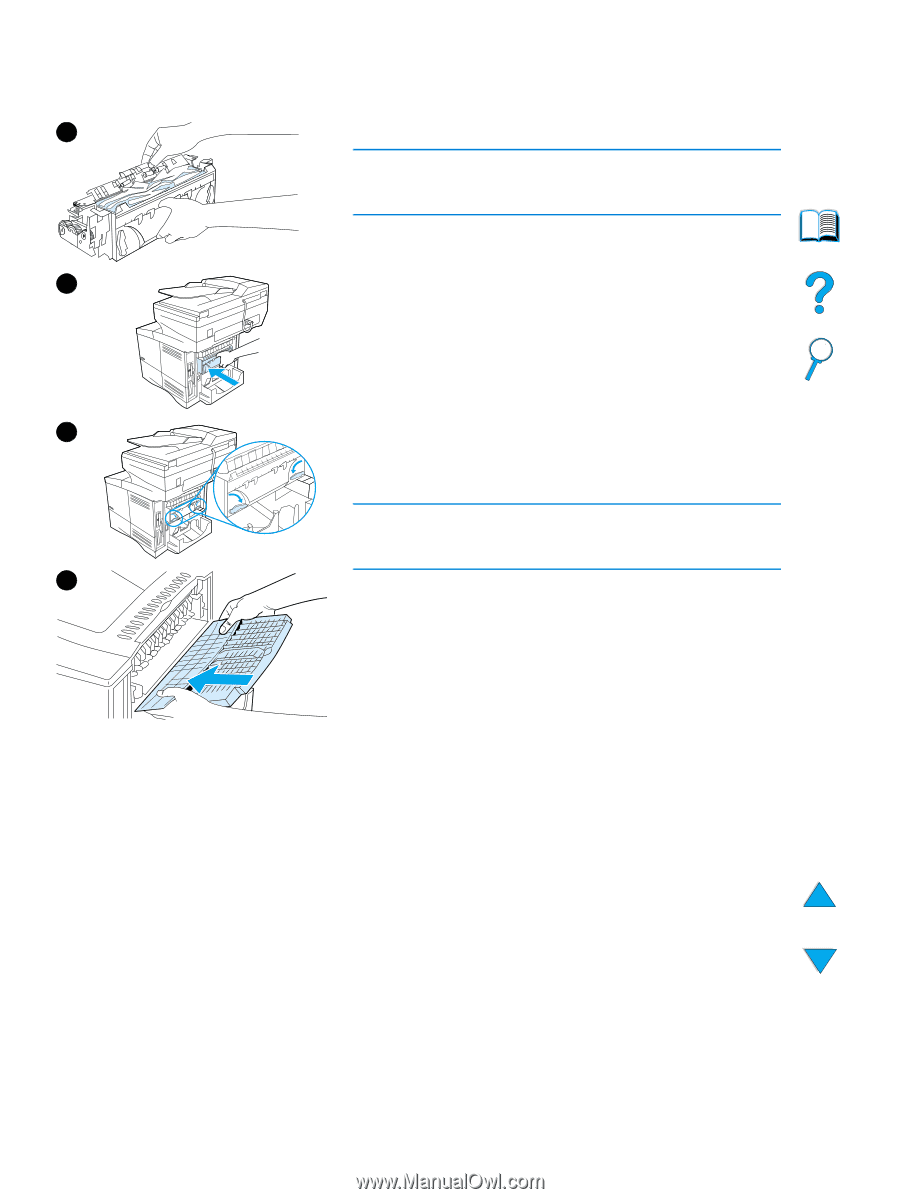
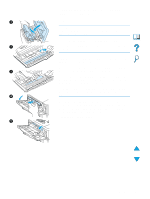
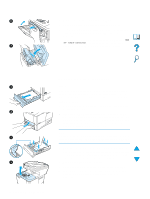
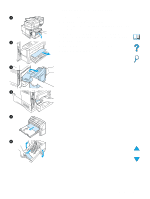
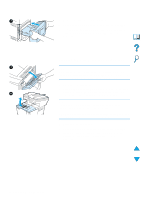
8 8 Remove the media that has jammed. CAUTION Do not use a sharp object to clear media from the fuser area. You might damage the fuser. 9 Replace the fuser, left side first. Be sure to push the fuser firmly into the product. 9 10 Lock the fuser in place by rotating the levers to the horizontal position. 11 Replace the rear output slot, left side first. 12 Plug the power cord into the product. 13 Replace the Tray 2 dust cover or the optional duplexer. 14 Turn the MFP on. 10 15 If a jam message persists, media remains in the product. Look for media in another location (see "Jam locations" on page 78). Note Because the product has been turned off, you must restart the copying or printing task. 11 Clearing jams from the ADF If originals jam in the ADF, follow this procedure: 1 Raise the ADF cover. 2 Remove any jammed media. 3 Close the ADF and control panel unit. Press each down firmly until it clicks into place. 4 After removing the stack of originals from the ADF, smooth the jammed page, add it to the top of the stack, and reinsert the stack. 5 Press START to resume sending or copying the document. 84 Chapter 8 - Problem solving EN
-
 1
1 -
2
-
3
-
4
-
5
-
6
-
7
-
8
-
9
-
10
-
11
-
12
-
13
-
14
-
15
-
16
-
17
-
18
-
19
-
20
-
21
-
22
-
23
-
24
-
25
-
26
-
27
-
28
-
29
-
30
-
31
-
32
-
33
-
34
-
35
-
36
-
37
-
38
-
39
-
40
-
41
-
42
-
43
-
44
-
45
-
46
-
47
-
48
-
49
-
50
-
51
-
52
-
53
-
54
-
55
-
56
-
57
-
58
-
59
-
60
-
61
-
62
-
63
-
64
-
65
-
66
-
67
-
68
-
69
-
70
-
71
-
72
-
73
-
74
-
75
-
76
-
77
-
78
-
79
-
80
-
 81
81 -
 82
82 -
 83
83 -
 84
84 -
 85
85 -
 86
86 -
 87
87 -
 88
88 -
 89
89 -
 90
90 -
 91
91 -
92
-
93
-
94
-
95
-
96
-
97
-
98
-
99
-
100
-
101
-
102
-
103
-
104
-
105
-
106
-
107
-
108
-
109
-
110
-
111
-
112
-
113
-
114
-
115
-
116
-
117
-
118
-
119
-
120
-
121
-
122
-
123
-
124
-
125
-
126
-
127
-
128
-
129
-
130
-
131
-
132
-
133
-
134
-
135
-
136
-
137
-
138
-
139
-
140
-
141
-
142
-
143
-
144
-
145
-
146
-
147
-
148
-
149
-
150
-
151
-
152
-
153
-
154
-
155
-
156
-
157
-
158
-
159
-
160
-
161
-
162
-
163
-
164
 |
 |