HP 5200dtn HP LaserJet 5200L Series Printer - User Guide - Page 87
Printing on both sides of the paper, Layout, s per Sheet, Layout Direction, Borders, Finishing
 |
UPC - 882780124240
View all HP 5200dtn manuals
Add to My Manuals
Save this manual to your list of manuals |
Page 87 highlights
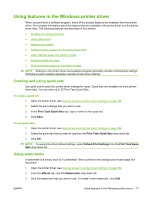
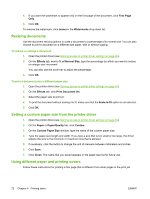
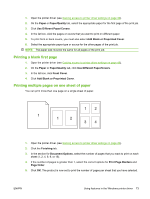
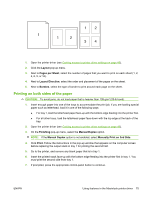
1. Open the printer driver (see Gaining access to printer driver settings on page 49). 2. Click the Layout pop-up menu. 3. Next to Pages per Sheet, select the number of pages that you want to print on each sheet (1, 2, 4, 6, 9, or 16). 4. Next to Layout Direction, select the order and placement of the pages on the sheet. 5. Next to Borders, select the type of border to print around each page on the sheet. Printing on both sides of the paper CAUTION: To avoid jams, do not load paper that is heavier than 105 g/m2 (28-lb bond). 1. Insert enough paper into one of the trays to accommodate the print job. If you are loading special paper such as letterhead, load it in one of the following ways: ● For tray 1, load the letterhead paper face-up with the bottom edge feeding into the printer first. ● For all other trays, load the letterhead paper face-down with the top edge at the back of the tray. 2. Open the printer driver (see Gaining access to printer driver settings on page 49). 3. On the Finishing pop-up menu, select the Manual Duplex option. NOTE: If the Manual Duplex option is not enabled, select Manually Print on 2nd Side. 4. Click Print. Follow the instructions in the pop-up window that appears on the computer screen before replacing the output stack in tray 1 for printing the second half. 5. Go to the printer, and remove any blank paper that is in tray 1. 6. Insert the printed stack face-up with the bottom edge feeding into the printer first in tray 1. You must print the second side from tray 1. 7. If prompted, press the appropriate control-panel button to continue. ENWW Using features in the Macintosh printer driver 75
-
 1
1 -
2
-
3
-
4
-
5
-
6
-
7
-
8
-
9
-
10
-
11
-
12
-
13
-
14
-
15
-
16
-
17
-
18
-
19
-
20
-
21
-
22
-
23
-
24
-
25
-
26
-
27
-
28
-
29
-
30
-
31
-
32
-
33
-
34
-
35
-
36
-
37
-
38
-
39
-
40
-
41
-
42
-
43
-
44
-
45
-
46
-
47
-
48
-
49
-
50
-
51
-
52
-
53
-
54
-
55
-
56
-
57
-
58
-
59
-
60
-
61
-
62
-
63
-
64
-
65
-
66
-
67
-
68
-
69
-
70
-
71
-
72
-
73
-
74
-
75
-
76
-
77
-
78
-
79
-
80
-
81
-
 82
82 -
 83
83 -
 84
84 -
 85
85 -
 86
86 -
 87
87 -
 88
88 -
 89
89 -
 90
90 -
 91
91 -
 92
92 -
93
-
94
-
95
-
96
-
97
-
98
-
99
-
100
-
101
-
102
-
103
-
104
-
105
-
106
-
107
-
108
-
109
-
110
-
111
-
112
-
113
-
114
-
115
-
116
-
117
-
118
-
119
-
120
-
121
-
122
-
123
-
124
-
125
-
126
-
127
-
128
-
129
-
130
-
131
-
132
-
133
-
134
-
135
-
136
-
137
-
138
-
139
-
140
-
141
-
142
-
143
-
144
-
145
-
146
-
147
-
148
-
149
-
150
-
151
-
152
-
153
-
154
-
155
-
156
-
157
-
158
-
159
-
160
-
161
-
162
-
163
-
164
-
165
-
166
-
167
-
168
-
169
-
170
-
171
-
172
-
173
-
174
-
175
-
176
-
177
-
178
-
179
-
180
-
181
-
182
-
183
-
184
-
185
-
186
-
187
-
188
-
189
-
190
-
191
-
192
-
193
-
194
-
195
-
196
-
197
-
198
-
199
-
200
-
201
-
202
-
203
-
204
-
205
-
206
-
207
-
208
-
209
-
210
-
211
-
212
 |
 |
