HP 8000 Hardware Reference Guide - HP Compaq 8000 Elite Convertible Minitower - Page 8
Front Panel Components
 |
UPC - 884420665106
View all HP 8000 manuals
Add to My Manuals
Save this manual to your list of manuals |
Page 8 highlights
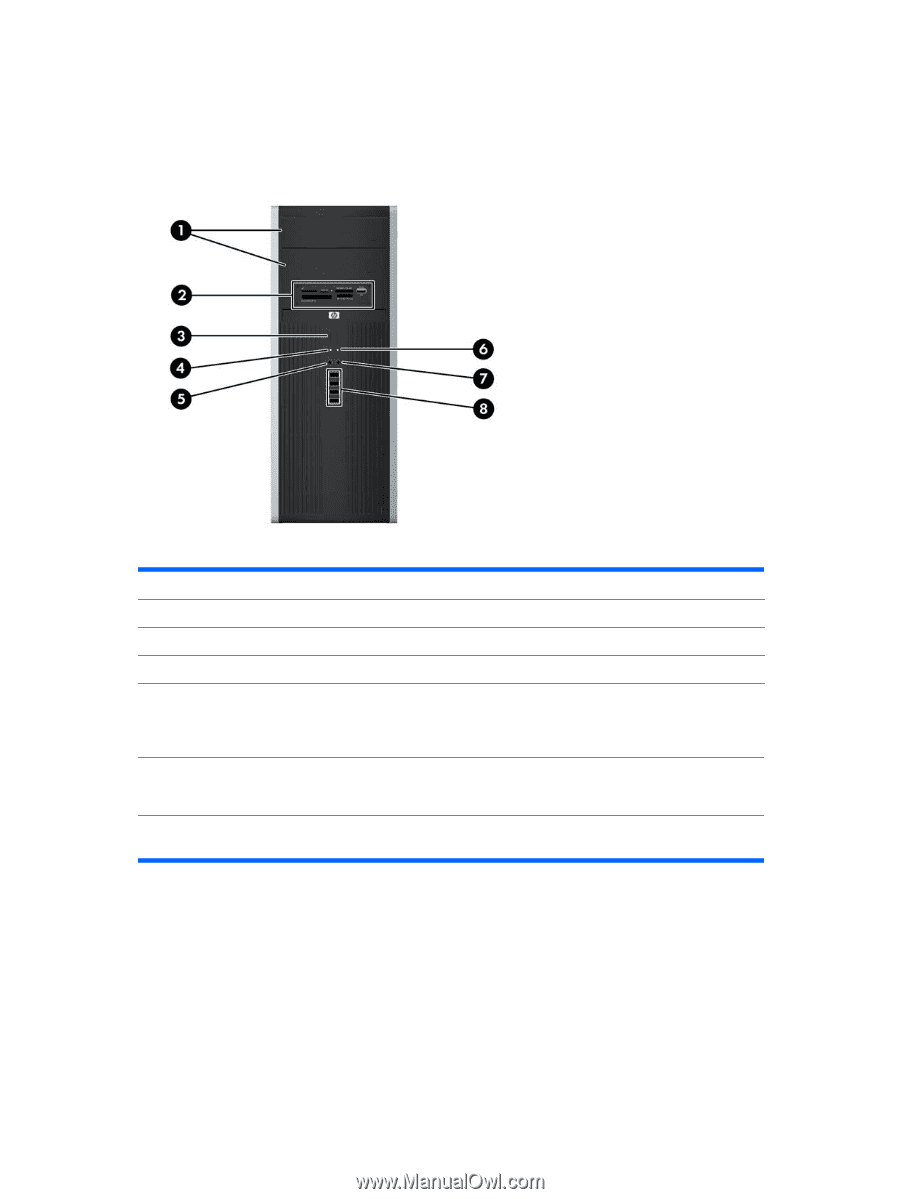
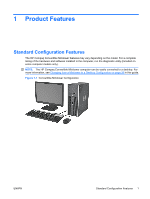
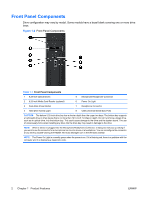
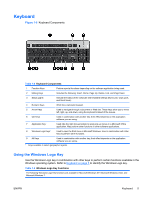
Front Panel Components Drive configuration may vary by model. Some models have a bezel blank covering one or more drive bays. Figure 1-2 Front Panel Components Table 1-1 Front Panel Components 1 5.25-inch Optical Drives 5 Microphone/Headphone Connector 2 5.25-inch Media Card Reader (optional) 6 Power On Light 3 Dual-State Power Button 7 Headphone Connector 4 Hard Drive Activity Light 8 USB (Universal Serial Bus) Ports CAUTION: The bottom 5.25-inch drive bay has a shorter depth than the upper two bays. The bottom bay supports a half-height drive or other device that is no more than 14.5 cm (5.7 inches) in depth. Do not try to force a larger drive, such as an optical drive, into the bottom bay. This could cause damage to the drive and the system board. The use of unnecessary force when installing any drive into the drive bay may result in damage to the drive. NOTE: When a device is plugged into the Microphone/Headphone Connector, a dialog box will pop up asking if you want to use the connector for a microphone line Line-In device or a headphone. You can reconfigure the connector at any time by double-clicking the Realtek HD Audio Manager icon in the Windows taskbar. NOTE: The Power On Light is normally green when the power is on. If it is flashing red, there is a problem with the computer and it is displaying a diagnostic code. 2 Chapter 1 Product Features ENWW
-
 1
1 -
2
-
 3
3 -
 4
4 -
 5
5 -
 6
6 -
 7
7 -
 8
8 -
 9
9 -
 10
10 -
 11
11 -
 12
12 -
 13
13 -
14
-
15
-
16
-
17
-
18
-
19
-
20
-
21
-
22
-
23
-
24
-
25
-
26
-
27
-
28
-
29
-
30
-
31
-
32
-
33
-
34
-
35
-
36
-
37
-
38
-
39
-
40
-
41
-
42
-
43
-
44
-
45
-
46
-
47
-
48
-
49
-
50
-
51
-
52
-
53
-
54
-
55
-
56
-
57
-
58
-
59
-
60
-
61
-
62
-
63
-
64
 |
 |