HP 8150 HP Embedded Web Server for HP LaserJet Printers - User Guide - Page 56
Setting Up the Printer to Receive and Respond to E-mail Messages, Appendix B - How Do I?, Address
 |
UPC - 725184622984
View all HP 8150 manuals
Add to My Manuals
Save this manual to your list of manuals |
Page 56 highlights
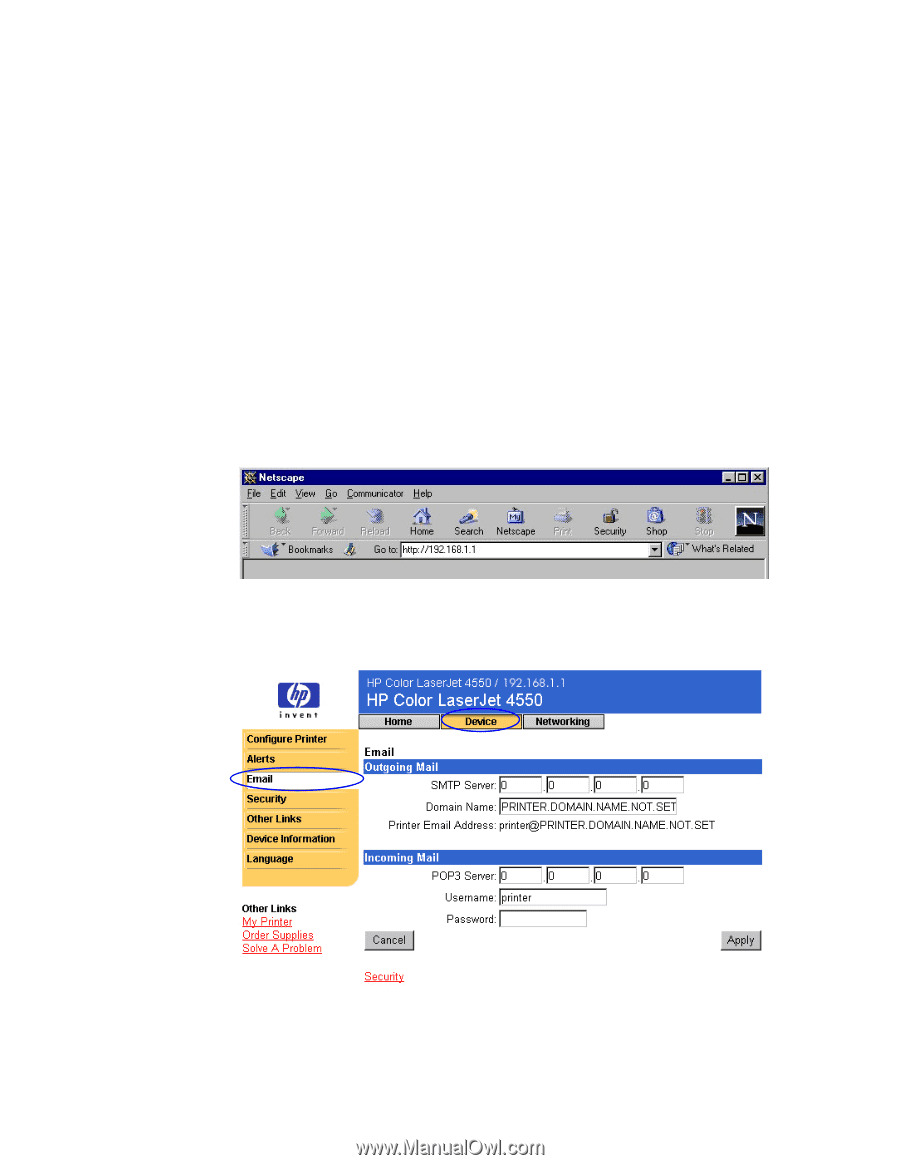
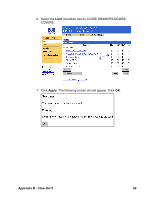
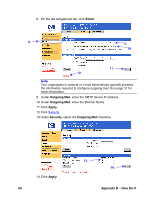
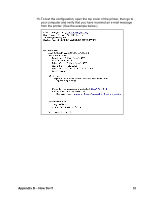
Setting Up the Printer to Receive and Respond to E-mail Messages How do I set up the embedded web server so that the printer can receive an incoming e-mail message and respond with an outgoing e-mail message? The following example shows how to configure the HP Color LaserJet 4550 printer so that you can send an e-mail message to the printer, requesting a configuration page, and the printer will respond with an e-mail message. 1. Launch your web browser. 2. In the Address: or Go to: field, type the IP address assigned to the printer (for example: http://192.168.1.1) or the host name (for example: http://myprinter). (If you do not know the IP address for the printer, see page 7.) 3. The embedded web server Home page should appear. From the top of the screen, click Device, then on the left navigational bar, click Email. 52 Appendix B - How Do I?
-
 1
1 -
2
-
3
-
4
-
5
-
6
-
7
-
8
-
9
-
10
-
11
-
12
-
13
-
14
-
15
-
16
-
17
-
18
-
19
-
20
-
21
-
22
-
23
-
24
-
25
-
26
-
27
-
28
-
29
-
30
-
31
-
32
-
33
-
34
-
35
-
36
-
37
-
38
-
39
-
40
-
41
-
42
-
43
-
44
-
45
-
46
-
47
-
48
-
49
-
50
-
 51
51 -
 52
52 -
 53
53 -
 54
54 -
 55
55 -
 56
56 -
 57
57 -
 58
58 -
 59
59 -
 60
60 -
 61
61 -
62
-
63
 |
 |