HP Blackbird 002-01A HP Blackbird Gaming System - Getting Started Guide - Page 41
Turning On the Computer for the First Time - case
 |
View all HP Blackbird 002-01A manuals
Add to My Manuals
Save this manual to your list of manuals |
Page 41 highlights
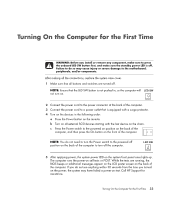
Turning On the Computer for the First Time WARNING: Before you install or remove any component, make sure to press the onboard LED SW button first, and make sure the standby power LED is off. Failure to do so may cause injury or severe damage to the motherboard, peripherals, and/or components. After making all the connections, replace the system case cover. 1 Make sure that all buttons and switches are turned off. NOTE: Ensure that the LED SW button is not pushed in, or the computer will not turn on. 2 Connect the power cord to the power connector at the back of the computer. 3 Connect the power cord to a power outlet that is equipped with a surge protector. 4 Turn on the devices in the following order: a Press the Power button on the monitor. b Turn on all external SCSI devices starting with the last device on the chain. c Press the Power switch to the powered on position on the back of the computer, and then press the On button on the front of the computer. NOTE: You do not need to turn the Power switch to the powered off position on the back of the computer to turn off the computer. 5 After applying power, the system power LED on the system front panel case lights up. The computer runs the power-on self tests or POST. While the tests are running, the BIOS beeps or additional messages appear on the LCD poster screen on the back of the computer. If you do not see anything within 30 seconds from the time you turned on the power, the system may have failed a power-on test. Call HP Support for assistance. Turning On the Computer for the First Time 33
-
 1
1 -
2
-
3
-
4
-
5
-
6
-
7
-
8
-
9
-
10
-
11
-
12
-
13
-
14
-
15
-
16
-
17
-
18
-
19
-
20
-
21
-
22
-
23
-
24
-
25
-
26
-
27
-
28
-
29
-
30
-
31
-
32
-
33
-
34
-
35
-
 36
36 -
 37
37 -
 38
38 -
 39
39 -
 40
40 -
 41
41 -
 42
42 -
 43
43 -
 44
44 -
 45
45 -
 46
46 -
47
-
48
-
49
-
50
-
51
-
52
-
53
-
54
-
55
-
56
-
57
-
58
-
59
-
60
-
61
-
62
-
63
-
64
-
65
-
66
-
67
-
68
-
69
-
70
-
71
-
72
-
73
-
74
-
75
-
76
-
77
-
78
-
79
-
80
-
81
-
82
-
83
-
84
-
85
-
86
-
87
-
88
-
89
-
90
-
91
-
92
-
93
-
94
-
95
-
96
-
97
-
98
-
99
-
100
-
101
-
102
-
103
-
104
-
105
-
106
-
107
-
108
-
109
-
110
-
111
-
112
-
113
-
114
-
115
-
116
-
117
-
118
-
119
-
120
-
121
-
122
-
123
-
124
-
125
-
126
-
127
-
128
-
129
-
130
-
131
-
132
-
133
-
134
-
135
-
136
-
137
-
138
-
139
-
140
-
141
-
142
-
143
-
144
-
145
-
146
-
147
-
148
-
149
-
150
-
151
-
152
-
153
-
154
-
155
-
156
-
157
-
158
-
159
-
160
-
161
-
162
-
163
-
164
 |
 |
