HP CP6015xh HP Color LaserJet CP6015 Series - User Guide - Page 130
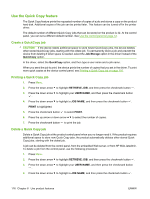
Use the Quick Copy feature, Create a QuickCopy job
 |
UPC - 883585363544
View all HP CP6015xh manuals
Add to My Manuals
Save this manual to your list of manuals |
Page 130 highlights
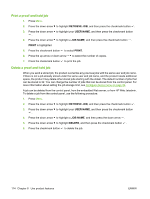
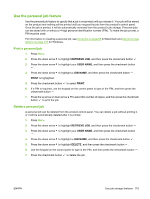
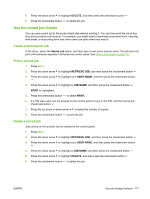
Use the Quick Copy feature The Quick Copy feature prints the requested number of copies of a job and stores a copy on the product hard disk. Additional copies of the job can be printed later. This feature can be turned off in the printer driver. The default number of different Quick Copy jobs that can be stored on the product is 32. At the control panel, you can set a different default number. See Use the control panel on page 12. Create a QuickCopy job CAUTION: If the device needs additional space to store newer QuickCopy jobs, the device deletes other stored QuickCopy jobs, starting with the oldest job. To permanently store a job and prevent the device from deleting it when space is needed, select the Job Storage option in the driver instead of the QuickCopy option. In the driver, select the QuickCopy option, and then type a user name and a job name. When you send the job to print, the device prints the number of copies that you set in the driver. To print more quick copies at the device control panel, see Printing a Quick Copy job on page 116. Printing a Quick Copy job 1. Press Menu. 2. Press the down arrow to highlight RETRIEVE JOB, and then press the checkmark button . 3. Press the down arrow to highlight your USER NAME, and then press the checkmark button . 4. Press the down arrow to highlight a JOB NAME, and then press the checkmark button . PRINT is highlighted. 5. Press the checkmark button to select PRINT. 6. Press the up arrow or down arrow to select the number of copies. 7. Press the checkmark button to print the job. Delete a Quick Copy job Delete a Quick Copy job at the product control panel when you no longer need it. If the product requires additional space to store new Quick Copy jobs, the product automatically deletes other stored Quick Copy jobs, starting with the oldest job. A job can be deleted from the control panel, from the embedded Web server, or from HP Web Jetadmin. To delete a job from the control panel, use the following procedure: 1. Press Menu. 2. Press the down arrow to highlight RETRIEVE JOB, and then press the checkmark button . 3. Press the down arrow to highlight your USER NAME, and then press the checkmark button . 4. Press the down arrow to highlight a JOB NAME, and then press the checkmark button . 116 Chapter 8 Use product features ENWW
-
 1
1 -
2
-
3
-
4
-
5
-
6
-
7
-
8
-
9
-
10
-
11
-
12
-
13
-
14
-
15
-
16
-
17
-
18
-
19
-
20
-
21
-
22
-
23
-
24
-
25
-
26
-
27
-
28
-
29
-
30
-
31
-
32
-
33
-
34
-
35
-
36
-
37
-
38
-
39
-
40
-
41
-
42
-
43
-
44
-
45
-
46
-
47
-
48
-
49
-
50
-
51
-
52
-
53
-
54
-
55
-
56
-
57
-
58
-
59
-
60
-
61
-
62
-
63
-
64
-
65
-
66
-
67
-
68
-
69
-
70
-
71
-
72
-
73
-
74
-
75
-
76
-
77
-
78
-
79
-
80
-
81
-
82
-
83
-
84
-
85
-
86
-
87
-
88
-
89
-
90
-
91
-
92
-
93
-
94
-
95
-
96
-
97
-
98
-
99
-
100
-
101
-
102
-
103
-
104
-
105
-
106
-
107
-
108
-
109
-
110
-
111
-
112
-
113
-
114
-
115
-
116
-
117
-
118
-
119
-
120
-
121
-
122
-
123
-
124
-
 125
125 -
 126
126 -
 127
127 -
 128
128 -
 129
129 -
 130
130 -
 131
131 -
 132
132 -
 133
133 -
 134
134 -
 135
135 -
136
-
137
-
138
-
139
-
140
-
141
-
142
-
143
-
144
-
145
-
146
-
147
-
148
-
149
-
150
-
151
-
152
-
153
-
154
-
155
-
156
-
157
-
158
-
159
-
160
-
161
-
162
-
163
-
164
-
165
-
166
-
167
-
168
-
169
-
170
-
171
-
172
-
173
-
174
-
175
-
176
-
177
-
178
-
179
-
180
-
181
-
182
-
183
-
184
-
185
-
186
-
187
-
188
-
189
-
190
-
191
-
192
-
193
-
194
-
195
-
196
-
197
-
198
-
199
-
200
-
201
-
202
-
203
-
204
-
205
-
206
-
207
-
208
-
209
-
210
-
211
-
212
-
213
-
214
-
215
-
216
-
217
-
218
-
219
-
220
-
221
-
222
-
223
-
224
-
225
-
226
-
227
-
228
-
229
-
230
-
231
-
232
-
233
-
234
-
235
-
236
-
237
-
238
-
239
-
240
-
241
-
242
-
243
-
244
-
245
-
246
-
247
-
248
-
249
-
250
-
251
-
252
-
253
-
254
-
255
-
256
-
257
-
258
-
259
-
260
-
261
-
262
-
263
-
264
-
265
-
266
-
267
-
268
-
269
-
270
-
271
-
272
-
273
-
274
-
275
-
276
-
277
-
278
-
279
-
280
-
281
-
282
-
283
-
284
-
285
-
286
-
287
-
288
-
289
-
290
-
291
-
292
-
293
-
294
-
295
-
296
-
297
-
298
-
299
-
300
-
301
-
302
-
303
-
304
-
305
-
306
-
307
-
308
 |
 |