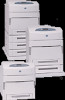
HP Color LaserJet 5550 HP Color LaserJet 5550 series - User Guide - Page 32
Installing the printing system software, HP LaserJet Utility
 |
View all HP Color LaserJet 5550 manuals
Add to My Manuals
Save this manual to your list of manuals |
Page 32 highlights
Note Note Note HP LaserJet Utility Use the HP LaserJet Utility to control features that are not available in the driver. The illustrated screens make selecting printer features easier than ever. Use the HP LaserJet Utility to do the following: ● name the printer, assign it to a zone on the network, and download files and fonts. ● configure and set the printer for Internet protocol (IP) printing. The HP LaserJet Utility is not currently supported for OS X, but the utility is supported for the Classic environment. Installing the printing system software The following sections contain instructions for installing the printing system software. The printer comes with printing system software and printer drivers on a CD-ROM. The printing system software on the CD-ROM must be installed to take full advantage of the printer features. If you do not have access to a CD-ROM drive, you can download the printing system software from the Internet at http://www.hp.com/support/clj5550. Sample model scripts for UNIX® (HP-UX®, Sun Solaris) and Linux networks are available for download at http://www.hp.com/support. You can download the latest software free of charge at http://www.hp.com/support/clj5550. Installing Windows printing system software for direct connections This section explains how to install the printing system software for Microsoft Windows 98, Windows Me, Windows NT 4.0, Windows 2000, Windows Server 2003, and Windows XP. When installing the printing software in a direct-connect environment, always install the software before connecting the parallel or USB cable. If the parallel or USB cable was connected before the software installation, see Installing the software after the parallel or USB cable has been connected. Either a parallel or USB cable can be used for the direct connection. However, you cannot connect parallel and USB cables at the same time. Use an IEEE 1284-compatible cable or a standard 2-meter USB cable. NT 4.0 does not support USB cable connections. To install the printing system software 1. Close all software programs that are open or running. 2. Insert the printer CD-ROM into the CD-ROM drive. If the welcome screen does not open, start it by using the following procedure: ● On the Start menu, click Run. ● Type the following: X:/setup (where X is the letter of the CD-ROM drive). ● Click OK. 3. When prompted, click Install Printer and follow the instructions on the computer screen. 4. Click Finish when the installation has completed. 18 Chapter 1 Printer basics ENWW
-
 1
1 -
2
-
3
-
4
-
5
-
6
-
7
-
8
-
9
-
10
-
11
-
12
-
13
-
14
-
15
-
16
-
17
-
18
-
19
-
20
-
21
-
22
-
23
-
24
-
25
-
26
-
 27
27 -
 28
28 -
 29
29 -
 30
30 -
 31
31 -
 32
32 -
 33
33 -
 34
34 -
 35
35 -
 36
36 -
 37
37 -
38
-
39
-
40
-
41
-
42
-
43
-
44
-
45
-
46
-
47
-
48
-
49
-
50
-
51
-
52
-
53
-
54
-
55
-
56
-
57
-
58
-
59
-
60
-
61
-
62
-
63
-
64
-
65
-
66
-
67
-
68
-
69
-
70
-
71
-
72
-
73
-
74
-
75
-
76
-
77
-
78
-
79
-
80
-
81
-
82
-
83
-
84
-
85
-
86
-
87
-
88
-
89
-
90
-
91
-
92
-
93
-
94
-
95
-
96
-
97
-
98
-
99
-
100
-
101
-
102
-
103
-
104
-
105
-
106
-
107
-
108
-
109
-
110
-
111
-
112
-
113
-
114
-
115
-
116
-
117
-
118
-
119
-
120
-
121
-
122
-
123
-
124
-
125
-
126
-
127
-
128
-
129
-
130
-
131
-
132
-
133
-
134
-
135
-
136
-
137
-
138
-
139
-
140
-
141
-
142
-
143
-
144
-
145
-
146
-
147
-
148
-
149
-
150
-
151
-
152
-
153
-
154
-
155
-
156
-
157
-
158
-
159
-
160
-
161
-
162
-
163
-
164
-
165
-
166
-
167
-
168
-
169
-
170
-
171
-
172
-
173
-
174
-
175
-
176
-
177
-
178
-
179
-
180
-
181
-
182
-
183
-
184
-
185
-
186
-
187
-
188
-
189
-
190
-
191
-
192
-
193
-
194
-
195
-
196
-
197
-
198
-
199
-
200
-
201
-
202
-
203
-
204
-
205
-
206
-
207
-
208
-
209
-
210
-
211
-
212
-
213
-
214
-
215
-
216
-
217
-
218
-
219
-
220
-
221
-
222
-
223
-
224
-
225
-
226
-
227
-
228
-
229
-
230
-
231
-
232
-
233
-
234
-
235
-
236
-
237
-
238
-
239
-
240
-
241
-
242
-
243
-
244
-
245
-
246
-
247
-
248
-
249
-
250
-
251
-
252
-
253
-
254
-
255
-
256
-
257
-
258
-
259
-
260
-
261
-
262
-
263
-
264
-
265
-
266
-
267
-
268
-
269
-
270
-
271
-
272
-
273
-
274
-
275
-
276
-
277
-
278
-
279
-
280
-
281
-
282
-
283
-
284
-
285
-
286
-
287
-
288
-
289
-
290
-
291
-
292
-
293
-
294
 |
 |
