HP Color LaserJet 5550 HP Color LaserJet 5550 series - User Guide - Page 67
Show address, Color/black mix, To show the IP address, To set the color/black mix
 |
View all HP Color LaserJet 5550 manuals
Add to My Manuals
Save this manual to your list of manuals |
Page 67 highlights
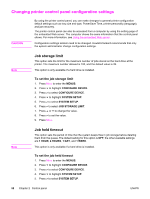
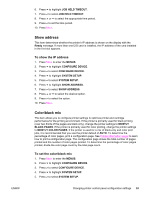
ENWW 6. Press to highlight JOB HELD TIMEOUT. 7. Press to select JOB HELD TIMEOUT. 8. Press or to select the appropriate time period. 9. Press to set the time period. 10. Press MENU. Show address This item determines whether the printer's IP address is shown on the display with the Ready message. If more than one EIO card is installed, the IP address of the card installed in the first slot appears. To show the IP address 1. Press MENU to enter the MENUS. 2. Press to highlight CONFIGURE DEVICE. 3. Press to select CONFIGURE DEVICE. 4. Press to highlight SYSTEM SETUP. 5. Press to select SYSTEM SETUP. 6. Press to highlight SHOW ADDRESS. 7. Press to select SHOW ADDRESS. 8. Press or to select the desired option. 9. Press to select the option. 10. Press MENU. Color/black mix This item allows you to configure printer settings to optimize printer and cartridge performance for the printing environment. If the printer is primarily used for black printing (over two-thirds of the pages are black only), change the printer settings to MOSTLY BLACK PAGES. If the printer is primarily used for color printing, change the printer settings to MOSTLY COLOR PAGES. If the printer is used for a mix of black-only and color print jobs, it is recommended that you use the printer default of AUTO. To determine the percentage of color pages, print a configuration page. See Printer information pages to learn how to print a configuration page. The configuration page shows the total number of pages printed and the number of color pages printed. To determine the percentage of color pages printed, divide the color page count by the total page count. To set the color/black mix 1. Press MENU to enter the MENUS. 2. Press to highlight CONFIGURE DEVICE. 3. Press to select CONFIGURE DEVICE. 4. Press to highlight SYSTEM SETUP. 5. Press to select SYSTEM SETUP. Changing printer control panel configuration settings 53
-
 1
1 -
2
-
3
-
4
-
5
-
6
-
7
-
8
-
9
-
10
-
11
-
12
-
13
-
14
-
15
-
16
-
17
-
18
-
19
-
20
-
21
-
22
-
23
-
24
-
25
-
26
-
27
-
28
-
29
-
30
-
31
-
32
-
33
-
34
-
35
-
36
-
37
-
38
-
39
-
40
-
41
-
42
-
43
-
44
-
45
-
46
-
47
-
48
-
49
-
50
-
51
-
52
-
53
-
54
-
55
-
56
-
57
-
58
-
59
-
60
-
61
-
 62
62 -
 63
63 -
 64
64 -
 65
65 -
 66
66 -
 67
67 -
 68
68 -
 69
69 -
 70
70 -
 71
71 -
 72
72 -
73
-
74
-
75
-
76
-
77
-
78
-
79
-
80
-
81
-
82
-
83
-
84
-
85
-
86
-
87
-
88
-
89
-
90
-
91
-
92
-
93
-
94
-
95
-
96
-
97
-
98
-
99
-
100
-
101
-
102
-
103
-
104
-
105
-
106
-
107
-
108
-
109
-
110
-
111
-
112
-
113
-
114
-
115
-
116
-
117
-
118
-
119
-
120
-
121
-
122
-
123
-
124
-
125
-
126
-
127
-
128
-
129
-
130
-
131
-
132
-
133
-
134
-
135
-
136
-
137
-
138
-
139
-
140
-
141
-
142
-
143
-
144
-
145
-
146
-
147
-
148
-
149
-
150
-
151
-
152
-
153
-
154
-
155
-
156
-
157
-
158
-
159
-
160
-
161
-
162
-
163
-
164
-
165
-
166
-
167
-
168
-
169
-
170
-
171
-
172
-
173
-
174
-
175
-
176
-
177
-
178
-
179
-
180
-
181
-
182
-
183
-
184
-
185
-
186
-
187
-
188
-
189
-
190
-
191
-
192
-
193
-
194
-
195
-
196
-
197
-
198
-
199
-
200
-
201
-
202
-
203
-
204
-
205
-
206
-
207
-
208
-
209
-
210
-
211
-
212
-
213
-
214
-
215
-
216
-
217
-
218
-
219
-
220
-
221
-
222
-
223
-
224
-
225
-
226
-
227
-
228
-
229
-
230
-
231
-
232
-
233
-
234
-
235
-
236
-
237
-
238
-
239
-
240
-
241
-
242
-
243
-
244
-
245
-
246
-
247
-
248
-
249
-
250
-
251
-
252
-
253
-
254
-
255
-
256
-
257
-
258
-
259
-
260
-
261
-
262
-
263
-
264
-
265
-
266
-
267
-
268
-
269
-
270
-
271
-
272
-
273
-
274
-
275
-
276
-
277
-
278
-
279
-
280
-
281
-
282
-
283
-
284
-
285
-
286
-
287
-
288
-
289
-
290
-
291
-
292
-
293
-
294
 |
 |