HP Color LaserJet Enterprise M555 User Guide - Page 47
Replace the toner cartridges, Introduction, Toner-cartridge information, more information, go
 |
View all HP Color LaserJet Enterprise M555 manuals
Add to My Manuals
Save this manual to your list of manuals |
Page 47 highlights
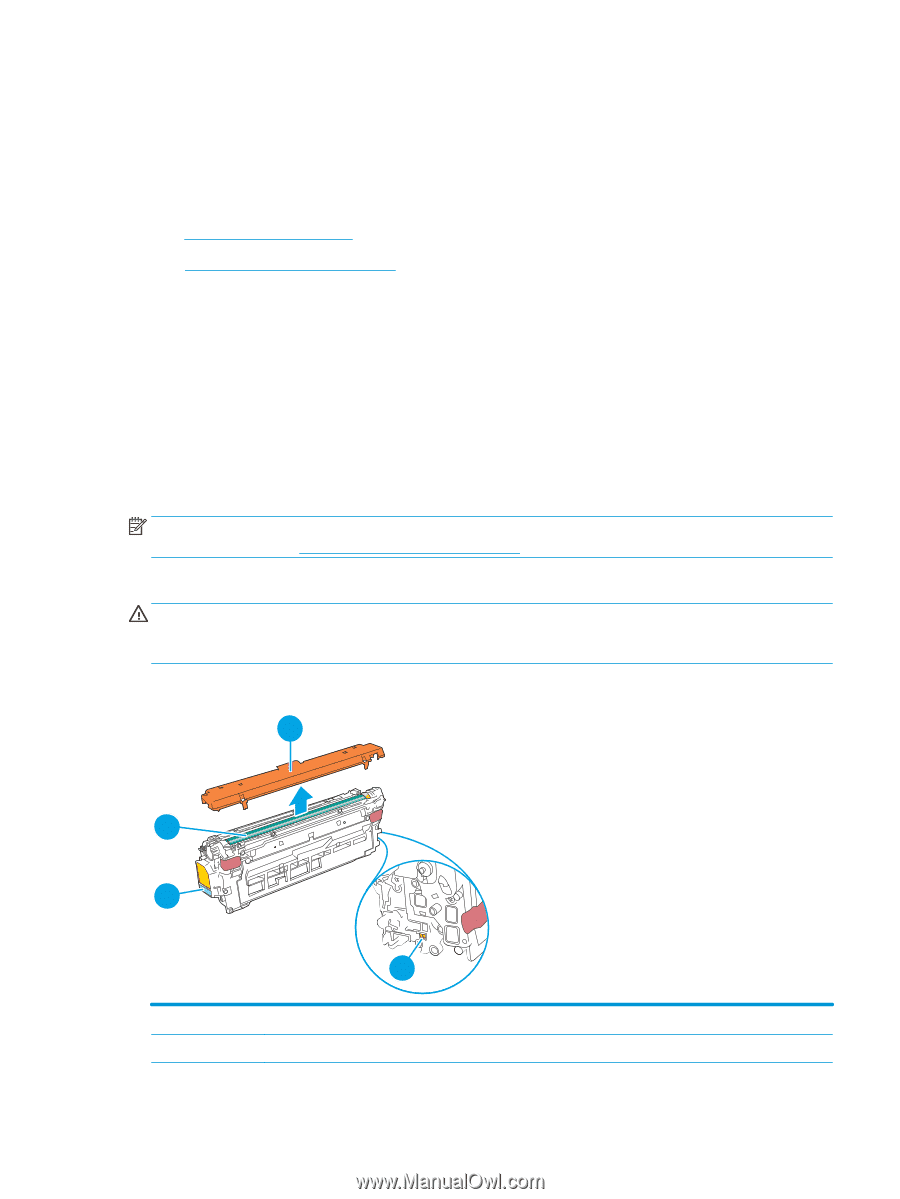
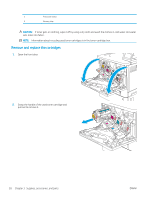
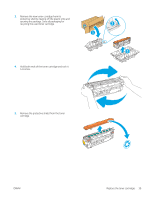
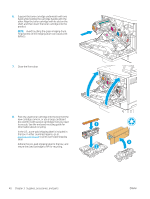
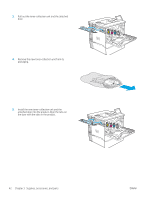
Replace the toner cartridges Introduction The following information provides details about the toner cartridges for the product, and it includes instructions to replace them. ● Toner-cartridge information ● Remove and replace the cartridges Toner-cartridge information This product indicates when the toner-cartridge level is low and very low. The actual toner cartridge life remaining can vary. Consider having a replacement cartridge available to install when print quality is no longer acceptable. The product uses four colors and has a different toner cartridge for each color: yellow (Y), magenta (M), cyan (C), and black (K). The toner cartridges are inside the front door. Continue printing with the current cartridge until redistributing the toner no longer yields acceptable print quality. To redistribute the toner, remove the toner cartridge from the printer and gently rock the cartridge back and forth end to end. Reinsert the toner cartridge into the printer and close the cover. NOTE: High-yield toner cartridges contain more toner than standard cartridges for increased page yield. For more information, go to www.hp.com/go/learnaboutsupplies. Do not remove the toner cartridge from its package until it is time to replace it. CAUTION: To prevent damage to the toner cartridge, do not expose it to light for more than a few minutes. Cover the green imaging drum if the toner cartridge must be removed from the product for an extended period of time. The following illustration shows the toner-cartridge components. 3 2 1 1 2 ENWW 4 Handle Imaging drum Replace the toner cartridges 37
-
 1
1 -
2
-
3
-
4
-
5
-
6
-
7
-
8
-
9
-
10
-
11
-
12
-
13
-
14
-
15
-
16
-
17
-
18
-
19
-
20
-
21
-
22
-
23
-
24
-
25
-
26
-
27
-
28
-
29
-
30
-
31
-
32
-
33
-
34
-
35
-
36
-
37
-
38
-
39
-
40
-
41
-
 42
42 -
 43
43 -
 44
44 -
 45
45 -
 46
46 -
 47
47 -
 48
48 -
 49
49 -
 50
50 -
 51
51 -
 52
52 -
53
-
54
-
55
-
56
-
57
-
58
-
59
-
60
-
61
-
62
-
63
-
64
-
65
-
66
-
67
-
68
-
69
-
70
-
71
-
72
-
73
-
74
-
75
-
76
-
77
-
78
-
79
-
80
-
81
-
82
-
83
-
84
-
85
-
86
-
87
-
88
-
89
-
90
-
91
-
92
-
93
-
94
-
95
-
96
-
97
-
98
-
99
-
100
-
101
-
102
-
103
-
104
-
105
-
106
-
107
-
108
-
109
-
110
-
111
-
112
-
113
-
114
-
115
-
116
-
117
-
118
-
119
-
120
-
121
-
122
-
123
-
124
-
125
-
126
-
127
-
128
-
129
-
130
-
131
-
132
-
133
-
134
-
135
-
136
-
137
-
138
-
139
-
140
-
141
-
142
-
143
-
144
 |
 |