HP Cp1700 HP CP 1700 Series - (English) User's Guide - Page 9
Back of printer, POWER, RESUME, CANCEL - printer will not power up
 |
View all HP Cp1700 manuals
Add to My Manuals
Save this manual to your list of manuals |
Page 9 highlights
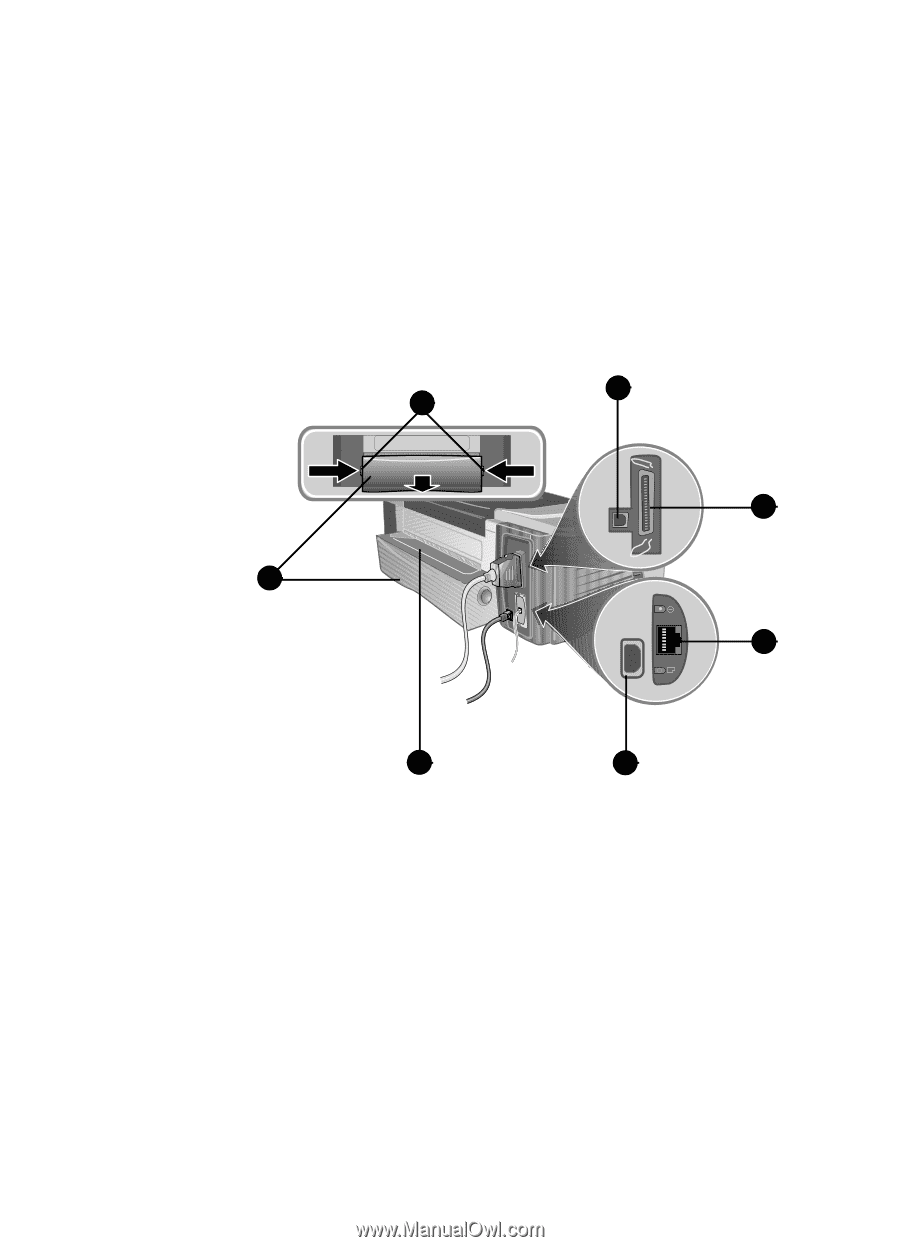
4 POWER button-Controls power to the printer. Press to turn the printer on or off. 5 RESUME button-Resumes current print operation after temporary interruption, for example, when adding print media to printer. 6 CANCEL button-Cancels the current print job. 7 Infrared lens-Enables printing from an infrared sending device, such as a handheld device or a laptop. Back of printer 4 7 3 5 2 6 1 ENWW 1 Power input-Attach power cord here. 2 LIO Adaptor Slot-Install an optional HP Jetdirect print server/ Internet connector (LIO module) here. 3 Parallel port-Attach parallel cable here. 4 USB port-Attach a USB cable here. 5 Rear access panel-Gain access to the back of the printer by removing this panel. The rear access panel must be removed to install the optional auto-duplex unit. 6 Rear manual feed-Print card stock and other special media using this straight paper path. 2-3
-
 1
1 -
2
-
3
-
 4
4 -
 5
5 -
 6
6 -
 7
7 -
 8
8 -
 9
9 -
 10
10 -
 11
11 -
 12
12 -
 13
13 -
 14
14 -
15
-
16
-
17
-
18
-
19
-
20
-
21
-
22
-
23
-
24
-
25
-
26
-
27
-
28
-
29
-
30
-
31
-
32
-
33
-
34
-
35
-
36
-
37
-
38
-
39
-
40
-
41
-
42
-
43
-
44
-
45
-
46
-
47
-
48
-
49
-
50
-
51
-
52
-
53
-
54
-
55
-
56
-
57
-
58
-
59
-
60
-
61
-
62
-
63
-
64
-
65
-
66
-
67
-
68
-
69
-
70
-
71
-
72
-
73
-
74
-
75
-
76
-
77
-
78
-
79
-
80
-
81
-
82
-
83
-
84
-
85
-
86
-
87
-
88
 |
 |