HP D2D D2D NAS Integration with CommVault (EH985-90934, March 2011) - Page 13
Share Permissions, Apply, with those permissions.
 |
View all HP D2D manuals
Add to My Manuals
Save this manual to your list of manuals |
Page 13 highlights
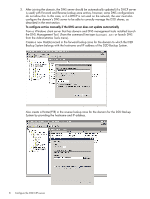
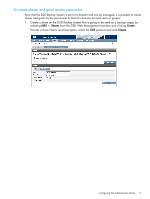
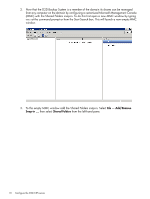
7. Select the Share Permissions tab and Add a user or group of users from the domain. Specify the level of permission that the users will receive and click Apply. 8. Now, from any Windows server on the domain, it is possible to access the newly created share using the credentials of anyone who had been given permission to access the share. If a permitted user is logged into Windows, access to the share will be granted automatically with those permissions. NOTE: In some cases, when switching the D2D Backup System from No Authentication or User Authentication mode to AD mode, it may be necessary to log out and back into a Windows client before it is possible to access the D2D shares. Configuring AD Authentication Mode 13
-
 1
1 -
2
-
3
-
4
-
5
-
6
-
7
-
 8
8 -
 9
9 -
 10
10 -
 11
11 -
 12
12 -
 13
13 -
 14
14 -
 15
15 -
 16
16 -
 17
17 -
 18
18 -
19
-
20
-
21
-
22
-
23
-
24
-
25
-
26
-
27
-
28
-
29
-
30
-
31
-
32
-
33
-
34
-
35
-
36
-
37
-
38
-
39
-
40
-
41
-
42
-
43
-
44
-
45
-
46
-
47
-
48
-
49
-
50
-
51
-
52
 |
 |

7.
Select the
Share Permissions
tab and
Add
a user or group of users from the domain.
Specify the level of permission that the users will receive and click
Apply
.
8.
Now, from any Windows server on the domain, it is possible to access the newly created
share using the credentials of anyone who had been given permission to access the share. If
a permitted user is logged into Windows, access to the share will be granted automatically
with those permissions.
NOTE:
In some cases, when switching the D2D Backup System from No Authentication or
User Authentication mode to AD mode, it may be necessary to log out and back into a
Windows client before it is possible to access the D2D shares.
Configuring AD Authentication Mode
13