HP DL585 ProLiant DL585 Generation 2 Server User Guide - Page 67
Prepare the server for diagnosis, Loose connections
 |
UPC - 882780448322
View all HP DL585 manuals
Add to My Manuals
Save this manual to your list of manuals |
Page 67 highlights
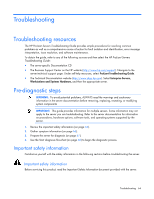
To answer these questions, the following information may be useful: • Run HP Insight Diagnostics (on page 61) and use the survey page to view the current configuration or to compare it to previous configurations. • Refer to your hardware and software records for information. • Refer to server LEDs and their statuses. Prepare the server for diagnosis 1. Be sure the server is in the proper operating environment with adequate power, air conditioning, and humidity control. Refer to the server documentation for required environmental conditions. 2. Record any error messages displayed by the system. 3. Remove all diskettes and CDs from the media drives. 4. Power down the server and peripheral devices if you will be diagnosing the server offline. Always perform an orderly shutdown, if possible. This means you must: a. Exit any applications. b. Exit the operating system. c. Power down the server (on page 27). 5. Disconnect any peripheral devices not required for testing (any devices not necessary to power up the server). Do not disconnect the printer if you want to use it to print error messages. 6. Collect all tools and utilities, such as a Torx screwdriver, loopback adapters, ESD wrist strap, and software utilities, necessary to troubleshoot the problem. o You must have the appropriate Health Drivers and Management Agents installed on the server. NOTE: To verify the server configuration, connect to the System Management homepage and select Version Control Agent. The VCA gives you a list of names and versions of all installed HP drivers, Management Agents, and utilities, and whether they are up to date. o HP recommends you have access to the SmartStart CD for value-added software and drivers required during the troubleshooting process. o HP recommends you have access to the server documentation for server-specific information. Loose connections Action: • Be sure all power cords are securely connected. • Be sure all cables are properly aligned and securely connected for all external and internal components. • Remove and check all data and power cables for damage. Be sure no cables have bent pins or damaged connectors. • If a fixed cable tray is available for the server, be sure the cords and cables connected to the server are routed correctly through the tray. • Be sure each device is properly seated. Avoid bending or flexing circuit boards when reseating components. • If a device has latches, be sure they are completely closed and locked. Troubleshooting 67
-
 1
1 -
2
-
3
-
4
-
5
-
6
-
7
-
8
-
9
-
10
-
11
-
12
-
13
-
14
-
15
-
16
-
17
-
18
-
19
-
20
-
21
-
22
-
23
-
24
-
25
-
26
-
27
-
28
-
29
-
30
-
31
-
32
-
33
-
34
-
35
-
36
-
37
-
38
-
39
-
40
-
41
-
42
-
43
-
44
-
45
-
46
-
47
-
48
-
49
-
50
-
51
-
52
-
53
-
54
-
55
-
56
-
57
-
58
-
59
-
60
-
61
-
 62
62 -
 63
63 -
 64
64 -
 65
65 -
 66
66 -
 67
67 -
 68
68 -
 69
69 -
 70
70 -
 71
71 -
 72
72 -
73
-
74
-
75
-
76
-
77
-
78
-
79
-
80
-
81
-
82
-
83
-
84
-
85
-
86
-
87
-
88
-
89
-
90
-
91
-
92
-
93
-
94
-
95
-
96
-
97
-
98
-
99
-
100
-
101
-
102
-
103
-
104
 |
 |
