HP Dc7600 Desktop Management Guide - Page 40
Setting the Smart Cover Sensor Protection Level, Start > Shut Down > Restart.
 |
View all HP Dc7600 manuals
Add to My Manuals
Save this manual to your list of manuals |
Page 40 highlights
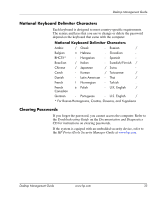
Desktop Management Guide Smart Cover Sensor Protection Levels Level Setting Description Level 0 Disabled Smart Cover Sensor is disabled (default). Level 1 Notify User When the computer is restarted, the screen displays a message indicating that the computer cover or side panel has been removed. Level 2 Setup Password When the computer is restarted, the screen displays a message indicating that the computer cover or side panel has been removed. You must enter the setup password to continue. ✎ These settings can be changed using Computer Setup. For more information about Computer Setup, see the Computer Setup (F10) Utility Guide on the Documentation and Diagnostics CD. Setting the Smart Cover Sensor Protection Level To set the Smart Cover Sensor protection level, complete the following steps: 1. Turn on or restart the computer. If you are in Windows, click Start > Shut Down > Restart. 2. As soon as the computer is turned on, press F10 when the monitor light turns green to enter Computer Setup. Press Enter to bypass the title screen, if necessary. ✎ If you do not press F10 at the appropriate time, you must restart the computer and again press F10 when the monitor light turns green to access the utility. 3. Select Security > Smart Cover > Cover Removal Sensor, and select the desired security level. 4. Before exiting, click File > Save Changes and Exit. 36 www.hp.com Desktop Management Guide
-
 1
1 -
2
-
3
-
4
-
5
-
6
-
7
-
8
-
9
-
10
-
11
-
12
-
13
-
14
-
15
-
16
-
17
-
18
-
19
-
20
-
21
-
22
-
23
-
24
-
25
-
26
-
27
-
28
-
29
-
30
-
31
-
32
-
33
-
34
-
 35
35 -
 36
36 -
 37
37 -
 38
38 -
 39
39 -
 40
40 -
 41
41 -
 42
42 -
 43
43 -
 44
44 -
 45
45 -
46
-
47
-
48
 |
 |
