HP Designjet 4520 HP Designjet 4020 and 4520 Printer Series - User's Guide: En - Page 178
I cannot insert an ink cartridge, The printer will not accept a large black ink cartridge
 |
View all HP Designjet 4520 manuals
Add to My Manuals
Save this manual to your list of manuals |
Page 178 highlights
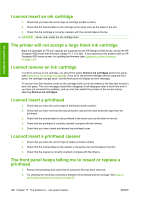
Ink system problems I cannot insert an ink cartridge 1. Check that you have the correct type of cartridge (model number). 2. Check that the colored label on the cartridge is the same color as the label on the slot. 3. Check that the cartridge is correctly oriented, with the colored label at the top. CAUTION: Never clean inside the ink cartridge slots. The printer will not accept a large black ink cartridge Black ink cartridges of 775 cm³ capacity are supported by the HP Designet 4520 series, and by the HP Designjet 4020 series with firmware release 4.1.1.5 or later. If you experience this problem with an HP Designjet 4020 series printer, try updating the firmware (see Update my printer's firmware on page 116). I cannot remove an ink cartridge In order to remove an ink cartridge, you should first select Remove ink cartridges at the front panel (see Remove an ink cartridge on page 88). If you try to remove the cartridge without using the front panel, the cartridge may get stuck, and the front panel will display an error message. To recover from this situation, press on the cartridge itself (not on the drawer or the blue tab) to push it back into place. The error message should then disappear (it will disappear after a short time even if you have not corrected the problem), and you can then restart the process in the correct way by selecting Remove ink cartridges. I cannot insert a printhead 1. Check that you have the correct type of printhead (model number). 2. Check that you have removed the blue protective cap and the clear protective tape from the printhead. 3. Check that the colored label on the printhead is the same color as the label on the slot. 4. Check that the printhead is correctly oriented (compare with the others). 5. Check that you have closed and latched the printhead cover. I cannot insert a printhead cleaner 1. Check that you have the correct type of cleaner (model number). 2. Check that the colored label on the cleaner is the same color as the label on the slot. 3. Check that the cleaner is correctly oriented (compare with the others). The front panel keeps telling me to reseat or replace a printhead 1. Remove the printhead and check that its protective film has been removed. 2. Try cleaning the electrical connections between the printhead and the carriage. See Clean a printhead's electrical connections on page 97. 168 Chapter 17 The problem is... (ink system topics) ENWW
-
 1
1 -
2
-
3
-
4
-
5
-
6
-
7
-
8
-
9
-
10
-
11
-
12
-
13
-
14
-
15
-
16
-
17
-
18
-
19
-
20
-
21
-
22
-
23
-
24
-
25
-
26
-
27
-
28
-
29
-
30
-
31
-
32
-
33
-
34
-
35
-
36
-
37
-
38
-
39
-
40
-
41
-
42
-
43
-
44
-
45
-
46
-
47
-
48
-
49
-
50
-
51
-
52
-
53
-
54
-
55
-
56
-
57
-
58
-
59
-
60
-
61
-
62
-
63
-
64
-
65
-
66
-
67
-
68
-
69
-
70
-
71
-
72
-
73
-
74
-
75
-
76
-
77
-
78
-
79
-
80
-
81
-
82
-
83
-
84
-
85
-
86
-
87
-
88
-
89
-
90
-
91
-
92
-
93
-
94
-
95
-
96
-
97
-
98
-
99
-
100
-
101
-
102
-
103
-
104
-
105
-
106
-
107
-
108
-
109
-
110
-
111
-
112
-
113
-
114
-
115
-
116
-
117
-
118
-
119
-
120
-
121
-
122
-
123
-
124
-
125
-
126
-
127
-
128
-
129
-
130
-
131
-
132
-
133
-
134
-
135
-
136
-
137
-
138
-
139
-
140
-
141
-
142
-
143
-
144
-
145
-
146
-
147
-
148
-
149
-
150
-
151
-
152
-
153
-
154
-
155
-
156
-
157
-
158
-
159
-
160
-
161
-
162
-
163
-
164
-
165
-
166
-
167
-
168
-
169
-
170
-
171
-
172
-
 173
173 -
 174
174 -
 175
175 -
 176
176 -
 177
177 -
 178
178 -
 179
179 -
 180
180 -
 181
181 -
 182
182 -
 183
183 -
184
-
185
-
186
-
187
-
188
-
189
-
190
-
191
-
192
-
193
-
194
-
195
-
196
-
197
-
198
-
199
-
200
-
201
-
202
-
203
-
204
-
205
-
206
-
207
-
208
-
209
-
210
-
211
-
212
-
213
-
214
-
215
-
216
-
217
-
218
-
219
-
220
-
221
-
222
-
223
-
224
-
225
-
226
-
227
-
228
-
229
-
230
-
231
-
232
-
233
-
234
-
235
 |
 |