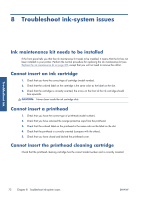
HP Designjet L26500 HP Designjet L26500 printer series - Maintenance and troub - Page 75
The automatic cutter does not work, Take-up reel substrate jam - pdf
 |
View all HP Designjet L26500 manuals
Add to My Manuals
Save this manual to your list of manuals |
Page 75 highlights
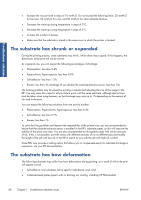
This deformation may be particularly noticeable in the following applications. ● Printing images that will later be cut automatically or manually. When there is bow deformation, cutters that are aligned on the sides may lose alignment in the center. ● Poster printing, if the poster is framed or mounted on a straight surface. The example below shows an original image, the substrate suffering from bow deformation, and the resulting print, also suffering from bow deformation. Troubleshoot substrate You can use the straightness optimization option in the front panel, or in your RIP software, to compensate for this effect and restore the original shape of your image. At the front panel, select the icon, then select Image quality maintenance > Straightness optimization, and select a correction value from -15 to +15. The chosen value should represent the vertical distance in millimeters that the centre of the substrate has moved with respect to the left and right edges. If the deformation moves the center of the substrate in the direction of substrate advance, the correction value should be negative; if in the reverse direction, the correction value should be positive. In practice, the required correction value is normally negative. TIP: You can use the diagnostic image provided in http://IPaddress/hp/device/webAccess/ diagnostic/StraightnessOptimizationPlot.pdf (where IPaddress is the IP address of your printer) to help you to determine the correct value to apply. The automatic cutter does not work The automatic cutter is turned off in any of the following cases. ● When it has been manually disabled from the front panel: Select the icon, then Substrate handling options > Disable cutter. ● When printing on some particularly heavy substrate types, which it cannot cut. ● When the take-up reel is enabled. TIP: You can disable the take-up reel from the front panel by selecting the up reel > Disable take-up reel. icon, then Take- ● During double-sided printing. Take-up reel substrate jam If the substrate is severely damaged on the take-up reel spindle, do not use the printer's cutter to cut and remove the substrate. Instead, cut the substrate manually as close as possible to the printer window, then remove the roll. ENWW The automatic cutter does not work 69
-
 1
1 -
2
-
3
-
4
-
5
-
6
-
7
-
8
-
9
-
10
-
11
-
12
-
13
-
14
-
15
-
16
-
17
-
18
-
19
-
20
-
21
-
22
-
23
-
24
-
25
-
26
-
27
-
28
-
29
-
30
-
31
-
32
-
33
-
34
-
35
-
36
-
37
-
38
-
39
-
40
-
41
-
42
-
43
-
44
-
45
-
46
-
47
-
48
-
49
-
50
-
51
-
52
-
53
-
54
-
55
-
56
-
57
-
58
-
59
-
60
-
61
-
62
-
63
-
64
-
65
-
66
-
67
-
68
-
69
-
 70
70 -
 71
71 -
 72
72 -
 73
73 -
 74
74 -
 75
75 -
 76
76 -
 77
77 -
 78
78 -
 79
79 -
 80
80 -
81
-
82
-
83
-
84
-
85
-
86
-
87
-
88
-
89
-
90
-
91
-
92
-
93
-
94
-
95
-
96
 |
 |
