HP DeskJet 3700 User Guide - Page 45
Scan using the HP printer software, Scan to a computer, Scan a Document or Photo
 |
View all HP DeskJet 3700 manuals
Add to My Manuals
Save this manual to your list of manuals |
Page 45 highlights
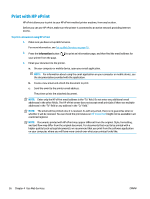
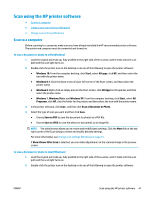
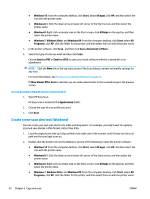
Scan using the HP printer software ● Scan to a computer ● Create a new scan shortcut (Windows) ● Change scan settings (Windows) Scan to a computer Before scanning to a computer, make sure you have already installed the HP recommended printer software. The printer and computer must be connected and turned on. To scan a document or photo to a file (Windows) 1. Load the original print side up, fully justified to the right side of the scanner, until it feeds into the scan path and the scan light turns on. 2. Double-click the printer icon on the desktop or do one of the following to open the printer software: ● Windows 10: From the computer desktop, click Start, select All apps, click HP, and then select the icon with the printer name. ● Windows 8.1: Click the down arrow in lower left corner of the Start screen, and then select the printer name. ● Windows 8: Right-click an empty area on the Start screen, click All Apps on the app bar, and then select the printer name. ● Windows 7, Windows Vista, and Windows XP: From the computer desktop, click Start, select All Programs, click HP, click the folder for the printer, and then select the icon with the printer name. 3. In the printer software, click Scan , and then click Scan a Document or Photo . 4. Select the type of scan you want and then click Scan . ● Choose Save as PDF to save the document (or photo) as a PDF file. ● Choose Save as JPEG to save the photo (or document) as an image file. NOTE: The initial screen allows you to review and modify basic settings. Click the More link at the top right corner of the Scan dialog to review and modify detailed settings. For more information, see Change scan settings (Windows) on page 43. If Show Viewer After Scan is selected, you can make adjustments to the scanned image in the preview screen. To scan a document or photo to email (Windows) 1. Load the original print side up, fully justified to the right side of the scanner, until it feeds into the scan path and the scan light turns on. 2. Double-click the printer icon on the desktop or do one of the following to open the printer software: ENWW Scan using the HP printer software 41
-
 1
1 -
2
-
3
-
4
-
5
-
6
-
7
-
8
-
9
-
10
-
11
-
12
-
13
-
14
-
15
-
16
-
17
-
18
-
19
-
20
-
21
-
22
-
23
-
24
-
25
-
26
-
27
-
28
-
29
-
30
-
31
-
32
-
33
-
34
-
35
-
36
-
37
-
38
-
39
-
 40
40 -
 41
41 -
 42
42 -
 43
43 -
 44
44 -
 45
45 -
 46
46 -
 47
47 -
 48
48 -
 49
49 -
 50
50 -
51
-
52
-
53
-
54
-
55
-
56
-
57
-
58
-
59
-
60
-
61
-
62
-
63
-
64
-
65
-
66
-
67
-
68
-
69
-
70
-
71
-
72
-
73
-
74
-
75
-
76
-
77
-
78
-
79
-
80
-
81
-
82
-
83
-
84
-
85
-
86
-
87
-
88
-
89
-
90
-
91
-
92
-
93
-
94
-
95
-
96
-
97
-
98
-
99
-
100
-
101
-
102
-
103
-
104
-
105
-
106
-
107
-
108
-
109
-
110
-
111
-
112
-
113
-
114
-
115
-
116
-
117
-
118
-
119
-
120
 |
 |
