HP Deskjet 9300 HP Deskjet 9300 series printer - (English) User Guide - Page 21
Printing on both sides of the paper, For Windows - software
 |
View all HP Deskjet 9300 manuals
Add to My Manuals
Save this manual to your list of manuals |
Page 21 highlights
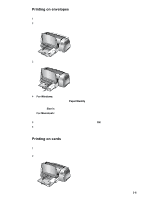
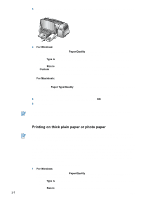
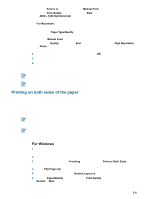
• In the Source is drop-down list, select Manual Feed. • In the Print Quality drop-down list, select Best. Alternatively, you can select 4800 x 1200 Optimized dpi* high-resolution print mode for optimum print quality. In this mode, printing will take longer because more memory is required in your computer. For Macintosh: • Select the paper size (such as Letter or A4). • Open the Paper Type/Quality panel and select the paper type you are using (such as HP Premium Plus Photo Paper). • Select Manual Feed. • Click the Quality tab and select Best. Alternatively, you can select High Resolution Photo, which provides up to 4800 x 1200 Optimized dpi*, for optimum print quality. In this mode, printing will take longer because more memory is required in your computer. 2 Change any other print settings if necessary and click OK. 3 Print your document. 4 Insert paper into the rear manual feed at the back of the printer. For instructions on feeding paper manually, see "Rear manual feed." It is recommended to remove each sheet of paper as it prints and set it aside to dry. Allowing wet paper to stack up may cause smearing. *Up to 4800 x 1200 Optimized dpi color printing on HP Premium Photo Papers and 1200 x 1200 input dpi. Printing on both sides of the paper You can print on both sides of a sheet of paper by manually turning a sheet of paper over and feeding it into the printer again. To print on both sides of a page, you must specify two-sided printing options in your software application or in the printer driver. For best results when printing, do not print on paper heavier than 135 g/m2 (36 lb bond); on both sides of labels or transparencies; or on both sides of pages that are covered densely with ink. It is recommended to remove each sheet of paper as it prints and set it aside to dry. Allowing wet paper to stack up may cause smearing. For Windows 1 Load the appropriate paper, print-side down along the right side of the main paper tray, until it stops. 2 Slide the paper width and length adjusters in until they stop at the edges of the paper. 3 In the printer driver, click the Finishing tab and then select Print on Both Sides. (For instructions on accessing the printer driver, see "Changing print settings.") 4 Select Flip Pages Up to change the page orientation, if desired. 5 Choose a booklet layout from the Booklet Layout is drop-down list, if desired. 6 Click the Paper/Quality tab, and then in the Print Quality drop-down list select either Normal or Best. ENWW 3-8
-
 1
1 -
2
-
3
-
4
-
5
-
6
-
7
-
8
-
9
-
10
-
11
-
12
-
13
-
14
-
15
-
 16
16 -
 17
17 -
 18
18 -
 19
19 -
 20
20 -
 21
21 -
 22
22 -
 23
23 -
 24
24 -
 25
25 -
 26
26 -
27
-
28
-
29
-
30
-
31
-
32
-
33
-
34
-
35
-
36
-
37
-
38
-
39
-
40
-
41
-
42
-
43
-
44
-
45
-
46
-
47
-
48
-
49
-
50
 |
 |
