HP Deskjet D4100 User Guide - Microsoft Windows 2000 - Page 39
Print labels, Guidelines, Prepare to print, Print, Printing Shortcuts, General Everyday Printing
 |
View all HP Deskjet D4100 manuals
Add to My Manuals
Save this manual to your list of manuals |
Page 39 highlights
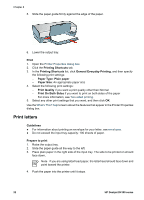
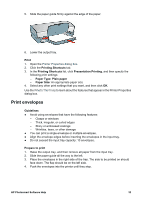
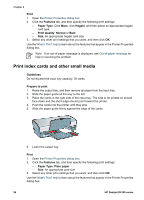
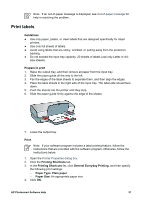
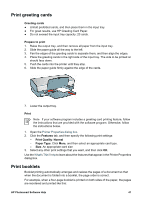
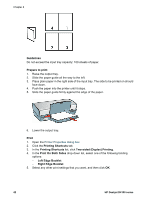
Note If an out-of-paper message is displayed, see Out-of-paper message for help in resolving the problem. Print labels Guidelines ● Use only paper, plastic, or clear labels that are designed specifically for inkjet printers. ● Use only full sheets of labels. ● Avoid using labels that are sticky, wrinkled, or pulling away from the protective backing. ● Do not exceed the input tray capacity: 20 sheets of labels (use only Letter or A4- size sheets). Prepare to print 1. Raise the output tray, and then remove all paper from the input tray. 2. Slide the paper guide all the way to the left. 3. Fan the edges of the label sheets to separate them, and then align the edges. 4. Place the label sheets in the right side of the input tray. The label side should face down. 5. Push the sheets into the printer until they stop. 6. Slide the paper guide firmly against the edge of the sheets. 7. Lower the output tray. Print Note If your software program includes a label printing feature, follow the instructions that are provided with the software program. Otherwise, follow the instructions below. 1. Open the Printer Properties dialog box. 2. Click the Printing Shortcuts tab. 3. In the Printing Shortcuts list, click General Everyday Printing, and then specify the following print settings: - Paper Type: Plain paper - Paper Size: An appropriate paper size 4. Click OK. HP Photosmart Software Help 37
-
 1
1 -
2
-
3
-
4
-
5
-
6
-
7
-
8
-
9
-
10
-
11
-
12
-
13
-
14
-
15
-
16
-
17
-
18
-
19
-
20
-
21
-
22
-
23
-
24
-
25
-
26
-
27
-
28
-
29
-
30
-
31
-
32
-
33
-
 34
34 -
 35
35 -
 36
36 -
 37
37 -
 38
38 -
 39
39 -
 40
40 -
 41
41 -
 42
42 -
 43
43 -
 44
44 -
45
-
46
-
47
-
48
-
49
-
50
-
51
-
52
-
53
-
54
-
55
-
56
-
57
-
58
-
59
-
60
-
61
-
62
-
63
-
64
-
65
-
66
-
67
-
68
-
69
-
70
-
71
-
72
-
73
-
74
-
75
-
76
-
77
-
78
-
79
-
80
-
81
-
82
-
83
-
84
-
85
-
86
-
87
-
88
-
89
-
90
-
91
-
92
-
93
-
94
-
95
-
96
-
97
-
98
-
99
-
100
-
101
-
102
 |
 |
