HP EliteDesk 800 95W G4 Maintenance and Service Guide - Page 47
Torx T15 screws
 |
View all HP EliteDesk 800 95W G4 manuals
Add to My Manuals
Save this manual to your list of manuals |
Page 47 highlights
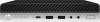
b. On models without a hard drive, disconnect the speaker cable from the system board (1), and then remove the five Torx T15 screws (2) that secure the system board to the computer. 9. Lift the front of the system board (1), and then pull it out of the computer (2). To install the system board, reverse the removal procedures. When replacing a system board be sure to install a thermal pad to service the graphics processor on the system board (1) at the location on the chassis as shown by callout (2) in the following image. System board 39
-
 1
1 -
2
-
3
-
4
-
5
-
6
-
7
-
8
-
9
-
10
-
11
-
12
-
13
-
14
-
15
-
16
-
17
-
18
-
19
-
20
-
21
-
22
-
23
-
24
-
25
-
26
-
27
-
28
-
29
-
30
-
31
-
32
-
33
-
34
-
35
-
36
-
37
-
38
-
39
-
40
-
41
-
 42
42 -
 43
43 -
 44
44 -
 45
45 -
 46
46 -
 47
47 -
 48
48 -
 49
49 -
 50
50 -
 51
51 -
 52
52 -
53
-
54
-
55
-
56
-
57
-
58
-
59
-
60
-
61
-
62
-
63
-
64
-
65
-
66
-
67
-
68
-
69
-
70
-
71
-
72
-
73
-
74
-
75
-
76
-
77
-
78
-
79
-
80
-
81
-
82
-
83
-
84
-
85
-
86
-
87
-
88
-
89
-
90
-
91
-
92
-
93
-
94
-
95
-
96
-
97
-
98
-
99
-
100
-
101
-
102
-
103
-
104
-
105
-
106
-
107
-
108
-
109
-
110
-
111
-
112
-
113
-
114
-
115
-
116
 |
 |

b.
On models without a hard drive, disconnect the speaker cable from the system board
(1)
, and then
remove the
five
Torx T15 screws
(2)
that secure the system board to the computer.
9.
Lift the front of the system board
(1)
, and then pull it out of the computer
(2)
.
To install the system board, reverse the removal procedures.
When replacing a system board be sure to install a thermal pad to service the graphics processor on the
system board
(1)
at the location on the chassis as shown by callout
(2)
in the following image.
System board
39