HP G4050 Setup and Support Guide - Page 10
Step 6. Test the installation - photo scanner
 |
UPC - 882780686793
View all HP G4050 manuals
Add to My Manuals
Save this manual to your list of manuals |
Page 10 highlights
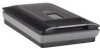
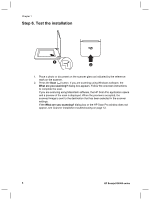
Chapter 1 Step 6. Test the installation 1 2 1. Place a photo or document on the scanner glass as indicated by the reference mark on the scanner. 2. Press the Scan ( ) button. If you are scanning using Windows software, the What are you scanning? dialog box appears. Follow the onscreen instructions to complete the scan. If you are scanning using Macintosh software, the HP Scan Pro application opens and a preview of the scan is displayed. When the preview is accepted, the scanned image is sent to the destination that has been selected in the scanner settings. If the What are you scanning? dialog box or the HP Scan Pro window does not appear, see Scanner installation troubleshooting on page 12. 8 HP Scanjet G4000 series
-
 1
1 -
2
-
3
-
4
-
 5
5 -
 6
6 -
 7
7 -
 8
8 -
 9
9 -
 10
10 -
 11
11 -
 12
12 -
 13
13 -
 14
14 -
 15
15 -
16
-
17
-
18
-
19
-
20
-
21
-
22
-
23
-
24
-
25
-
26
-
27
-
28
-
29
-
30
-
31
-
32
-
33
-
34
-
35
-
36
-
37
-
38
-
39
-
40
-
41
-
42
-
43
-
44
 |
 |
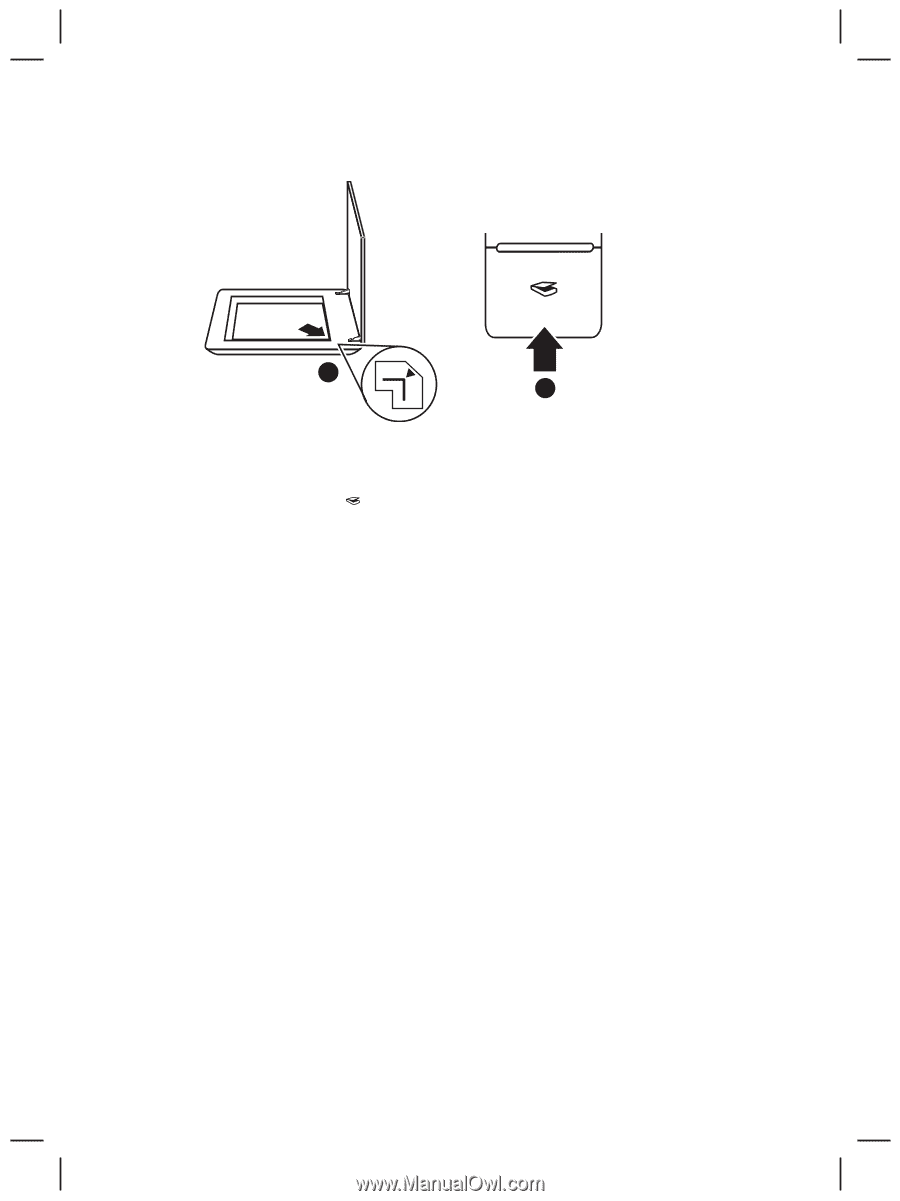
Step 6. Test the installation
1
2
1.
Place a photo or document on the scanner glass as indicated by the reference
mark on the scanner.
2.
Press the
Scan
(
) button. If you are scanning using Windows software, the
What are you scanning?
dialog box appears. Follow the onscreen instructions
to complete the scan.
If you are scanning using Macintosh software, the HP Scan Pro application opens
and a preview of the scan is displayed. When the preview is accepted, the
scanned image is sent to the destination that has been selected in the scanner
settings.
If the
What are you scanning?
dialog box or the HP Scan Pro window does not
appear, see
Scanner installation troubleshooting
on page 12.
Chapter 1
8
HP Scanjet G4000 series