HP Integrity rx4640 Installation (Smart Setup) Guide, Windows Server 2003, v5. - Page 57
Installing the Management Tools, Installing System Management Home
 |
View all HP Integrity rx4640 manuals
Add to My Manuals
Save this manual to your list of manuals |
Page 57 highlights
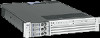
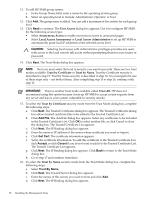
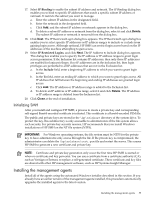
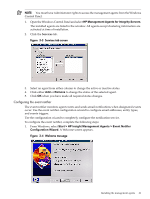
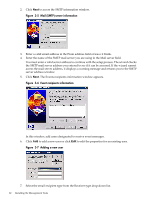
3 Installing the Management Tools This chapter describes the installation of tools and applications used to manage your Integrity server. Installing System Management Homepage This section describes the installation of System Management Homepage (SMH) on Integrity servers. Configure SMH after Support Pack installation When you install SMH using the Support Pack it, is configured using the default security settings. Use the SMH online help for information on the security settings. To access the help: 1. Click Help on the System Management Homepage. 2. Click System Management Homepage Help. 3. On the left navigation bar, select Settings Tab > Security. Install SMH separately If SMH is not installed from the Support Pack, install it using the HP Smart Setup interface and manually configure the security settings, using the following instructions: 1. Insert the HP Smart Setup media into the CD drive. The Smart Setup media autorun menu loads and executes. 2. Click Agree to accept the license agreement and display the software and drivers window. 3. Go to the Software tab. 4. Select the server model from the list to display the software available. 5. Select System Management. 6. Click HP System Management Homepage for Windows. The Smart Setup download page appears. 7. Click download >> to start the installation. The HP Package Setup screen appears. Figure 3-1 HP System Management Homepage for Windows 8. Click Install. 9. Monitor the installation process as the files are copied to the server hard disk. The HP System Management Homepage Setup wizard appears. 10. Click Next. The Operating System Groups dialog box appears. Installing System Management Homepage 57
-
 1
1 -
2
-
3
-
4
-
5
-
6
-
7
-
8
-
9
-
10
-
11
-
12
-
13
-
14
-
15
-
16
-
17
-
18
-
19
-
20
-
21
-
22
-
23
-
24
-
25
-
26
-
27
-
28
-
29
-
30
-
31
-
32
-
33
-
34
-
35
-
36
-
37
-
38
-
39
-
40
-
41
-
42
-
43
-
44
-
45
-
46
-
47
-
48
-
49
-
50
-
51
-
 52
52 -
 53
53 -
 54
54 -
 55
55 -
 56
56 -
 57
57 -
 58
58 -
 59
59 -
 60
60 -
 61
61 -
 62
62 -
63
-
64
-
65
-
66
-
67
-
68
-
69
-
70
-
71
-
72
-
73
-
74
-
75
-
76
-
77
-
78
-
79
-
80
-
81
-
82
-
83
-
84
-
85
-
86
-
87
-
88
-
89
-
90
-
91
-
92
-
93
-
94
-
95
-
96
 |
 |