HP LH4r HP Netserver LH 3/LH 3r Processor Upgrade Guide - Page 9
Removing the Cover Panels
 |
View all HP LH4r manuals
Add to My Manuals
Save this manual to your list of manuals |
Page 9 highlights
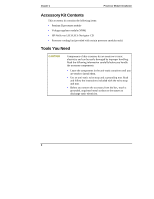
Chapter 1 Processor Module Installation Removing the Cover Panels The NetServer has three removable cover panels (see Figure 1-2): • Cover 1 covers the side where the I/O board is located. • Cover 2 covers the area above the processor. • Cover 3 covers the side where the processor is located. You will remove cover 3 to access the system board and upgrade the NetServer processor module. CAUTION The NetServer covers are heavy. Support them as you remove them, and allow room to move them away from the NetServer and for storage. Figure 1-2. HP NetServer LH 3 Covers 1. Remove cover 3 by unscrewing the thumbscrew, pulling the cover forward using the cover handle and then slightly sideways to disengage it. 2. Lift it up and away from the chassis. Proceed to the section "Installing the Processor Modules" later in this chapter. 5
-
 1
1 -
2
-
3
-
 4
4 -
 5
5 -
 6
6 -
 7
7 -
 8
8 -
 9
9 -
 10
10 -
 11
11 -
 12
12 -
 13
13 -
 14
14 -
15
-
16
-
17
-
18
-
19
-
20
-
21
-
22
-
23
-
24
-
25
-
26
-
27
-
28
-
29
-
30
-
31
-
32
-
33
-
34
 |
 |
