HP LH4r HP Netserver LXr 8000 to LXr 8500 Upgrade Guide - Page 34
Remove I/O Tray
 |
View all HP LH4r manuals
Add to My Manuals
Save this manual to your list of manuals |
Page 34 highlights
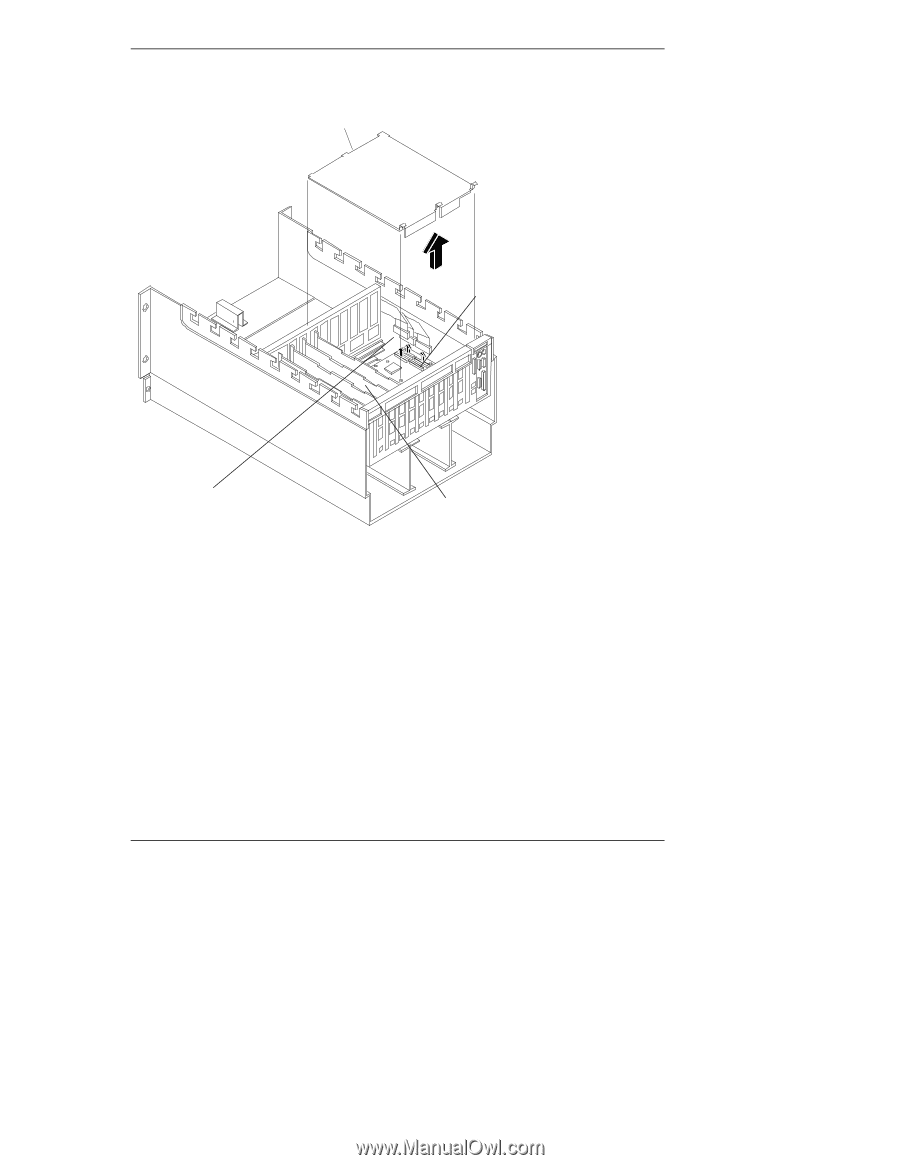
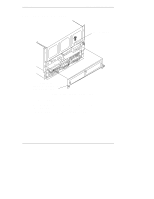
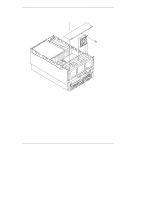
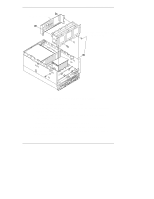
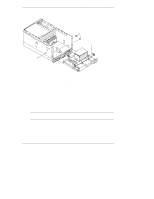
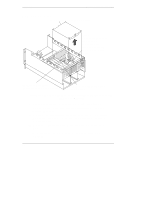
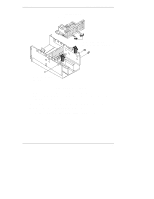
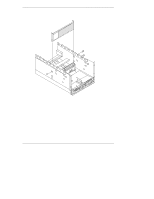
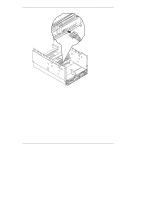
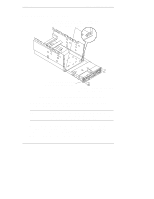
Chapter 3 Disassembling the LXr 8000 Remove I/O Tray 22. Remove embedded I/O cover. Note: SCSI extender cable (not shown) connects here. It is not necessary to disconnect this cable. 23. Disconnect three peripheral bay ribbon cables. 24. Remove all boards from the I/O tray. Figure 3-9. Remove Embedded I/O Cover, Disconnect Peripheral Bay Cables, and Remove I/O Boards 22. Remove the embedded I/O cover from the I/O tray. (See Figure 3-9.) Place the I/O cover on the table with items that will not be reused in the NetServer LXr 8500. 23. Disconnect the three peripheral bay ribbon cables from the I/O baseboard. To help you reconnect these cables later, you should label each cable as you disconnect it. 24. Remove all of the boards in the I/O tray, and place them on anti-static mats. All of the boards from the LXr 8000 I/O tray will be reused in the LXr 8500. 28
-
 1
1 -
2
-
3
-
4
-
5
-
6
-
7
-
8
-
9
-
10
-
11
-
12
-
13
-
14
-
15
-
16
-
17
-
18
-
19
-
20
-
21
-
22
-
23
-
24
-
25
-
26
-
27
-
28
-
 29
29 -
 30
30 -
 31
31 -
 32
32 -
 33
33 -
 34
34 -
 35
35 -
 36
36 -
 37
37 -
 38
38 -
 39
39 -
40
-
41
-
42
-
43
-
44
-
45
-
46
-
47
-
48
-
49
-
50
-
51
-
52
-
53
-
54
-
55
-
56
-
57
-
58
-
59
-
60
-
61
-
62
-
63
-
64
-
65
-
66
-
67
-
68
-
69
-
70
-
71
-
72
-
73
-
74
-
75
-
76
-
77
-
78
-
79
-
80
-
81
-
82
-
83
-
84
-
85
-
86
-
87
-
88
-
89
-
90
-
91
-
92
-
93
-
94
-
95
-
96
-
97
 |
 |