HP LP2065 HP LP1965 19", LP2065 20", and LP2465 24" LCD Monitor - Page 27
Using the Auto-Adjustment Function - 20
 |
UPC - 882780206175
View all HP LP2065 manuals
Add to My Manuals
Save this manual to your list of manuals |
Page 27 highlights
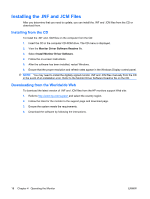
Using the Auto-Adjustment Function You can optimize the screen performance for the VGA (analog) input by using the -/Auto button on the monitor and the auto-adjustment pattern software utility on the CD provided. Do not use this procedure if the monitor is using a DVI input. If the monitor is using a VGA (analog) input, this procedure can correct the following image quality conditions: ● Fuzzy or unclear focus ● Ghosting, streaking or shadowing effects ● Faint vertical bars ● Thin, horizontal scrolling lines ● An off-center picture To use the auto-adjustment feature: 1. Allow the monitor to warm up for 20 minutes before adjusting. 2. Press the -/Auto button on the monitor front panel. ● You can also press the Menu/Select button, then select Auto-Adjustment from the OSD Main Menu. Refer to Adjusting the Monitor Settings on page 21 in this chapter. ● If the result is not satisfactory, continue with the procedure. 3. Insert the CD in the disc drive. The CD menu is displayed. 4. Select Open Auto-Adjustment Software . The setup test pattern is displayed. 5. Press the -/Auto button on the monitor front panel to produce a stable, centered image. 6. Press the ESC key or any other key on the keyboard to exit the test pattern. ENWW Using the Auto-Adjustment Function 19
-
 1
1 -
2
-
3
-
4
-
5
-
6
-
7
-
8
-
9
-
10
-
11
-
12
-
13
-
14
-
15
-
16
-
17
-
18
-
19
-
20
-
21
-
 22
22 -
 23
23 -
 24
24 -
 25
25 -
 26
26 -
 27
27 -
 28
28 -
 29
29 -
 30
30 -
 31
31 -
 32
32 -
33
-
34
-
35
-
36
-
37
-
38
-
39
-
40
-
41
-
42
-
43
-
44
-
45
-
46
-
47
-
48
-
49
-
50
-
51
 |
 |