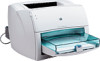
HP LaserJet 1000 HP LaserJet 1000 Series - User Guide - Page 97
Installing a shared printer on Windows 2000, Local Port - printer driver for windows 8
 |
View all HP LaserJet 1000 manuals
Add to My Manuals
Save this manual to your list of manuals |
Page 97 highlights
Installing a shared printer on Windows 2000 1 Quit all programs. 2 From the Windows system tray, click Start, select Settings, and click Printers. 3 Double-click the Add Printer icon. 4 In the Add Printer Wizard, click Next. 5 Select Local printer, clear the Automatically detect and install my Plug and Play printer check box, and click Next. 6 Select Create a new port, select Local Port from the Type drop-down list, and click Next. 7 In the dialog displayed, type the new port name (for example, \\computer_name\printer_share_name), and click OK. 8 Select Use the following port, select the port name that you just created from the list, and click Next. 9 Click Have Disk. 10 Click Browse. 11 In the Open dialog, select the CD-ROM drive, select the appropriate .inf file, and click Open. 12 Click OK. 13 Select the HP LaserJet 1000 printer driver from the list, and click Next. 14 If you want to change the default printer name, type the new name in Printer name. 15 Click Next. 16 Click Next. 17 Select Yes, and click Next. 18 Click Finish. A test page prints verifying that the printer is set up properly. ENWW Installing a shared printer on Windows 2000 95
-
 1
1 -
2
-
3
-
4
-
5
-
6
-
7
-
8
-
9
-
10
-
11
-
12
-
13
-
14
-
15
-
16
-
17
-
18
-
19
-
20
-
21
-
22
-
23
-
24
-
25
-
26
-
27
-
28
-
29
-
30
-
31
-
32
-
33
-
34
-
35
-
36
-
37
-
38
-
39
-
40
-
41
-
42
-
43
-
44
-
45
-
46
-
47
-
48
-
49
-
50
-
51
-
52
-
53
-
54
-
55
-
56
-
57
-
58
-
59
-
60
-
61
-
62
-
63
-
64
-
65
-
66
-
67
-
68
-
69
-
70
-
71
-
72
-
73
-
74
-
75
-
76
-
77
-
78
-
79
-
80
-
81
-
82
-
83
-
84
-
85
-
86
-
87
-
88
-
89
-
90
-
91
-
 92
92 -
 93
93 -
 94
94 -
 95
95 -
 96
96 -
 97
97 -
 98
98 -
 99
99 -
 100
100 -
 101
101 -
 102
102 -
103
-
104
 |
 |
