HP LaserJet Pro 300 HP LaserJet Pro 300 and 400 Color M351 and M451 - Software - Page 46
Paper sizes, Custom Paper Size, Name - color mfp driver
 |
View all HP LaserJet Pro 300 manuals
Add to My Manuals
Save this manual to your list of manuals |
Page 46 highlights
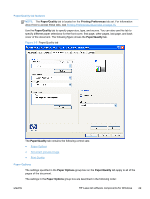
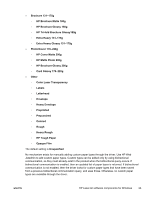
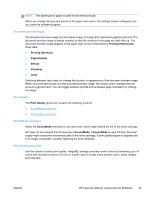
● Paper sizes ● Custom Paper Size ● Paper source ● Paper type ● Special pages Paper sizes The Paper sizes setting is a drop-down menu that lists all of the supported paper sizes. When you move the mouse over the dimensions label, the mouse cursor changes from an arrow to a gloved hand. Click the dimensions label to toggle between English and metric units. Because paper-size settings in most software programs override driver settings, it is generally best to use the driver to set paper size only when you are printing from software programs that do not include a paper-size setting, such as NotePad, or when you are producing a book or a booklet that does not require different paper sizes. NOTE: Certain software programs can override the size command and specify different paper sizes within a single document. When you change the print-driver setting to a paper size that is not currently loaded in the product, a control-panel message appears that prompts you to load the paper size or select another tray. When the Settings under the Special Pages section have been changed, the Paper sizes, Paper source, and Paper type menus change also, offering a variety of options. Custom Paper Size The Custom Paper Size dialog box appears when you click the Custom... button on the Paper/ Quality tab. The following figure shows the initial appearance of the Custom Paper Size dialog box. NOTE: The HP LaserJet Pro 300 color M351 and HP LaserJet Pro 400 color MFP M451 support custom paper sizes up to 14 inches in length. To use this paper size, set the custom paper size to match the custom paper size that you are using, up to 14 inches in length. Name Use the Name text box to type a new name for a custom paper size. When you change the name to something other than Custom, the Save and OK buttons become active. 30 Chapter 2 Windows software description and installation ENWW
-
 1
1 -
2
-
3
-
4
-
5
-
6
-
7
-
8
-
9
-
10
-
11
-
12
-
13
-
14
-
15
-
16
-
17
-
18
-
19
-
20
-
21
-
22
-
23
-
24
-
25
-
26
-
27
-
28
-
29
-
30
-
31
-
32
-
33
-
34
-
35
-
36
-
37
-
38
-
39
-
40
-
 41
41 -
 42
42 -
 43
43 -
 44
44 -
 45
45 -
 46
46 -
 47
47 -
 48
48 -
 49
49 -
 50
50 -
 51
51 -
52
-
53
-
54
-
55
-
56
-
57
-
58
-
59
-
60
-
61
-
62
-
63
-
64
-
65
-
66
-
67
-
68
-
69
-
70
-
71
-
72
-
73
-
74
-
75
-
76
-
77
-
78
-
79
-
80
-
81
-
82
-
83
-
84
-
85
-
86
-
87
-
88
-
89
-
90
-
91
-
92
-
93
-
94
-
95
-
96
-
97
-
98
-
99
-
100
-
101
-
102
-
103
-
104
-
105
-
106
-
107
-
108
-
109
-
110
-
111
-
112
-
113
-
114
-
115
-
116
-
117
-
118
-
119
-
120
-
121
-
122
-
123
-
124
-
125
-
126
-
127
-
128
-
129
-
130
-
131
-
132
-
133
-
134
-
135
-
136
-
137
-
138
-
139
-
140
-
141
-
142
-
143
-
144
-
145
-
146
-
147
-
148
-
149
-
150
-
151
-
152
-
153
-
154
-
155
-
156
-
157
-
158
-
159
-
160
-
161
-
162
-
163
-
164
-
165
-
166
-
167
-
168
-
169
-
170
-
171
-
172
-
173
-
174
-
175
-
176
-
177
-
178
-
179
-
180
-
181
-
182
-
183
-
184
-
185
-
186
-
187
-
188
-
189
-
190
-
191
-
192
-
193
-
194
-
195
-
196
 |
 |