HP Media Center m376n HP Media Center Desktop PCs - Creating DVDs and CDs With - Page 12
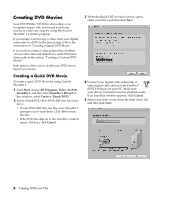
Creating a Custom, DVD Movie
 |
View all HP Media Center m376n manuals
Add to My Manuals
Save this manual to your list of manuals |
Page 12 highlights
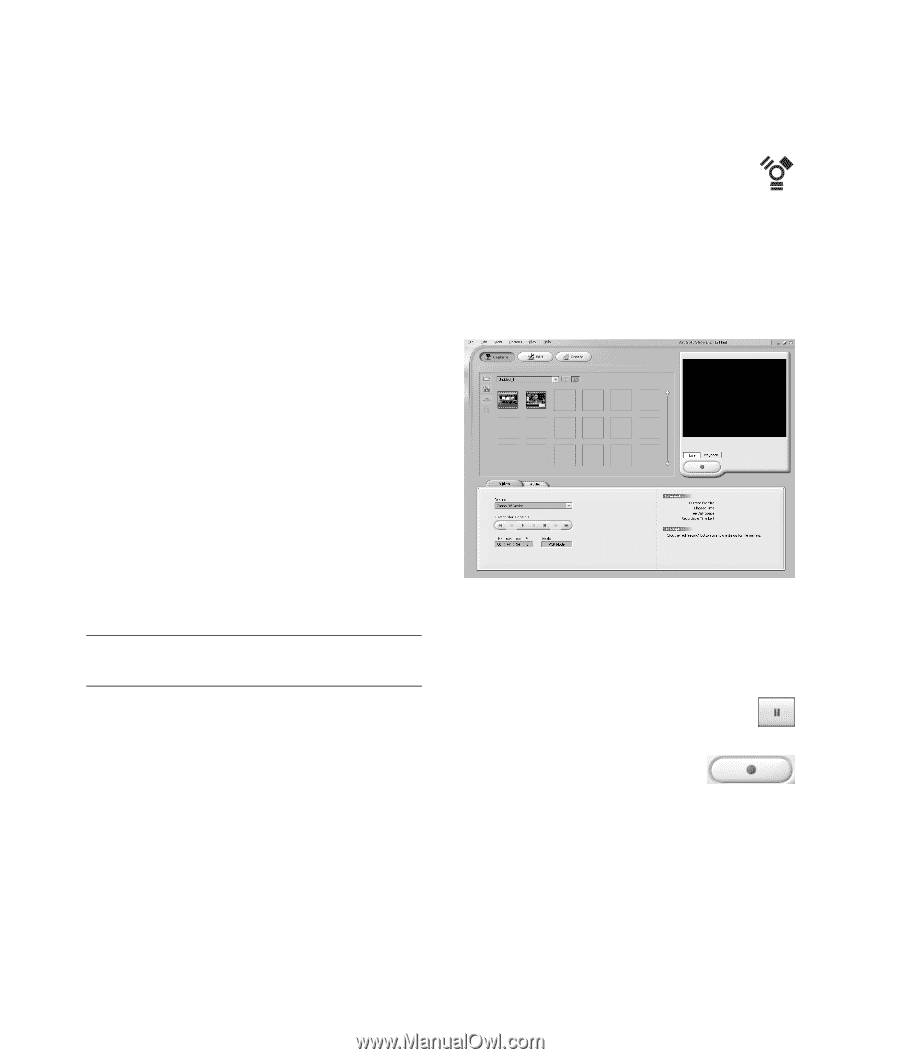
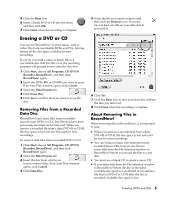
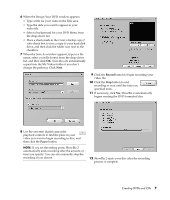
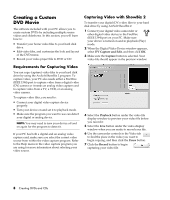
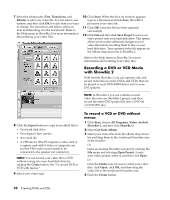
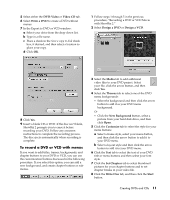
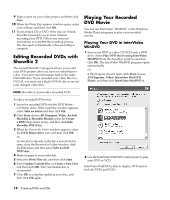
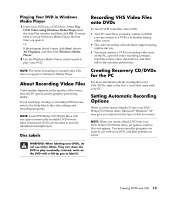
Creating a Custom DVD Movie The software included with your PC allows you to create custom DVDs by including multiple source videos and slideshows. In this section, you will learn how to: • Transfer your home video files to your hard disk drive. • Edit video files, and customize the look and layout of the DVD menu. • Record your video project file to DVD or CD. Capturing Video with ShowBiz 2 To transfer your digital (DV) video files to your hard disk drive by using ArcSoft ShowBiz 2: 1 Connect your digital video camcorder or other digital video device to the FireWire (IEEE 1394) port on your PC. Make sure your device is turned on and in playback (Play) mode. 2 When the Digital Video Device window appears, select DV Capture and Edit, and then click OK. 3 Make sure the Capture button is selected. Your video file should appear in the preview window. Requirements for Capturing Video You can copy (capture) video files to your hard disk drive by using the ArcSoft ShowBiz 2 program. To capture video, your PC also needs either a FireWire (IEEE 1394) port to capture video from a digital video (DV) camera or it needs an analog video capture card to capture video from a TV, a VCR, or an analog video camera. To capture video files, you need to: • Connect your digital video capture device properly. • Turn your device on and set it to playback mode. • Make sure the program you want to use can detect your digital or analog device. NOTE: You may need to turn your device off and on again for the program to detect it. If your PC has both a digital and an analog video capture card, make sure you select the correct video source from within the video capture program. Refer to the Help menu in the video capture program you are using for more information about selecting your video source. 4 Select the Playback button under the video file display window to preview your video file before you record it. 5 Select the Live button under the video display window when you are ready to record your file. 6 Use the camcorder controls in the Video tab to find the place in the video you want to begin copying, and then click the Pause button. 7 Click the Record button to begin capturing your video file. 8 Creating DVDs and CDs
-
 1
1 -
2
-
3
-
4
-
5
-
6
-
 7
7 -
 8
8 -
 9
9 -
 10
10 -
 11
11 -
 12
12 -
 13
13 -
 14
14 -
 15
15 -
 16
16 -
 17
17 -
18
-
19
-
20
-
21
-
22
-
23
-
24
 |
 |