HP N6310 HP Scanjet N6310 User Guide - Page 42
Automatic document feeder (ADF) does not feed paper, The bottom of the scanned image is cut off
 |
UPC - 883585956005
View all HP N6310 manuals
Add to My Manuals
Save this manual to your list of manuals |
Page 42 highlights
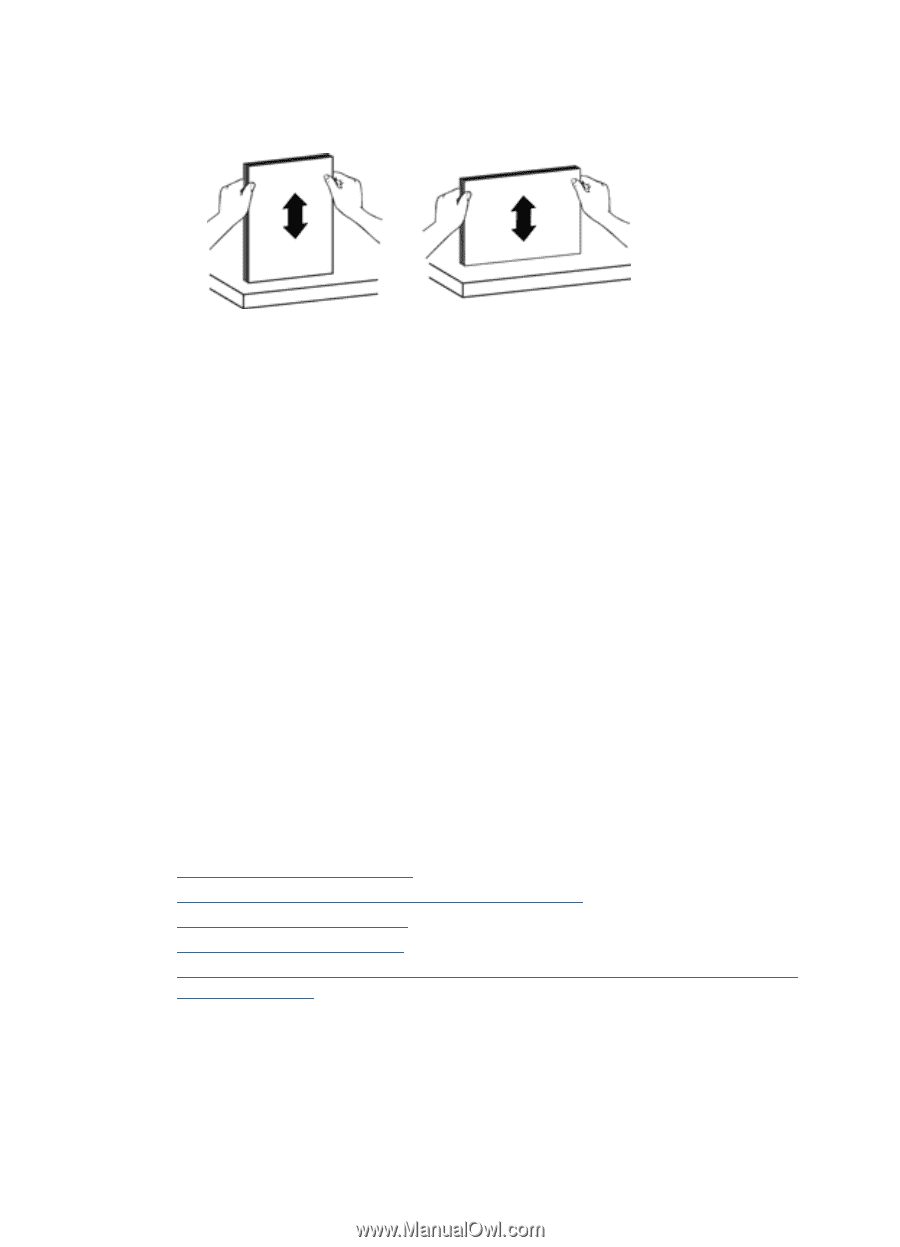
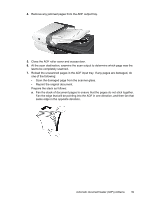
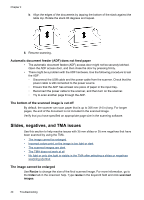
Chapter 4 b. Align the edges of the documents by tapping the bottom of the stack against the table top. Rotate the stack 90 degrees and repeat. 8. Resume scanning. Automatic document feeder (ADF) does not feed paper • The automatic document feeder (ADF) access door might not be securely latched. Open the ADF access door, and then close the door by pressing firmly. • There might be a problem with the ADF hardware. Use the following procedure to test the ADF: ◦ Disconnect the USB cable and the power cable from the scanner. Check that the power cable is still connected to the power source. ◦ Ensure that the ADF has at least one piece of paper in the input tray. ◦ Reconnect the power cable to the scanner, and then turn on the scanner. ◦ Try to scan another page through the ADF. The bottom of the scanned image is cut off By default, the scanner can scan paper that is up to 356 mm (14 in) long. For longer pages, the end of the document is not included in the scanned image. Verify that you have specified an appropriate page size in the scanning software. Slides, negatives, and TMA issues Use this section to help resolve issues with 35 mm slides or 35 mm negatives that have been scanned by using the TMA. • The image cannot be enlarged • Incorrect colors print, or the image is too light or dark • The scanned images are dark • The TMA does not work at all • No light or only dim light is visible in the TMA after selecting a slides or negatives scanning shortcut The image cannot be enlarged Use Resize to change the size of the final scanned image. For more information, go to the Index tab in the onscreen help. Type resize in the keyword field and click scanned images. 40 Troubleshooting
-
 1
1 -
2
-
3
-
4
-
5
-
6
-
7
-
8
-
9
-
10
-
11
-
12
-
13
-
14
-
15
-
16
-
17
-
18
-
19
-
20
-
21
-
22
-
23
-
24
-
25
-
26
-
27
-
28
-
29
-
30
-
31
-
32
-
33
-
34
-
35
-
36
-
 37
37 -
 38
38 -
 39
39 -
 40
40 -
 41
41 -
 42
42 -
 43
43 -
 44
44 -
 45
45 -
 46
46 -
 47
47 -
48
 |
 |