HP Officejet 6500A User Guide - Page 40
Print DPOF photos, Print on special and custom-size paper - printer driver
 |
View all HP Officejet 6500A manuals
Add to My Manuals
Save this manual to your list of manuals |
Page 40 highlights
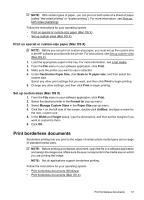
Chapter 2 - or a. Touch a photo you want to print. The photo enlarges and gives you several editing options. • Touch the up and down arrows to specify the number of copies you want to print. • Touch the Full Screen icon to enlarge the photo to fill the screen. • Touch Edit to make changes to the photo before printing, such as Rotate, Crop, and Red Eye Removal. b. When you are finished making changes to the photo, touch Done. The preview image of the selected photo appears. c. Touch one of the following options. • Touch Add More to select and edit more photos. • Touch Settings to make changes to the way the photos are printed, such as layout, paper type, and date stamp, and then select Done. • Touch Print to print the selected photos. Print DPOF photos Camera-selected photos are photos you marked for printing with your digital camera. Depending on your camera, the camera might identify page layout, number of copies, rotation, and other print settings. The printer supports the Digital Print Order Format (DPOF) file format 1.1, so you do not have to reselect the photos to print. When you print camera-selected photos, the printer's print settings do not apply; the DPOF settings for page layout and number of copies override those of the printer. NOTE: Not all digital cameras enable you to tag your photos for printing. See the documentation that came with your digital camera to see if your camera supports DPOF file format 1.1. To print camera-selected photos using the DPOF standard 1. Insert your memory card into the appropriate slot on the printer. 2. When prompted, do one of the following: • Touch OK to print all DPOF-tagged photos. • Touch No to bypass DPOF printing. Print on special and custom-size paper If your application supports custom-size paper, set the size in the application before printing the document. If not, set the size in the printer driver. You might need to reformat existing documents to print them correctly on custom-size paper. Use only custom-size paper that is supported by the printer. For more information, see Media specifications. 36 Print
-
 1
1 -
2
-
3
-
4
-
5
-
6
-
7
-
8
-
9
-
10
-
11
-
12
-
13
-
14
-
15
-
16
-
17
-
18
-
19
-
20
-
21
-
22
-
23
-
24
-
25
-
26
-
27
-
28
-
29
-
30
-
31
-
32
-
33
-
34
-
 35
35 -
 36
36 -
 37
37 -
 38
38 -
 39
39 -
 40
40 -
 41
41 -
 42
42 -
 43
43 -
 44
44 -
 45
45 -
46
-
47
-
48
-
49
-
50
-
51
-
52
-
53
-
54
-
55
-
56
-
57
-
58
-
59
-
60
-
61
-
62
-
63
-
64
-
65
-
66
-
67
-
68
-
69
-
70
-
71
-
72
-
73
-
74
-
75
-
76
-
77
-
78
-
79
-
80
-
81
-
82
-
83
-
84
-
85
-
86
-
87
-
88
-
89
-
90
-
91
-
92
-
93
-
94
-
95
-
96
-
97
-
98
-
99
-
100
-
101
-
102
-
103
-
104
-
105
-
106
-
107
-
108
-
109
-
110
-
111
-
112
-
113
-
114
-
115
-
116
-
117
-
118
-
119
-
120
-
121
-
122
-
123
-
124
-
125
-
126
-
127
-
128
-
129
-
130
-
131
-
132
-
133
-
134
-
135
-
136
-
137
-
138
-
139
-
140
-
141
-
142
-
143
-
144
-
145
-
146
-
147
-
148
-
149
-
150
-
151
-
152
-
153
-
154
-
155
-
156
-
157
-
158
-
159
-
160
-
161
-
162
-
163
-
164
-
165
-
166
-
167
-
168
-
169
-
170
-
171
-
172
-
173
-
174
-
175
-
176
-
177
-
178
-
179
-
180
-
181
-
182
-
183
-
184
-
185
-
186
-
187
-
188
-
189
-
190
-
191
-
192
-
193
-
194
-
195
-
196
-
197
-
198
-
199
-
200
-
201
-
202
-
203
-
204
-
205
-
206
-
207
-
208
-
209
-
210
-
211
-
212
-
213
-
214
-
215
-
216
-
217
-
218
-
219
-
220
-
221
-
222
-
223
-
224
-
225
-
226
-
227
-
228
-
229
-
230
-
231
-
232
-
233
-
234
-
235
-
236
-
237
-
238
-
239
-
240
-
241
-
242
-
243
-
244
-
245
-
246
-
247
-
248
-
249
-
250
 |
 |